Every gardener’s been there—ready to dig in the dirt, but your trowel’s pulled a Houdini.
Rusty tools? Hoses knotted like 2007 iPod earbuds? Classic garden chaos.
The fix? No She Shed required, and Marie Kondo can stay home.
With a little creativity and maybe a trip to the dollar store, you can whip your tool zone into shape.
Think pegboards that’d make Joanna Gaines proud and DIY hacks even MacGyver would nod at.
This quick guide gives you 12 smart, budget-friendly storage ideas to rescue your tools, save time, and make your shed look less like a gardening crime scene. Grab your drill (if you can find it), and let’s get organized.
Why Proper Garden Tool Organization Matters?
Okay, before we dive into the fun stuff—like turning your rake into wall art—let’s talk about why organizing your garden tools actually matters.
Protecting your investment
Good garden tools aren’t cheap.
Between shovels, pruners, and that fancy hose with five spray settings, you could be dropping serious cash.
Leaving them out in the wild (a.k.a. your muddy backyard) means rust, cracks, and a fast ticket to the trash bin.
Store them right, and they’ll last longer—kind of like your favorite pair of jeans after you stopped putting them in the dryer.
Maximizing efficiency
Ever spend 15 minutes looking for your trowel only to find it under a pile of dried leaves… again?
When your tools are organized, you don’t have to play hide-and-seek with your shovel.
Everything has its place, and you get more time doing the fun stuff—like yelling at squirrels or planting actual plants.
Safety first
A rake left face-up is just one cartoon banana peel away from disaster.
Sharp tools lying around = accidents waiting to happen.
And if you’ve got kids, pets, or clumsy friends (you know who you are), organizing your tools keeps your yard safe and drama-free.
Space management
Even the tiniest shed or corner of a garage can hold a ton more when it’s organized.
Go vertical with pegboards, hang stuff on hooks, repurpose an old ladder—boom, more space without building a garden Batcave.
- Read also: DIY Garden Arches and Pergolas: Step by Step Guide
- Read also: Simple Designs: Building a DIY Outdoor Garden Benches
Essential Planning: Before You Start Building
Before you grab your drill and start mounting random hooks like a DIY tornado, let’s pump the brakes for a sec.
A little planning now saves a ton of headaches (and misplaced screwdrivers) later.
Step 1: Know what you’ve got
First things first—round up all your garden gear.
Yep, even the rogue trowel hiding under your porch since last spring.
Sort them out like a garden-themed episode of The Home Edit:
- Big guys: Shovels, rakes, hoes, and wheelbarrows—basically anything that takes two hands or a lot of sass.
- Mid-sized MVPs: Pruners, watering cans, and hand saws.
- Small but mighty: Trowels, hand forks, and all those plant labels you swore you’d organize last year.
- Seasonal stuff: Holiday garden gnomes, frost covers, or that giant inflatable flamingo for summer vibes.
- Consumables: Seeds, fertilizers, and potting soil—aka the garden pantry.
This step helps you avoid building a pegboard shrine for tools you don’t even use.
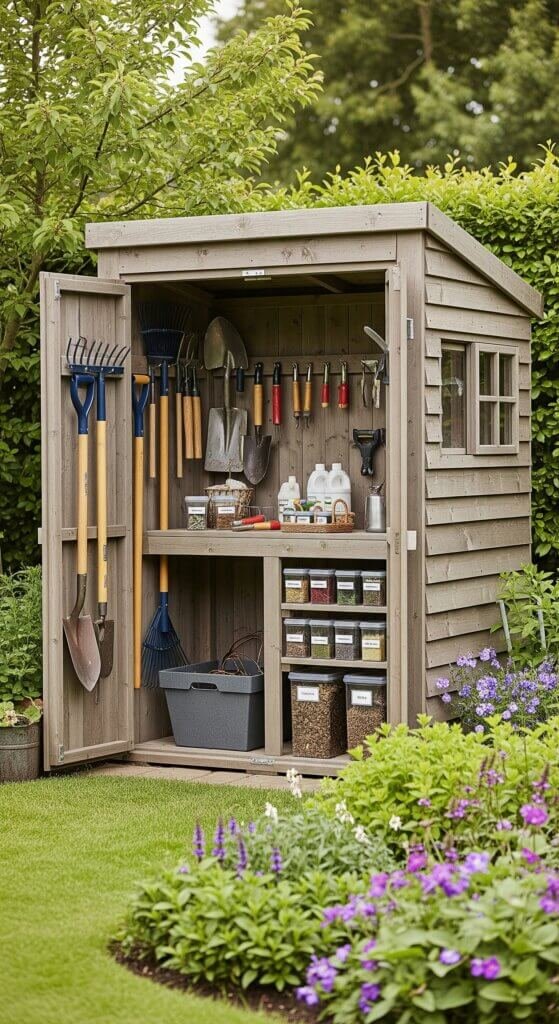
Step 2: Scout your space
Now look around—where can you stash your gear without turning your garage into a jungle?
Here are some prime spots:
- Garage walls and corners (pegboard paradise)
- Inside or outside shed walls
- Utility rooms or basement nooks
- Covered patios (bonus if it’s near your garden!)
- Even under stairs if you’re feeling Harry Potter vibes
Just make sure it’s dry and safe—your tools are cool, but they’re not into rain showers.
Step 3: Check your budget (no panic, promise)
Good news: you don’t need to sell a kidney to get organized.
Most of these DIY tool storage projects can be done for $20–$100—less if you’re a wizard with scrap wood or a regular at the dollar store.
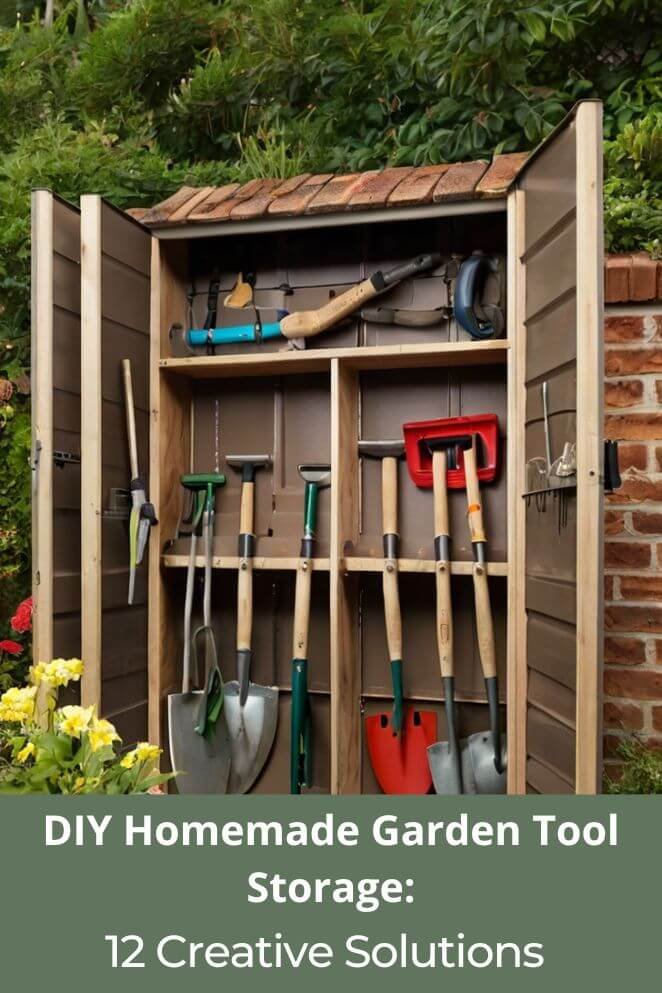
12 DIY Garden Tool Storage Solutions
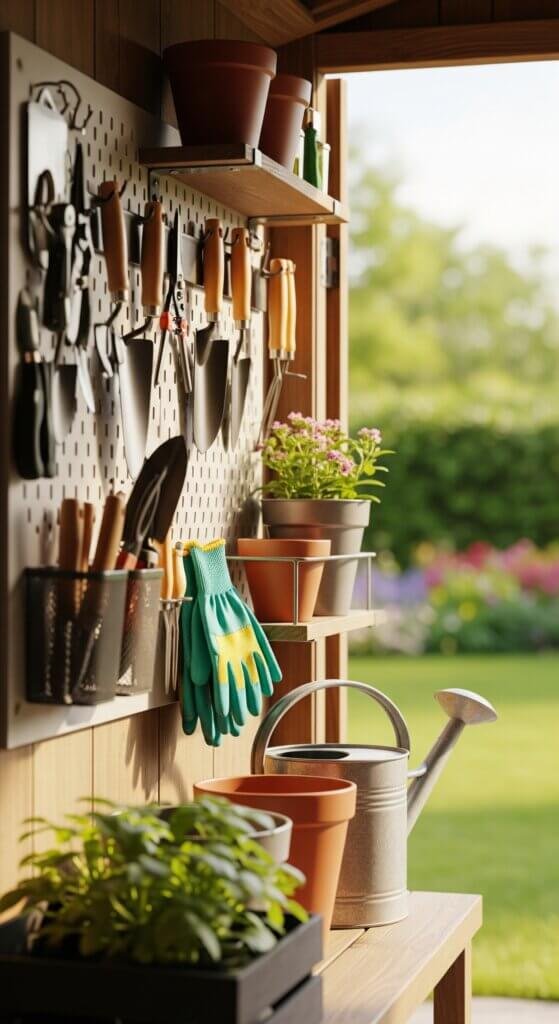
1. Wall-mounted pegboard system
If Batman gardened, he’d 100% have a pegboard wall.
It’s the ultimate customizable setup—just like LEGO for adults.
What you’ll need:
- One 4×8-foot pegboard panel (or two if you’re feeling ambitious)
- A variety pack of pegboard hooks and holders
- Wall brackets, screws, and wall anchors
- A level (unless you enjoy crooked chaos)
How to do it:
- Find those wall studs (use a stud finder, not your neighbor).
- Screw in the mounting brackets securely.
- Hang the pegboard and check that it’s level.
- Add hooks for each tool—big, small, weirdly shaped.
- Label spots if you want to feel really organized (or just find stuff faster).
Why it rocks:
Pegboards grow with your collection. Buy a new weeder? Boom—rearrange a few hooks and it’s got a home.
It’s like a Tetris wall for your tools, minus the annoying music.
2. PVC pipe tool organizer
This setup is like giving every long-handled tool its own personal garage bay.
No more shovel avalanches.
Supplies:
- 4-inch wide PVC pipe (cut into segments)
- PVC pipe end caps (to keep things from sliding out the bottom)
- Wall brackets, screws, and your trusty drill
The how-to:
- Cut PVC pipes to the right length for your tools.
- Sand the edges unless you want your gloves snagged.
- Mount the brackets at tool-holding height.
- Pop the pipes in, cap the bottoms.
- Drop in your rakes, shovels, and hoes like a boss.
Why it’s great:
It keeps long tools upright, neat, and ready for action.
Plus, you’ll feel like a genius using plumbing parts to organize your garden.
3. Repurposed wooden pallet rack
Got an old wooden pallet? Don’t toss it—turn it into a Pinterest-worthy tool rack that screams “I grow my own kale.”
You’ll need:
- One wooden pallet (bonus if it already looks artsy)
- Sandpaper and weatherproof paint or stain
- Hooks or dowels
- Wall mounting gear
DIY steps:
- Sand that bad boy down—splinters are not a vibe.
- Stain or paint it to match your shed’s aesthetic (or at least not clash).
- Add hooks or dowels between slats.
- Mount it to the wall—studs are your best friend here.
- Hang tools by use: daily stuff front and center, seasonal stuff in the back.
Why you’ll love it:
It’s cheap, stylish, and adds serious farmhouse flair.
Joanna Gaines would be proud.
4. Five-gallon bucket caddies
Let’s face it: five-gallon buckets are the Swiss Army knives of the garden world.
Add a caddy insert and you’ve got a mobile command center.
Here’s what you need:
- Food-grade 5-gallon buckets (clean ones, please)
- Bucket organizer inserts (you can find these online or at hardware stores)
- Drill with a hole saw attachment
- Waterproof labels (or duct tape + marker, let’s be honest)
How to build it:
- Scrub the bucket like it’s going in your kitchen.
- Slip the organizer around the rim.
- Drill a few drainage holes in the bottom (no one wants a swamp in their bucket).
- Add tools to pockets, bigger gear in the middle.
- Label it by category (weeding tools, planting tools, etc.) if you’ve got multiple.
Why it works:
It’s portable, practical, and saves you from running back and forth like you’re training for a 5K.
Just grab your bucket and conquer the garden.
5. Magnetic tool strip storage
Got a lot of small metal tools? Slap ’em on a magnetic strip and feel like a Jedi every time you reach for your pruners.
You’ll need:
- Heavy-duty magnetic strips (the strong ones—don’t cheap out!)
- Wall screws and anchors
- A level (because crooked strips = chaos)
- A rag to clean your tools (they’ve been through a lot)
How to do it:
- Give your tools a quick spa day—wipe off rust and grime.
- Pick your wall space, mark the spot, and drill in the strip.
- Check the magnetic hold with your beefiest hand fork.
- Line up your tools like you’re curating an art gallery for gardeners.
Why it’s awesome:
Perfect for metal goodies like trowels, snips, and shears.
You’ll save drawer space and feel a little cooler every time you hear that satisfying click of metal meeting magnet.
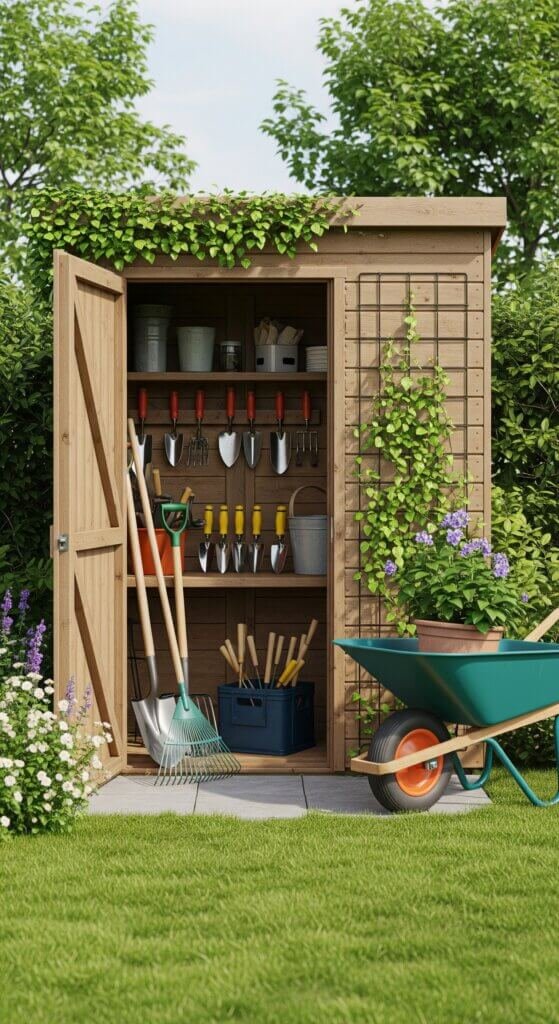
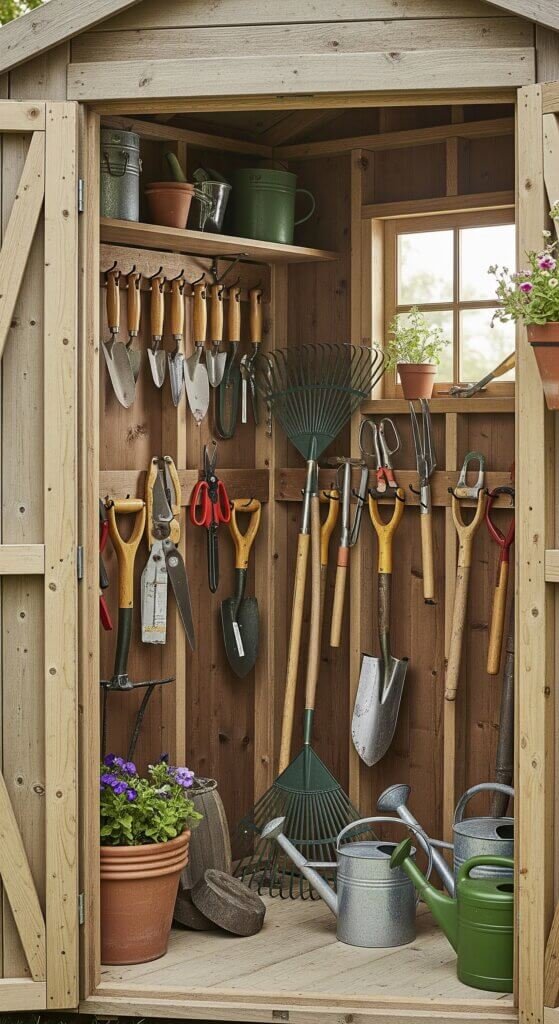
6. DIY tool shed from repurposed materials
If you’ve got a pile of salvaged stuff lying around, guess what? You’re halfway to building a tool shed with soul.
Material treasure hunt:
- Old doors (they make awesome walls and entrances)
- Scrap wood or leftover lumber
- Recycled roofing (tin, shingles—whatever you’ve got)
- Repurposed windows (let that sunshine in)
How to build it:
- Sketch a rough layout based on the junk you’ve got.
- Level the spot where it’ll go (unless you want a shed that leans like the Tower of Pisa).
- Frame it out and slap on those doors and panels.
- Roof it, add a latch, maybe even a little window box if you’re feeling cute.
- Organize the inside with shelves, pegs, or crates.
Why it’s epic:
This isn’t just a shed—it’s a Frankenstein’s monster of awesome.
Built from scraps, full of charm, and saves you cash and landfill space. Mother Earth approves.
7. Hanging garden hose storage
Let’s be honest—garden hoses love to tangle like Christmas lights.
Time to tame that green noodle.
You’ll need:
- A wall-mounted hose reel (go for heavy-duty if your hose is long)
- A big planter, barrel, or decorative pot
- Hooks for nozzles, sprayers, and that sprinkler head you always lose
- Rust-proof screws and anchors
Set it up:
- Pick a spot close to your faucet (bonus if it’s shady).
- Mount the reel at arm’s height—no back strain allowed.
- Coil your hose in the pot for extra storage flair.
- Add hooks for hose heads and watering gear.
Why it’s handy:
No more tripping over your hose like a cartoon character.
It keeps your hose alive longer, and it actually looks nice—Martha Stewart would nod in approval.
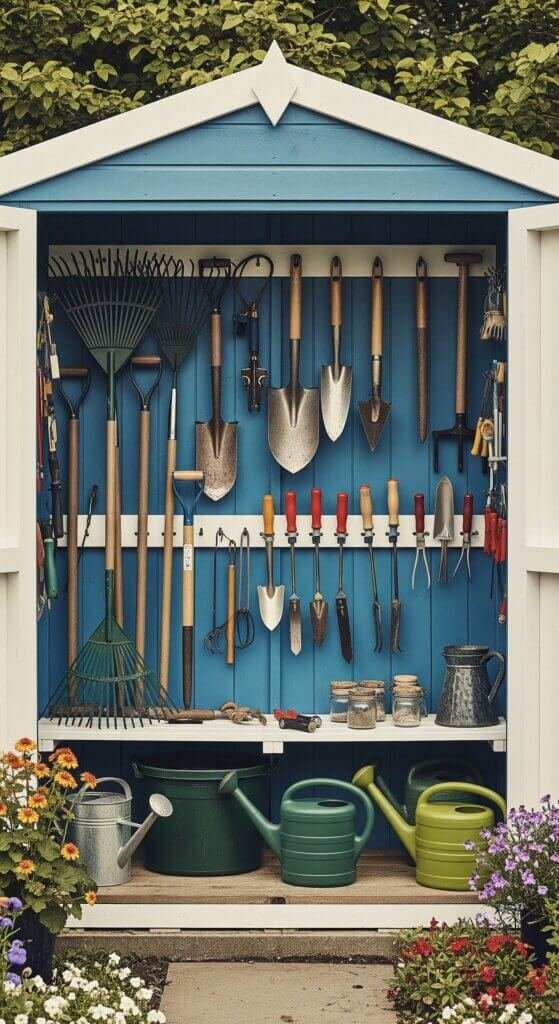
8. Vertical Garden Tool Rack
Running out of floor space? Go vertical, baby.
This DIY wall rack gets your gear off the ground and into easy reach.
You’ll need:
- 2×4 boards (tough enough to hold your weight… or at least your shovel)
- Screws and construction adhesive
- Tool holders, clips, or heavy-duty hooks
- Outdoor paint or stain (because soggy wood is sad wood)
The build:
- Measure your wall space and plan your frame (don’t wing it—this isn’t Jenga).
- Cut your boards, slap ‘em together with glue and screws.
- Paint or stain it so it stands up to weather (and looks sharp).
- Add hooks, clips, or holders based on your tools.
- Mount to the wall studs—no drywall-only disasters, please.
Why it works:
You’ll feel like a pro contractor every time you hang up a tool.
Plus, it frees up precious floor space so you’re not stepping over a hoe on your way to the watering can.
9. Rolling garden cart storage
Tired of making 12 trips back and forth to the shed like you’re training for a gardening marathon?
A rolling cart is the MVP you didn’t know you needed.
You’ll need:
- A wheeled base (old utility cart? Yes, please)
- Crates, bins, or baskets for storage
- Tool clips or even a magnetic strip for your metal bits
- A tarp or waterproof cover (Mother Nature loves surprises)
How to build it:
- Grab a sturdy rolling base—garage sale finds work great.
- Add bins and stack up organizers for pruners, gloves, and mystery seed packets.
- Attach clips or magnets for quick tool grab-and-go.
- Throw on a cover if it’s living outdoors.
- Give it a spin around the garden like it’s the pit crew cart at a Formula 1 race.
Why it rocks:
It follows you around like a loyal golden retriever.
Your tools stay close, organized, and ready for action—no more mid-weeding scavenger hunts.
10. Overhead garage storage
Got seasonal stuff you only touch twice a year? Send it to the sky! Overhead garage storage is like giving your tools their own secret lair.
You’ll need:
- A ceiling pulley system or hanging rack
- Bins or storage nets (bonus points if they’re clear)
- Heavy-duty mounting gear (don’t cheap out)
- Labels so future-you isn’t confused
How to install:
- Find your ceiling joists (the real MVPs holding things up).
- Mount your pulley system or hanging shelves.
- Load up your bins—think snow shovels, Halloween lawn gnomes, and seed vaults.
- Label everything like it’s the garden section at IKEA.
Why it’s genius:
You free up floor space and make use of that forgotten ceiling zone.
Plus, it’s great for the gear you don’t need on the daily but still want handy when the season hits.
11. Mailbox tool storage
Imagine this: a rustic mailbox tucked behind your rose bushes holding your go-to trowel and gloves.
James Bond meets garden gnome.
You’ll need:
- A weather-resistant mailbox (metal or plastic)
- A post, wall mount, or tree-friendly bracket
- Dividers if you like things neat
- Rust-proofing spray for your metal tools
How to set it up:
- Pick a shady spot near your main garden zone.
- Mount your mailbox like it’s delivering seed catalogs.
- Add small dividers inside if you want a section for each tool.
- Toss in gloves, pruners, labels—whatever you grab most.
- Bonus: Paint it to match your garden vibe or slap on some decals.
Why it’s a win:
You get a super-convenient mini-tool station right where you work.
No shed runs. No drama. Just pop it open and get planting.
12. Repurposed cabinet storage
Old cabinets taking up garage space?
Give them a glow-up and turn them into your garden gear’s new best friend.
What you’ll need:
- Retired kitchen or bathroom cabinets
- Some extra shelves or pegboard bits
- A paintbrush and weatherproof finish
- Tool clips, baskets, or organizers
How to hack it:
- Clean it like you’re prepping it for a cooking show.
- Yank out anything inside that doesn’t serve your tool dreams.
- Add shelves, bins, or hooks—customize it like a gardening Swiss Army knife.
- Paint or seal it if it’ll live outdoors.
- Mount it somewhere smart—shed wall, porch corner, or even inside your garage.
Why it’s great:
It keeps your gear protected, tidy, and stylish.
Bonus: It’s way cheaper than buying those fancy “garden armoires” online.
Cost-Effective Implementation Strategies
You don’t need to drop a fortune to get your garden tools in order.
With a little strategy and some savvy sourcing, you can organize like a pro—without maxing out your Home Depot credit card.
Here’s how to get it done without losing your cool (or your paycheck):
Phased implementation
Trying to organize everything at once? That’s a recipe for burnout—and a sore back. Instead, tackle your storage project in episodes:
- Phase 1: Start with your ride-or-die tools—the ones you use all the time (looking at you, trowel and pruners).
- Phase 2: Next, wrangle the seasonal MVPs—like your snow shovel, Halloween scarecrow, or those weird tomato cages you only use once a year.
- Phase 3: Finally, stash away the rarely used stuff—the random gadgets you swore you’d need “someday” (but haven’t touched since 2021).
Free materials:
You don’t need a fancy woodworking budget.
Just channel your inner garden MacGyver and check these spots:
Free finds
- Shipping pallets – Ask your local garden center or hardware store. They usually toss them.
- Scrap lumber – Construction sites often have leftovers (ask nicely, don’t just take!).
- Old kitchen cabinets – Know anyone remodeling? Snag their castoffs before they hit the curb.
- Random bins and containers – Dig through your garage, pantry, or even old toy boxes.
Low-cost purchases:
- Basic wood and boards – Grab from the discount bin at hardware stores.
- Hardware on sale – Check seasonal clearance deals (spring and fall = goldmines).
- Thrift shop furniture – That $10 bookshelf? Boom. Instant vertical tool rack.
- PVC plumbing parts – Cheap, sturdy, and secretly amazing for tool storage hacks.
- Read also: Creating Art: DIY Garden Sculptures to Transform Your Garden
- Read also: Affordable DIY Patio and Deck Ideas for Your Backyard
Conclusion: Creating Your Perfect Garden Tool Storage System
Let’s be honest—your garden tools shouldn’t live in a scene straight out of Hoarders: Backyard Edition.
You don’t need a contractor or big bucks to fix it.
From pegboards to rolling carts, these DIY ideas will turn your tool mess into something even Pinterest would applaud.
Start small—tackle one project at a time. Maybe hang up your hand tools or build a mobile cart.
As you go, you’ll see what works (and which tools seem to multiply like garden gnomes).
Good storage isn’t just pretty—it saves time, money, and sanity. No more buying doubles or tripping over rakes like you’re in Tom & Jerry.


