Imagine turning those sad celery ends you usually toss into a garden goldmine.
That’s exactly what happens when you regrow celery from scraps.
It’s one of the easiest, most satisfying ways to jump into home gardening—no green thumb or plant whisperer skills needed.
Whether you’re all about cutting food waste, saving a few bucks, or just want a chill, sustainable hobby, regrowing celery is a win-win.
This guide will show you how to take those leftover stalks from the store and turn them into a thriving plant with just water, soil, and some sunshine.
We’ll even drop some pro tips to help you squeeze the most out of your celery comeback story.
Ready to get your hands dirty? Let’s dig in—literally.
Why Regrow Celery from Scraps?
Celery isn’t just any veggie—it’s one of the easiest and fastest plants to bring back from the kitchen graveyard.
Seriously, regrowing celery is like the garden equivalent of a DIY superhero move.
Here’s why you should jump on this celery comeback story:
- Slash your food waste like a sustainability ninja
- Save some cash so you can splurge on that fancy coffee (or whatever fuels your day)
- Learn legit gardening skills without signing up for a full course
- Have fun and teach the kiddos a thing or two about growing their own food—win-win!
- Bonus: You can grow it indoors all year long, no backyard needed
And hey, science backs this up—according to a 2021 study in Waste Management, about 30% of global food waste could vanish if more people jumped on smart home hacks like regrowing veggies.
Basically, your celery scraps could help save the planet, one stalk at a time.
- Read also: The No-Soil Solution: How to Grow Onion in Water
- Read also: Extend Your Harvest: Tips for Growing Broccoli in Winter
What You’ll Need to Get Started
Here’s the good news: regrowing celery doesn’t mean dropping serious cash or setting up a mini greenhouse.
You just need a few simple things to get started—no fancy gear required.
Here’s your celery starter pack:
- The bottom 2 inches of a celery bunch (yep, that sad little stump you usually toss)
- A shallow bowl or dish to soak it in (think celery spa day)
- Fresh, clean water
- Toothpicks (totally optional, but handy if you want to stabilize your stalk like a pro)
- A sunny windowsill or any bright spot—celery loves a good sunbath
- Potting soil for when it’s ready to graduate from water to dirt
- A container or pot with drainage holes—because soggy roots are no one’s friend
Pro tip: Grab organic celery if you can. Conventional stuff sometimes gets a “growth inhibitor” makeover, which is like putting celery on pause. Go organic to hit play on your regrow mission.
Step-by-Step: How to Regrow Celery in Water
Celery’s got some serious comeback skills—it can regrow its leafy center in just a few days.
Here’s how to get your celery’s second act rolling:
Step 1: Slice the base
Grab a sharp knife and chop off the bottom 2 inches of your celery bunch.
Don’t worry—the rest is still good to munch or stash in the fridge for later.
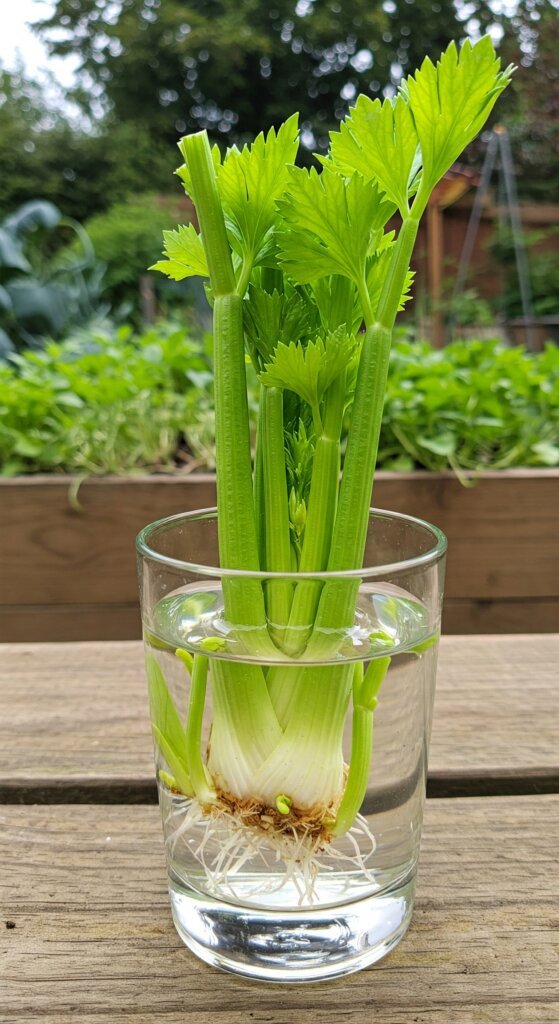
Step 2: Give it a water spa
Pop that celery stump upright into a shallow bowl with about an inch of fresh water.
Make sure the cut side is facing up—your celery’s basically chilling upside-down (but in a good way).
Step 3: Find its sunny throne
Place the bowl on a sunny windowsill—south-facing if you want to get fancy.
Celery’s basically a solar-powered plant and needs about 6 hours of indirect sunlight daily. No sun, no fun.
Step 4: Watch the magic happen
In 3 to 5 days, tiny leaves will start popping up like little green fireworks.
Keep things fresh by changing the water every other day—nobody likes a smelly celery spa.
Bonus hack: Use toothpicks to steady the base and keep it just above the water line. This little trick stops your celery from turning into a soggy mess and helps it thrive.
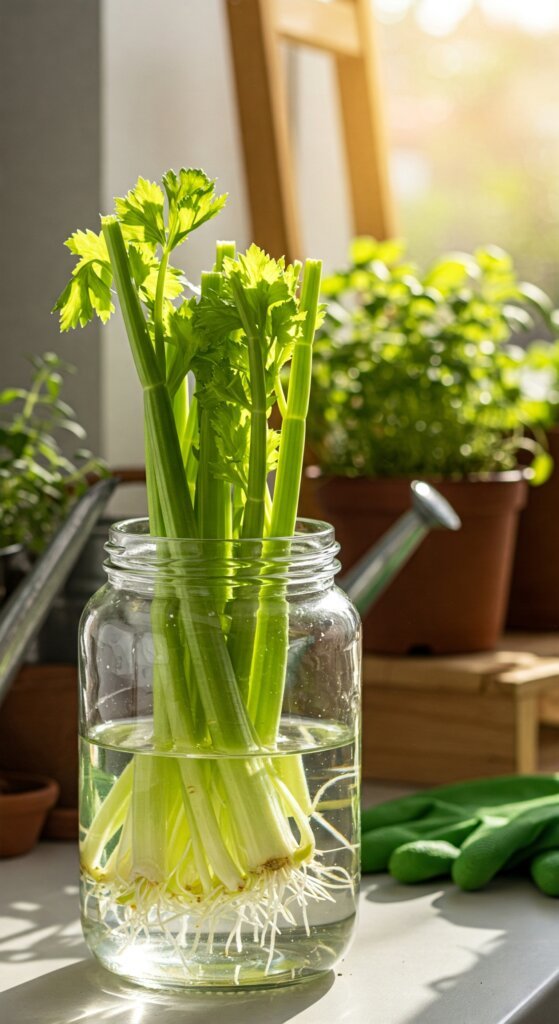
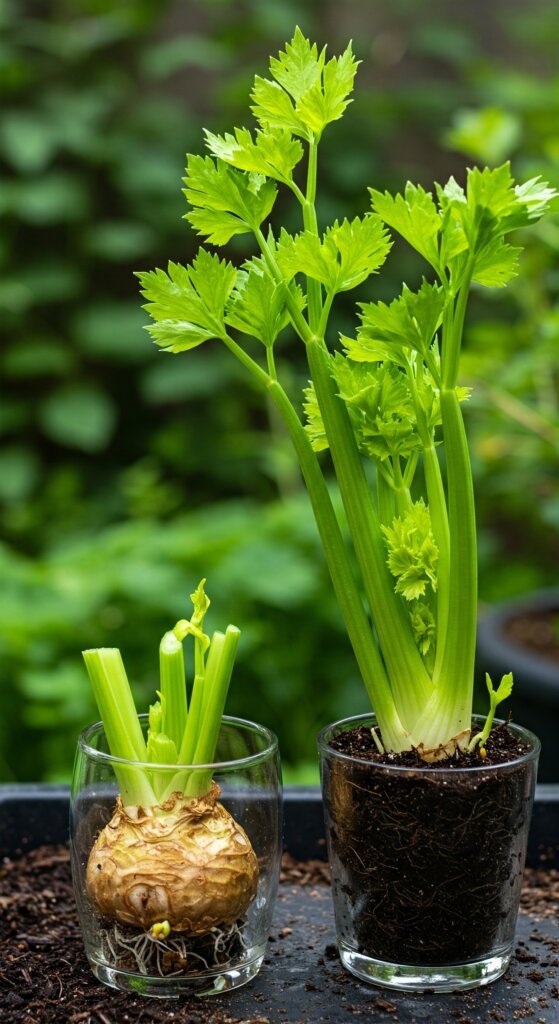
When and How to Transfer to Soil
After about 7 to 10 days, when your celery’s showing off some decent roots or a strong leafy center, it’s time for the big move—transplanting into soil.
Think of it as your celery graduating from water therapy to the dirt penthouse.
Here’s the game plan:
- Pick the right pad: Grab a pot that’s at least 6 inches deep and has drainage holes. No drainage? Your celery’s gonna feel like it’s stuck in a swamp.
- Prep the soil: Use rich, loamy soil that drains well—kind of like the perfect mattress for your plant’s roots.
- Plant it right: Bury the celery base halfway in the soil, but keep those fresh new shoots out and proud—like a plant runway model.
- Water like a pro: Give the soil a good soak, but don’t drown it. Moist, not soggy, is the vibe.
- Keep it sun-kissed: Set your celery somewhere sunny, because it’s still hungry for at least 6 hours of light a day.
Bonus move: If you have a backyard or raised bed, feel free to send your celery to its forever home outdoors—just wait until after the last frost, or your plant will throw a freeze party you don’t want.
Celery Care Tips for Healthy Growth
Celery’s a bit picky, but with a little TLC, you’ll get stalks so crisp they’d make even Popeye jealous.
Here’s the lowdown:
Light & location
Celery needs a solid 6–8 hours of sunshine every day.
If you’re growing indoors and natural light is playing hard to get, grab some grow lights—think of them as celery’s personal spotlight.
Watering
This veggie is basically a thirsty diva.
Keep the soil consistently moist—don’t let it dry out like your favorite houseplant after you forget to water it for a week.
Temperature
Celery chills best between 60°F and 70°F (15°C to 21°C).
Keep it away from frost or heatwaves—extreme temps are like bad reality TV drama for your plant.
Fertilizing
Feed celery with a balanced liquid fertilizer every 2–3 weeks.
But don’t go overboard—too much fertilizer can turn your stalks weak, like overcooked spaghetti.
Common Problems and How to Fix Them
Even beginner-friendly celery can face some hiccups. Here’s how to handle them:
| Problem | Cause | Fix |
| Yellowing leaves | Overwatering or lack of nutrients |
Check drainage; use balanced fertilizer
|
| Mold or slimy base | Stagnant water or poor airflow |
Change water regularly; move to fresh air
|
| Stunted growth | Low light or poor soil |
Relocate plant; enrich soil with compost
|
| Bolting (flowering too early) | Sudden temperature shifts |
Maintain stable temps; harvest sooner
|
According to the Royal Horticultural Society, celery is most productive when grown under stable, cool conditions and watered regularly to avoid stress.
Harvesting and Using Your Regrown Celery
After about 4 to 6 weeks, your celery will be ready to show off. Here’s how to pick the best stalks without killing the vibe:
How to harvest
Snip the outer stalks with scissors once they hit around 8 inches or taller.
Leave the inner ones growing strong for a steady celery supply—kind of like having a VIP stalk club.
How to use
Toss your fresh celery into soups, stews, salads, or even smoothies (yes, celery smoothies are a thing).
Don’t forget the leaves! They make killer garnishes or pesto bases—chef’s kiss.
Storage hack: Keep harvested stalks crisp by storing them in a jar of water in your fridge. It’s basically a celery spa treatment that keeps ‘em crunchy.
- Read also: The Ultimate Guide to Growing Spinach in Containers
- Read also: The Ultimate Guide: How to Grow Carrots in Containers
Conclusion: Turn Kitchen Scraps Into Kitchen Staples
Regrowing celery from scraps isn’t just a cool science project—it’s a smart, sustainable way to keep fresh greens on hand without breaking the bank or killing your houseplant vibes.
Whether you’re a seasoned plant parent or just getting your feet wet, this method delivers fresh, tasty celery with minimal fuss.
So next time you’re about to toss that celery base, think twice.
Give it a second shot at life and watch your kitchen scraps turn into crunchy kitchen staples.
Your future self (and your salads) will thank you.