Winter doesn’t have to murder your garden vibes.
With the right hack, you can keep plants alive through frost and maybe even sneak some growth into early spring.
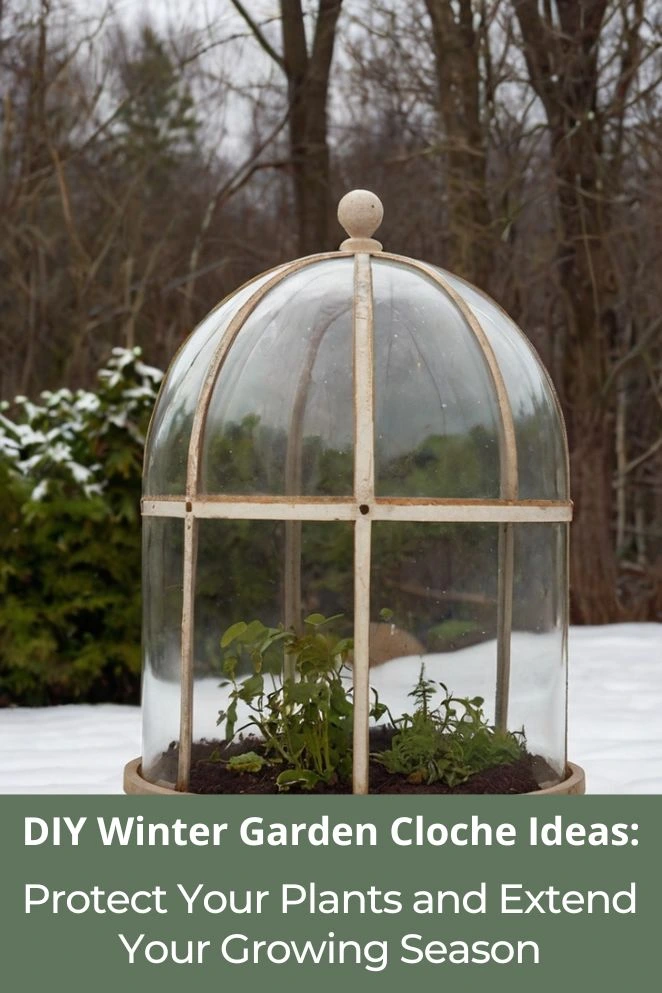
That’s where the garden cloche comes in—a lil’ personal greenhouse for your plants.
It traps daytime heat, slowly releases it at night, and saves your leafy friends from freezing to death.
And no, you don’t need to drop big cash—half the fun is DIY’ing one from random stuff lying around.
Trust me, once you try it, winter gardening hits different.
Why Every Winter Gardener Needs Cloches
Before we get into the fun DIY hacks, you gotta know why cloches are basically cheat codes for winter gardening.
They let you grow stuff you normally couldn’t keep alive in your area, like you’re low-key upgrading your climate settings.
It’s like telling winter, “Yeah, nice try, but we’re still growing.”
Key benefits
- Frost Protection: They can crank the temp around your plants up by 5–10°F—sometimes that’s the difference between “thriving” and “frozen salad.”
- Season Extension: You can flex on your neighbors by planting earlier in spring and harvesting way later in fall.
- Pest Deterrence: It’s basically a “no entry” sign for bugs and small animals.
- Weather Shield: Blocks wind, hail, and rain from wrecking your hard work.
- Microclimate Creation: Keeps humidity and temps steady so your plants aren’t going through mood swings.
- Cost-Effective: DIY versions are stupid cheap compared to store-bought ones.
Real talk—research shows cloches can warm the soil before you even plant and give that extra boost when frost tries to pull a sneak attack.
If you’re serious about winter gardening, they’re not optional—they’re essential.
- Read also: DIY Winter Gardening Projects to Keep Your Green Thumb Busy
- Read also: DIY Plant Covers for Winter: Protect Your Greenery
Essential Materials for DIY Cloches
The best part about making your own cloches? You don’t need fancy gear—just random stuff you’ve probably got lying around.
It’s basically recycling, but with bonus points for keeping your plants alive.
Transparent materials
- Clear plastic bottles (2-liter soda bottles are perfect—finish the drink first, obviously)
- Glass jars and containers (the big pickle jar? Yeah, that works)
- Clear plastic storage bins
- Milk jugs (cut ’em up and they’re basically instant cloches)
- Clear plastic sheeting or wrap (cling film for your plants)
Support structures
- Wire coat hangers (bend them into shape—MacGyver style)
- PVC pipe
- Bamboo stakes
- Metal hoops
- Wooden frames (scrap wood from the garage? Boom.)
Fastening and anchoring
- Cable ties or zip ties (never underestimate zip ties—they’re garden duct tape)
- Duct tape (because… duct tape)
- Bungee cords
- Rocks or soil to weigh stuff down
- Stakes to lock things into the ground
Think of it like building a forcefield for your plants—you’re not just protecting them from frost, you’re creating their own little VIP lounge.
Top 8 DIY Winter Garden Cloche Ideas
1. The classic plastic bottle cloche
This one’s the OG. Grab a clear 2-liter soda bottle, cut off the bottom, and drop it over your plant.
Take the cap off for air flow—the skinny neck keeps things ventilated while the wide base covers the plant.
Pro Tip: Keep that cap handy. On brutal cold nights, screw it back on for max heat. Just don’t forget to take it off on sunny days unless you want your plant roasted like it’s in a sauna.
2. Milk jug mini greenhouse
Same idea as the soda bottle, but bigger. Perfect for larger plants or a whole squad of seedlings.
Cut the bottom off, keep the handle so you can lift it like a pro, and use the cap to control airflow. Works great for herbs or small veggie gangs.
3. Wire frame with plastic sheeting
For those who want their garden looking a bit “pro,” bend wire coat hangers into domes, cover them in clear plastic, and boom—you’ve got a custom cloche.
Durable enough for the whole season.
Steps:
- Bend 2–3 coat hangers into semi-circles
- Tie them together at the top
- Cover with clear plastic
- Clip or tie the plastic down
- Anchor with stakes so it doesn’t take off in the wind
4. Glass mason jar cloches
Got a few oversized mason jars or glass containers? Instant mini greenhouses for small herbs or seedlings.
They let in loads of light and are easy to pop off when you need to water or check on your plants. Plus, they look straight-up aesthetic.
5. PVC hoop house cloche
For when you’re protecting entire rows, not just single plants.
Use PVC pipes as hoops, cover them with clear plastic, and clamp it all down. Big coverage, still DIY.
You’ll need:
- 1/2″ PVC pipe
- Connectors (if making long sections)
- 6mm clear plastic sheeting
- Clamps/clips
- Rebar or stakes for holding it in place
6. Repurposed clear storage container
Big plants? Flip a clear plastic storage bin over them. Ventilate by taking off the lid or drilling holes.
Heavy-duty enough for windy spots and no tools required—just plop it on and call it a day.
7. Water-filled “wall o’ water” style
This one’s like giving your plants a heated jacket. Line clear plastic bags filled with water around your plant.
The water soaks up daytime heat and releases it at night. Tomatoes and peppers love this.
8. Umbrella frame cloche
Broken umbrella? Strip off the fabric, wrap the frame in clear plastic, and you’ve got a big, sturdy cloche.
The spokes hold everything solid, even when the wind’s trying to rip your garden apart.
Once you start making these, you’ll realize winter gardening isn’t about “surviving the season”—it’s about straight-up beating it.
Advanced Cloche Techniques and Tips
Ventilation is critical
Here’s the thing—if you trap too much heat, you’ll slow-cook your plants.
Overheating can wreck them just as fast as frost.
You’ve gotta give them some air, especially on sunny afternoons.
Ways to vent like a pro:
- Automatic venting: Grab temp-sensitive vent openers (garden centers sell them) so they do the work for you.
- Removable caps: On bottle cloches, keep the cap loose or off when it’s warm.
- Lifting systems: Build cloches you can pop open or prop up easily.
- Multiple openings: Add top and side vents for better air flow.
Anchoring and wind protection
If you don’t anchor your cloche, one good gust will send it rolling down the street like a plastic tumbleweed.
Lock it down.
Ways to keep it grounded:
- Ground stakes: Push them right through the cloche into the soil.
- Weight systems: Pile rocks or soil around the base.
- Underground anchoring: Bury the edges of plastic cloches in the dirt.
- Tether systems: For big cloches, use guy-wires—yes, like tiny tent ropes.
Temperature monitoring
You can’t just set it and forget it—plants aren’t air fryers.
You’ve gotta know what’s going on under there.
Stay on top of it:
- Min/max thermometers: Track the hottest and coldest temps inside.
- Soil temperature: The ground’s warmth matters as much as the air.
- Multiple readings: Check temps at different times of day and weather.
- Adjustment timing: Learn when to vent, close, or ditch the cloche entirely.
Seasonal Management and Maintenance
Spring setup
Start getting your cloches ready in late winter so you can flex on early spring planting.
- Soil preparation: Drop cloches on the garden 2–3 weeks before planting to preheat that soil like a toaster.
- Gradual acclimatization: As the weather gets warmer, slowly back off the protection so your plants don’t get soft and spoiled.
- Cleaning and inspection: Make sure your gear’s clean and not falling apart—you don’t want last year’s gunk starting this year’s problems.
Winter protection protocol
If you’re keeping plants alive all winter, you need a routine, not chaos.
- Evening installation: Put cloches on in the late afternoon to trap that day heat before the cold hits.
- Morning venting: Pop ’em open during sunny days so your plants don’t bake.
- Weather monitoring: Check the forecast—this is where you get to play “plant meteorologist.”
- Plant inspection: Look for pests or disease so you can fix it before it’s a big deal.
End-of-season care
If you treat your cloches right, they’ll be ready to go next season without a panic Walmart run.
- Thorough cleaning: Get rid of dirt, dead leaves, and anything funky—mild soap does the job.
- Damage assessment: Fix what’s fixable, toss what’s trash.
- Organized storage: Keep all your parts together so you’re not hunting for that one missing zip tie next year.
- Material inventory: Restock during off-season sales so you’re ready before spring sneaks up on you.
Troubleshooting Common Cloche Problems
Condensation issues
Too much trapped moisture = fungal nightmare.
Your plants will straight-up suffocate if you don’t fix it.
- Increase ventilation: Add bigger or more vent holes—let that air breathe.
- Timing adjustments: On sunny days, take the cloche off earlier so it doesn’t turn into a steam room.
- Absorption materials: Toss in something that soaks up extra moisture.
- Plant spacing: Don’t cram plants together—give them room so air can move.
Overheating damage
Yep, you can cook your plants even in winter. Don’t turn your cloche into an oven.
- Shade cloth: Throw on a temporary cover when temps jump unexpectedly.
- Automatic venting: Install vents that open when it gets too hot.
- Monitoring frequency: Check temps more often when the weather’s being moody.
- Quick-release systems: Build cloches you can yank off fast if things heat up.
Wind damage and instability
One gust and your cloche can turn into an airborne frisbee—don’t let that happen.
- Enhanced anchoring: Use more than one anchor point—belt and suspenders style.
- Flexible materials: Pick stuff that bends instead of snapping.
- Aerodynamic designs: Shape your cloche so the wind flows over it instead of catching it.
- Backup plans: Keep extra materials handy for quick “oh crap” repairs.
- Read also: DIY Row Covers: The Ultimate Guide to Protecting Your Garden
- Read also: DIY Planters from Household Items: Creative and Budget-Friendly
Conclusion
DIY winter cloches are basically the MVP of cheap, effective plant protection.
From soda bottles to full-on mini greenhouses, they can stretch your growing season and keep your plants alive when the weather’s being evil.
The real secret? It’s not just building them—it’s knowing how to manage heat, venting, and weather changes.
You could have the fanciest cloche in the world, but if you ignore temps or forget to vent, you’re just slow-roasting your plants.


