Let’s face it—bending over to garden feels more like a punishment than a hobby.
Your back’s yelling, your knees are cracking, and underground pests are throwing wild garden parties.
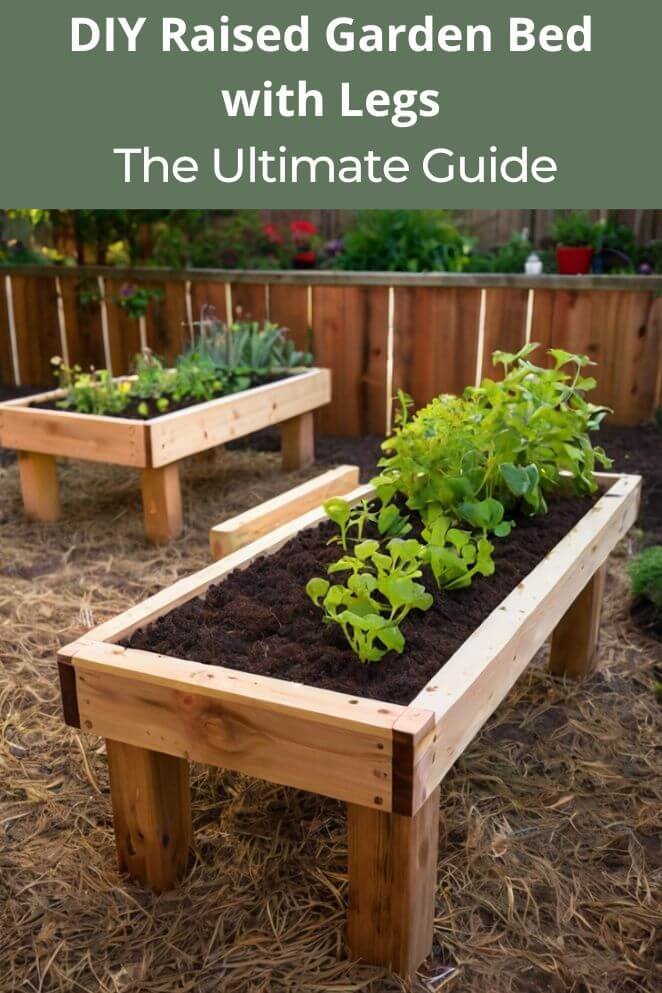
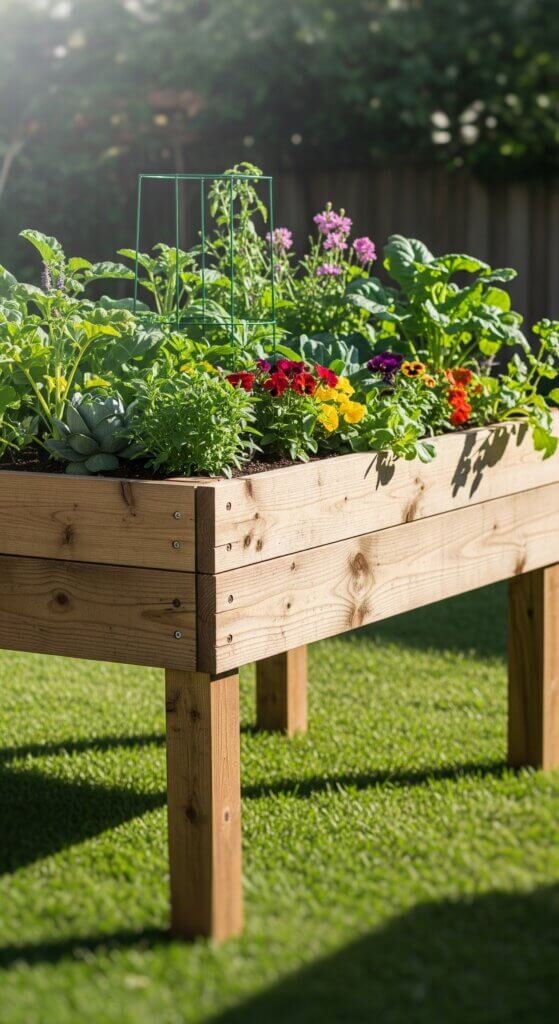
Enter: the raised garden bed with legs. It’s like giving your plants a penthouse suite—no bending, fewer weeds, and zero gopher drama.
Plus, it actually looks cute (Pinterest would approve).
In this quick guide, I’ll show you how to build one yourself.
It’s beginner-friendly, budget-friendly, and your spine will high-five you.
Whether you’re a plant whisperer or just tired of losing to squirrels, this one’s for you. Let’s grow—literally!
Why Choose a Raised Garden Bed with Legs?
Let’s cut to the compost—raised garden beds with legs are a total game-changer.
Here’s why they’re basically the Beyoncé of backyard gardening:
Ergonomic benefits and accessibility
Tired of gardening like you’re training for a yoga marathon?
These beds bring the plants up to you, saving your back, knees, and dignity.
Perfect for older folks, anyone with mobility issues, or just people who don’t love crawling around in the dirt like toddlers.
Superior pest and weed control
Raised means out of reach for the usual suspects—gophers, rabbits, slugs, and other plant-thieving hooligans.
Plus, no ground contact = way fewer weeds.
Less time weeding, more time sipping iced tea and admiring your tomatoes.
Better soil control and drainage
Bad yard soil? No problem.
Fill your elevated bed with that top-shelf mix your plants actually want.
Better drainage too—no soggy roots, no drama.
Space efficiency and design flexibility
Tight on space? These beds are balcony- and patio-approved.
They fit almost anywhere and look way more organized than a random dirt patch.
Customize the size, color, or even paint it to match your flamingo garden decor (no judgment).
Planning Your DIY Raised Garden Bed with Legs
Before you grab a drill and start building like you’re on an episode of Fixer Upper: Garden Edition, let’s talk strategy.
A little planning goes a long way—and saves you from mid-project meltdowns.
Determining the right size and height
Too big? Can’t reach the middle. Too small? Not enough room for your tomato army.
Aim for 3–4 feet wide—so you can reach everything without needing yoga-level flexibility.
Length? Whatever fits your space—4 to 8 feet is the sweet spot.
Now height: you want that bed tall enough to save your back but not so tall it feels like a bar counter.
Go for 30–36 inches total height, with 8–12 inches of soil depth for veggies, herbs, and all your plant babies.
Choosing the right location
Plants are like people—they need sunlight, a stable home, and easy access to water.
Pick a spot that gets:
- 6–8 hours of sun (veggies are sun worshippers)
- Flat ground (no wonky wobbles)
- Close to a hose (no one wants to drag a mile of garden hose every day)
- Shelter from strong wind (windburn is real, even for lettuce)
- Bonus: make sure it looks cute in your yard. Instagram matters
Material selection for durability and safety
Not all wood is created equal, and you don’t want your bed rotting faster than a reality show romance.
Wood options:
- Cedar: Smells amazing, naturally rot-resistant, kind of the Beyoncé of wood.
- Redwood: Gorgeous and long-lasting, but your wallet might cry a little.
- Pressure-treated pine: Budget-friendly, but make sure it’s rated safe for food gardens.
- Composite lumber: Eco-friendly, low-maintenance, slightly bougie.
Hardware and fasteners:
- Galvanized or stainless screws (rust is the enemy)
- Metal brackets (for extra support if your DIY skills are “learning as I go”)
- Weather-resistant wood glue (because overkill = peace of mind)
Essential Tools and Materials
Alright, ready to build your plant palace? Let’s get your toolkit locked and loaded.
No need to be Bob the Builder—just have the right gear and a little hustle.
Tools you’ll need
Gather these essential tools before starting your project:
- Circular saw or miter saw – For clean, precise cuts. Think “lumber ninja.”
- Drill + drill bits – You’ll be making a lot of holes. Screws won’t drive themselves.
- Measuring tape + pencil – Measure twice, cut once. It’s a rule and a vibe.
- Level – No one likes a wonky garden bed. Keep it straight, just like your posture wishes it could be.
- Sandpaper or power sander – Smooth those edges unless you want splinters with your spinach.
- Safety gear – Glasses, gloves, and a dust mask. Safety first, superhero second.
Complete materials list
For a standard 4×4 foot raised bed with legs:
Lumber:
- 4 pieces of 2×10 boards (4 feet long) – That’s your bed frame.
- 4 pieces of 4×4 posts (30–36 inches long) – These are your bed’s legs. Tall and sturdy, like a plant bodyguard.
- 1 sheet of plywood or hardware cloth – This is your bed’s bottom. Keeps soil in, pests out.
Hardware:
- 16–20 galvanized screws (3″) – Rust-resistant, garden-ready.
- 8 galvanized bolts + washers + nuts (4″) – For extra strength. Earthquakes? No problem.
- Wood glue – For bonding like a rom-com montage.
- Drill bits – For making drainage holes, not Swiss cheese.
Optional additions:
- Wood stain or sealant – Protects your bed from the elements. Like sunscreen, but for wood.
- Landscape fabric – Bonus weed control. Plants only, please.
- Casters – Want a mobile garden? Add wheels and roll like a boss.
Step-by-Step Construction Guide
Ready to turn that pile of wood into a garden bed that’s functional and fabulous?
Let’s break it down like a DIY playlist—step by step, no fuss, and a little fun.
Step 1: Preparing the frame components
First things first: grab your boards and cut everything to size (deep breath—you’ve got this).
Sand like you’re prepping for a HGTV close-up—no rough edges, no splinters.
Focus on the spots you’ll touch often.
Using cedar? You’re golden—it’s already rot-resistant.
Leave it raw for a rustic look or slap on a food-safe sealant if you want that polished “I-know-what-I’m-doing” vibe.
Pro tip: Mark where your corner legs will go. You want the legs inside the frame, so the boards wrap around them—makes the whole thing sturdier (and way easier to assemble).
Step 2: Assembling the Frame
Start by attaching one of the short side boards to two legs.
Use wood glue + screws or bolts for superhero strength.
Don’t skip the pilot holes—split wood is not the look we’re going for.
Now repeat on the other side.
Once both ends are up, attach the long side boards to connect the whole rectangle.
Check your corners with a measuring tape (diagonals should match—geometry, but make it useful).
Step 3: Adding the Bottom Panel
Time to give your plants a floor.
If you’re using plywood, make sure it’s exterior-grade, then drill drainage holes every 6–8 inches.
No one likes soggy roots.
If you’re team hardware cloth, attach it with heavy-duty staples or screws.
It’ll keep critters out and let water drain through like magic. Bonus: it’s basically a built-in pest defense.
Step 4: Final Assembly and Finishing
Add wood stain or sealant if you’re feeling fancy (or just want your bed to survive the apocalypse).
Follow the label’s drying time—no shortcuts here.
Move your bed into its final spot before adding soil.
Trust me, it’s way easier to move when it’s not full of 200 pounds of dirt.
Bust out your level and make sure everything’s even.
If one leg’s doing the hokey pokey, trim it or shim it till your bed sits flat and proud.
Soil Selection and Filling Your Elevated Bed
You’ve built your raised bed—cue applause.
Now let’s talk dirt. Because yeah, the right soil mix is everything.
Creating the perfect soil mix
Your plants want a cozy, well-drained, nutrient-packed home—not a compacted mud pit.
Here’s the go-to mix:
- 40% topsoil – the base layer, like the carbs of the soil world
- 30% compost – adds nutrients, keeps plants well-fed and thriving
- 30% amendments – like perlite, vermiculite, or coarse sand. Think of these as your soil’s personal trainers—keeping it light, fluffy, and well-drained.
Skip plain garden soil—it gets dense and cranky in a raised bed. We want light and airy, like your favorite sponge cake (but for roots).
Calculating Soil Volume
Time for a little garden math—but don’t panic. It’s easy:
Length × Width × Depth = Soil Volume
For a standard 4×4 bed with 8 inches of depth:
4 × 4 × 0.67 = about 10.7 cubic feet
(Because 8 inches is roughly 0.67 feet. Math nerds, you’re welcome.)
Pro tip: If you’re filling multiple beds, skip the bagged stuff. Buy in bulk and save money (plus you’ll feel like a gardening boss when that dump truck rolls in).
Adding soil and initial setup
Add your mix in layers, watering a bit as you go.
This helps the soil settle and keeps it from turning into a lumpy mess.
Leave about 1 inch of space at the top so the soil doesn’t flood out every time it rains like you’re in a Disney movie.
Let the bed sit for a few days before planting—trust the process.
The soil will settle, and you might need to top it off. Then boom—you’re ready to plant like a pro.
Plant Selection and Layout Strategies
Congrats—you’ve got your elevated garden bed all set up.
Now it’s time to fill it with plants that actually want to live their best life and make your gardening easy and fun.
Maximizing your growing space
Think about how big your plants will get—tall plants are like the divas of the garden and need their own spotlight.
Plant those on the north side so they don’t throw shade (literally) on the little guys.
Use succession planting to keep your harvest rolling all season.
It’s like rotating your favorite Netflix shows—fresh and exciting every time.
Recommended Plants for Raised Beds with Legs
Vegetables:
- Leafy greens (lettuce, spinach, kale)
- Herbs (basil, parsley, cilantro, oregano)
- Compact root vegetables (radishes, carrots, beets)
- Bush varieties of tomatoes and peppers
- Compact cucumber and squash varieties
Flowers:
- Marigolds for pest control
- Nasturtiums as companion plants
- Compact flowering varieties that won’t overwhelm the space
Companion planting and crop rotation
Plant your basil next to tomatoes—they’re like peanut butter and jelly, but for bugs.
Basil helps keep pesky insects away and might boost tomato flavor. Win-win.
Don’t forget crop rotation—even raised beds get tired soil.
Switching up where you plant stuff prevents diseases and keeps the dirt happy.
Maintenance and Seasonal Care
Alright, your raised bed is up and growing—now let’s keep it thriving year-round without turning gardening into a full-time job.
Watering and irrigation considerations
Raised beds with legs dry out faster than your favorite meme goes viral.
More airflow and drainage mean your plants can get thirsty quick—especially in summer.
Check soil moisture regularly.
If you want to get fancy, set up a drip irrigation or soaker hoses.
Just a heads up though: installing those on a raised bed is a bit like trying to hang holiday lights on a tree—doable but tricky. Still, the time you save watering by hand totally pays off.
Seasonal maintenance tasks
Spring:
- Add fresh compost or soil amendments
- Check and tighten any loose hardware
- Inspect the frame for winter damage
- Plan and start your planting schedule
Summer:
- Monitor watering needs closely
- Harvest regularly to encourage continued production
- Watch for pest issues and address promptly
- Provide shade during extreme heat if necessary
Fall:
- Clean up spent plants
- Add compost or organic matter
- Cover with mulch or plant cover crops
- Perform any necessary repairs before winter
Winter:
- Protect the frame from extreme weather
- Plan next year’s garden layout
- Order seeds and supplies for spring
- Consider cold-season growing options
Troubleshooting Common Issues
So your raised bed’s acting up or you want to pimp it out?
No worries—I’ve got the fixes and fun extras to keep your garden game strong.
Structural problems and solutions
If your bed’s doing the cha-cha instead of standing steady, check every screw and bolt—tighten those suckers.
For extra muscle, slap on some diagonal braces between the legs.
Think of it as giving your bed a backbone upgrade.
Spotted warping or cracks?
Don’t ghost those issues—patch them up before they turn your garden into a DIY horror story.
Pest management in elevated beds
Raised beds with legs keep many critters out, but flying pests can still RSVP.
Fight back with the ultimate pest squad: introduce beneficial bugs (ladybugs, anyone?), use organic sprays, or throw up some physical barriers.
Soil and Drainage Issues
Too soggy? Your soil’s drowning in its own drama—add more perlite or coarse sand to perk up drainage.
Too thirsty? If water runs right through like it’s got somewhere better to be, toss in more compost or vermiculite to keep things cozy and hydrated.
Advanced Features and Customizations
Adding mobility with casters
Add heavy-duty locking wheels to your bed and become the garden’s version of a road tripper.
Follow the sun, dodge bad weather—your plants get the VIP treatment on wheels.
Integrated storage solutions
Integrate storage compartments into the base.
Keep your gloves, trowels, and seed packets close—because losing tools is so last season.
Expandable and modular designs
Dream big! Design your bed to connect with others.
Build a mini garden empire with pathways and extra beds that snap together like Lego for the ultimate backyard flex.
Conclusion: Elevating Your Gardening Experience
Building a raised garden bed with legs isn’t just a weekend project—it’s like giving your back a high-five while upgrading your garden’s style and success.
These beds tackle all the usual gardening headaches: better soil, fewer pests, and zero hobbit-level bending.
Plus, they look sharp and make gardening easier for everyone—from rookie green thumbs to seasoned plant bosses.
The best part? You get to flex those DIY muscles and enjoy the whole ride, from building to harvesting.


