Creating a stunning garden doesn’t require wizard-level skills or years of dirt under your nails. Raised flower beds are basically the cheat code. You get cleaner soil, less hassle, and a garden that actually looks intentional. I’ve seen people turn sad concrete corners into full-on flower flexes with just a few boards and some soil. It works anywhere—tiny balcony, big backyard, doesn’t matter.
Why Choose Raised Flower Beds for Your Garden?
Raised beds are having a moment, and it’s deserved. Even the National Gardening Association says most households are gardening now, and a lot of them go raised because it’s easier, faster, and way less frustrating. If gardening were a game, this would be easy mode.
- Read Also: A Step-by-Step Guide: DIY Self-Watering Raised Garden Bed
- Read Also: Save Water, Grow More! DIY Drip Irrigation for Raised Beds
Key Benefits of Raised Flower Beds
- Superior Soil Control: You’re not stuck with whatever dirt fate gave you. You build your own soil mix, like making the perfect playlist for your plants. They notice. They thrive.
- Improved Drainage: No swampy roots. Raised beds let extra water escape, which is clutch if your soil is basically clay soup.
- Extended Growing Season: Raised beds warm up faster in spring. Translation: you plant earlier and brag sooner.
- Ergonomic Advantages: Gardening without constantly bending over feels illegal once you try it, especially if you’ve ever stood up too fast and questioned your life choices.
- Weed and Pest Management: Fewer weeds, fewer sneaky underground freeloaders. Add a barrier and mulch, and suddenly you’re winning the garden war.
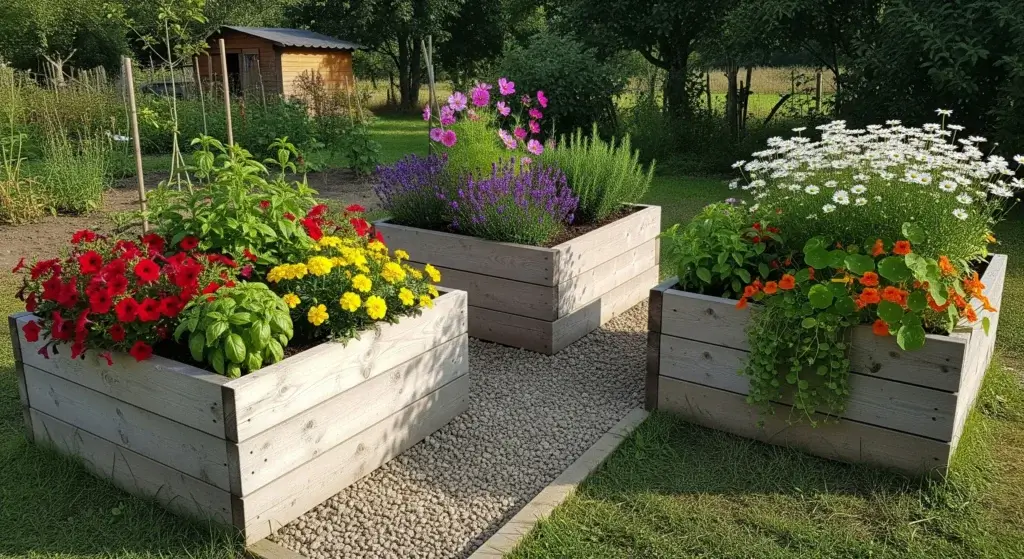
- Visual Appeal: Raised beds make your garden look sharp and intentional. Clean lines, cool layers, main-character energy for your yard.
Choosing the Right Materials for Your DIY Raised Flower Beds
This part matters more than people think. Pick the wrong material and your bed rots, warps, or turns into a science experiment. Pick the right one and you’re chilling for years while your plants do their thing.
Wood Options
- Cedar and Redwood: These are the VIPs. They don’t rot easily, they look great, and they last forever in garden years (10–15 easy).
- Pine, Fir, and Hemlock: Budget squad. Cheap, easy to find, and totally usable—but they age faster. Expect 5–7 years before they start looking tired.
- Important Wood Considerations: Hard no to treated, painted, stained, mystery wood, or railroad ties. That stuff can leach toxins into your soil.
Alternative Materials
- Concrete Blocks: Built like tanks. They last forever and let you get creative with patterns. Heavy, but rock-solid.
- Corrugated Metal: Modern, edgy, and weirdly awesome. Metal warms soil faster, which plants love. Big urban garden energy.
- Galvanized Troughs: Old farm vibes, zero effort. Perfect for herbs and smaller flowers. Drain holes are non-negotiable.
- Composite Materials: Looks like wood, behaves like plastic in the best way. No rot, low maintenance, high chill.
Pick the material that matches your budget, your style, and how long you want this thing to last. Your future self will notice.
Planning Your Raised Flower Bed Layout
This is where gardens are won or quietly ruined. A little planning now saves you from yelling at your plants later.
Location Selection
Sun is non-negotiable. Most flowers and veggies want at least six hours of full sun, minimum. Walk your yard like a detective and track where the light actually hits, not where you wish it did. Pick a flat spot so water doesn’t pool like a sad puddle, and keep your beds close to a hose unless you enjoy carrying watering cans like it’s leg day.
Size and Dimensions
- Width: One-sided access? Keep it 1½–2 feet so you’re not doing yoga to reach the middle. Two-sided access? Four feet is the sweet spot.
- Length: Eight feet is popular, but this isn’t a rulebook. Go shorter if space is tight or split long beds so things don’t turn chaotic.
- Depth: Anywhere from 6–24 inches works, but flowers are happiest around 12–18 inches. Roots like space. Who knew.
- Spacing: Leave at least 18 inches between beds so you can move, weed, and harvest without feeling trapped. Want wheelbarrow access? Three feet or more, no debate.
Orientation
North–south gives short plants equal sun on both sides. Tall plants can handle east–west just fine. Think about shadows now, not after everything stretches like it’s reaching for Wi-Fi.
Step-by-Step Construction Guide
This is a weekend build, not a reality show challenge. If you can measure, cut, and screw things together without panicking, you’re good.
Tools and Materials Needed
- Measuring tape and pencil
- Saw (hand saw or power saw for cutting lumber)
- Level
- Drill with screws (or hammer and nails)
- Your chosen frame material
- Landscape fabric or cardboard
- Quality garden soil and compost
- Mulch
Building Process
- Prepare the Site: Mark your bed, rip out the grass, and lay down cardboard or newspaper like you’re tucking the ground in. This smothers weeds before they start drama.
- Cut Materials to Size: Cut your boards to length—or let the store do it and pretend you’re efficient.
- Assemble the Frame: Screw the sides together, keep it square, and use a level unless you want a crooked garden forever. Blocks? Stack and chill.
- Line the Bottom: Cardboard or fabric goes in to block weeds but still let water through.
- Fill with Growing Medium: Toss in leaves and sticks first (yes, really), then top with soil and compost. It’s called the lasagna method and it’s way cooler than it sounds.
- Add Finishing Touches: Leave space for mulch and smooth things out. Congrats—you just built a raised bed. That’s main-character energy.
Filling Your Raised Flower Beds: The Key to Success
This part is everything. You can build the prettiest bed on Earth, but bad soil will absolutely humble you.
Soil Composition
Create a balanced growing mix by combining:
- 50% topsoil or garden soil
- 30% compost or aged manure
- 20% drainage material (perlite, vermiculite, or coarse sand for flowers)
Cost-Saving Strategies
Here’s the broke-genius move: throw sticks, leaves, straw, or grass clippings in the bottom first. Nature’s free filler. It saves money, improves drainage, and slowly turns into plant fuel. I’ve done this for years and my plants think I’m rich.
Maintenance Over Time
Good news: this isn’t a yearly reset. After year one, just top it off with compost and organic matter. Low effort, high reward.
Best Flowers for Raised Beds
Raised beds are ideal for cultivating a diverse array of flowering plants. Consider these popular options:
- Cut Flowers: Dahlias, sunflowers, zinnias, cosmos—tall, dramatic, and perfect for flexing bouquets.
- Perennials: Daylilies, coneflowers, black-eyed Susans, salvia. Plant once, enjoy forever. Elite behavior.
- Annuals: Petunias, marigolds, impatiens, begonias. Easy, colorful, and great for experimenting.
- Spring Bulbs: Tulips, daffodils, crocuses, hyacinths. Raised beds = better drainage = no sad, rotting bulbs.
- Herbs: Lavender, oregano, thyme. Smell good, look good, and secretly make you feel like a gardening pro.
Budget-Friendly DIY Ideas
You don’t need rich-person money to have a cool garden. You need creativity and a little chaos.
Repurposed Materials
- Use old wooden pallets (ensure they’re untreated and safe)
- Convert old dresser drawers into charming planters
- Stack and secure old tires (painted for visual appeal) for ornamental flower beds
- Transform old storage carts into mobile tiered gardens
Simple Cedar Fence Board Beds
This is the sleeper hit. Cedar fence pickets are cheap, rot-resistant, and shockingly good-looking. You can build a whole raised bed for around $22 and feel like you hacked the system.
Concrete Block Benefits
No cutting. No screws. Just stack and go. They last forever and don’t ask for maintenance. Heavy, yes—but so is your future success.
Advanced Features to Consider
Once you’ve got the basics down, things get fun.
- Irrigation Systems: Drip lines plus a timer = plants watered while you do literally anything else. Peak efficiency.
- Trellises and Supports: Let flowers climb. Clematis and morning glories turn beds into vertical art.
- Season Extension: Hoops and plastic covers keep plants alive when the weather tries to end them early.
- Accessibility Modifications: Wide ledges, taller beds, and wheelchair-friendly heights make gardening easier for everyone. Smart design is just good design.
Common Mistakes to Avoid
Learn from others’ experiences to ensure your raised flower bed project succeeds:
- Insufficient Drainage: Always drill holes in the bottom of containers or use permeable barriers in ground-level beds. Poor drainage leads to root rot and plant failure.
- Overfilling: Leave space at the top for mulch and to prevent soil spillage during heavy rains.
- Ignoring Sun Requirements: Don’t assume shade-loving plants will adapt to full sun in raised beds. Match plants to your location’s light conditions.
- Skipping Weed Barriers: Even raised beds benefit from bottom barriers to prevent weed infiltration from below.
- Using Contaminated Soil: Never use soil from unknown sources or from areas potentially contaminated with chemicals or pollutants.
Maintenance Tips for Long-Lasting Beds
Proper maintenance extends the life of your raised flower beds and keeps plants healthy:
- Inspect wood beds annually for rot or insect damage
- Reapply wood stain or sealant every 2-3 years if using treated surfaces
- Refresh mulch layers each spring to suppress weeds and retain moisture
- Add compost annually to replenish nutrients depleted by growing plants
- Rotate plant varieties each year to prevent soil-borne diseases
- Monitor and repair irrigation systems before each growing season
Raised flower beds are the easiest way to get into gardening without getting wrecked by bad soil, weeds, or sore backs. Fancy cedar or scrappy concrete blocks—doesn’t matter. They all work, and they all level up your garden fast.
Better drainage, better soil, less bending, more flowers. That’s the deal. With basic tools and a free weekend, you can build something that keeps paying you back in blooms year after year.


