Are you looking to add a bit of greenery to your home or garden without breaking the bank?
A DIY plant stand made from pallets could be just the solution you need!
Not only are pallet plant stands affordable and eco-friendly, but they also add a rustic charm to any space.
With a little time and effort, you can create a beautiful and functional plant stand that will showcase your plants in style.
In this blog post, we’ll guide you through the process of building your very own plant stand from pallets, including the materials you’ll need, step-by-step instructions, and tips for maintaining your new creation.
Let’s get started!
Materials Needed
Before you start building your pallet plant stand, you’ll need to gather some basic materials and tools.
Here’s a list of what you’ll need:
Materials:
- Wooden pallets: Look for pallets that are in good condition without any broken slats or signs of rot. It’s best to use heat-treated pallets marked with “HT” to ensure they haven’t been treated with harmful chemicals.
- Sandpaper or an electric sander: To smooth out rough edges and surfaces.
- Wood screws or nails: To secure the pieces of the pallet together.
- Wood glue: For extra stability.
- Wood stain or paint: To protect the wood and add a finished look to your plant stand.
- Sealer (optional): To protect the wood from moisture if you plan to use the plant stand outdoors.
Tools
- Hammer or nail gun: For nailing the pieces together.
- Saw: To cut the pallets to the desired size and shape.
- Measuring tape: To ensure accurate cuts and assembly.
- Drill: For making pilot holes and driving screws.
- Paintbrushes: For applying stain, paint, or sealer.
- Read also: Elevate Your Green Haven: DIY Plant Stands Indoor for Every Style
- Read also: Elevate Your Greenery: DIY Plant Stand Outdoor Ideas
Step-by-Step Instructions
Building a plant stand from pallets is a fun and rewarding DIY project that can be completed in a weekend.
Here’s how to do it:
Step 1: Select and prepare your pallets
Start by selecting sturdy, heat-treated pallets for your project.
Once you have your pallets, disassemble them using a hammer or pry bar.
Be careful not to crack or split the wood as you remove the slats.
After disassembling the pallets, sand down all the wood pieces to remove any rough spots or splinters.
You can use sandpaper or an electric sander for this step. Smooth wood not only looks better but is also safer to handle and work with.
Step 2: Design your plant stand
Before you start cutting and assembling, decide on the design of your plant stand.
Consider how many levels you want, the size of each level, and how much space you need for your plants.
Sketch out your design on paper, noting the dimensions of each piece.
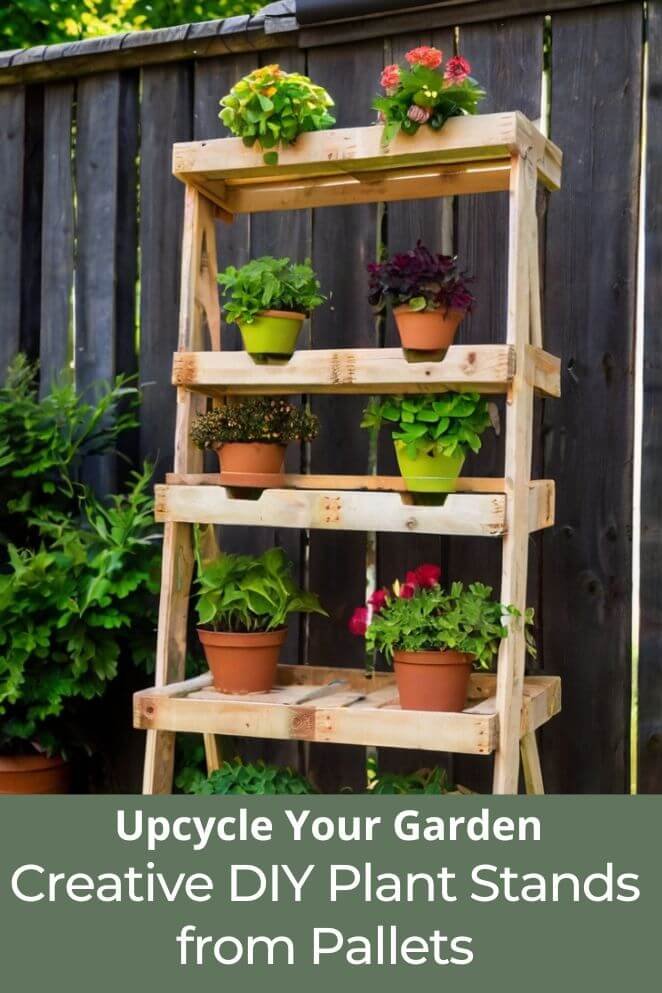
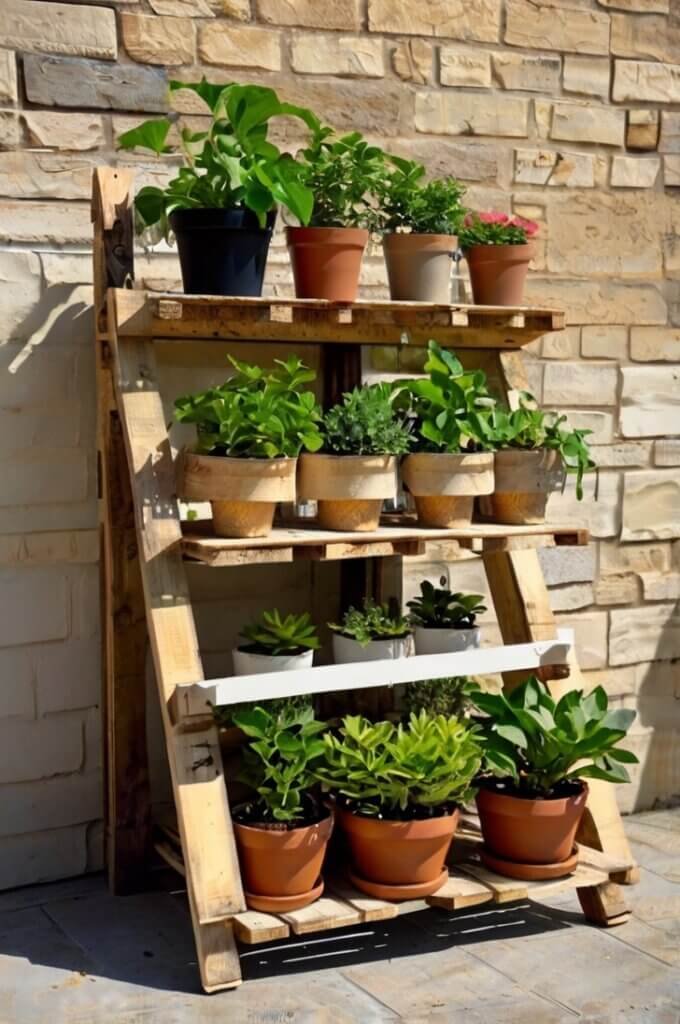
For a simple, tiered plant stand, plan for three levels: a wide bottom shelf, a medium middle shelf, and a smaller top shelf.
This design provides ample space for multiple plants and creates a visually appealing display.
Step 3: Cut the pallet wood to size
Using your design as a guide, measure and mark the pallet slats for cutting.
Cut the slats to the desired lengths for each shelf and the legs of the plant stand using a saw.
Remember to double-check your measurements before cutting to ensure all pieces fit together properly.
Step 4: Assemble the shelves
Begin by assembling the shelves for your plant stand. Lay out the cut slats for each shelf, spacing them evenly apart.
Use wood screws or nails to attach the slats to support beams, creating a sturdy base for each shelf.
Apply wood glue to the joints for added stability.
Once all the shelves are assembled, set them aside and let the glue dry completely before moving on to the next step.
Step 5: Attach the legs
With the shelves complete, it’s time to attach the legs of the plant stand.
Start by attaching the legs to the bottom shelf, ensuring they are evenly spaced and securely fastened.
Use wood screws or nails to attach the legs, drilling pilot holes first to prevent the wood from splitting.
After securing the legs to the bottom shelf, attach the middle and top shelves in the same manner.
Make sure each shelf is level before securing it in place.
Step 6: Stain or paint your plant stand
Once the plant stand is fully assembled, it’s time to add a finish.
Apply a coat of wood stain or paint to protect the wood and give your plant stand a polished look.
Use a paintbrush to apply the stain or paint evenly, following the grain of the wood.
Allow the stain or paint to dry completely before applying a second coat if necessary.
If you plan to use your plant stand outdoors, consider applying a sealer to protect the wood from moisture and UV damage.
Tips and Tricks
Building a DIY plant stand from pallets is a straightforward project, but here are some tips and tricks to make the process even easier:
Choose the right pallets
Not all pallets are created equal.
When selecting pallets for your DIY plant stand, it’s important to choose ones that are in good condition—meaning they aren’t cracked, splintered, or weakened.
Also, make sure the pallets are heat-treated rather than chemically treated.
Use a level
As you assemble your plant stand, using a level is essential.
This tool helps you ensure that each shelf is perfectly even, which is important not just for the appearance of your stand, but also for its stability.
An uneven shelf might cause your plants to tip over, especially if they are heavy or tall.
Pre-drill holes
When you’re screwing or nailing the pallet pieces together, it’s a good idea to pre-drill holes in the wood.
This simple step prevents the wood from splitting, which can happen when you drive screws or nails directly into it.
Sand thoroughly
Sanding is a crucial step in any woodworking project.
By thoroughly sanding all the wood pieces before assembly, you’ll create a smooth surface that’s not only more attractive but also safer to handle.
Sanding removes rough edges and splinters that could cause injury.
Customize your design
One of the best parts of building your own plant stand is that you can make it uniquely yours.
Don’t be afraid to get creative with the design!
You can add hooks for hanging plants, build extra shelves for more storage, or incorporate decorative elements like paint, stencils, or carvings.
Maintenance Tips
To keep your DIY plant stand looking great and ensure it lasts for years, follow these maintenance tips:
Clean regularly
Dust and dirt can build up on your plant stand over time, especially if it’s outdoors.
For indoor stands, simply wipe it down with a damp cloth to keep it clean.
For outdoor stands, you might need to use a gentle soap and water solution to remove grime.
Reapply finish
Over time, the finish on your plant stand, whether it’s paint, stain, or sealant, can wear down, especially if it’s exposed to the elements.
To keep the wood protected from moisture, sun, and general wear and tear, reapply a coat of finish every couple of years.
Check for damage
It’s a good idea to periodically inspect your plant stand for any signs of damage, such as loose screws, wobbly parts, or cracked wood.
Catching these issues early and making prompt repairs can prevent further damage and keep your stand sturdy and safe for your plants.
Protect from moisture
If your plant stand is used outdoors, try to place it in a sheltered area, such as under a porch or in a shaded spot, to protect it from rain and direct sunlight.
Excessive moisture can cause the wood to swell, warp, or rot, while too much sun can dry out and weaken the wood.
- Read also: DIY Flower Stands: A Step-by-Step Guide for Beginners
- Read also: DIY Plant Shelf Outdoor Ideas for Green Enthusiasts
Final Thoughts
Building a DIY plant stand from pallets is a fun and rewarding project that allows you to showcase your plants in a stylish and eco-friendly way.
With a few simple materials and tools, you can create a beautiful plant stand that adds character to any space.
Whether you’re a seasoned DIY enthusiast or a beginner, this project is a great way to test your skills and create something unique for your home or garden.


