Are you stuck with a tiny garden (or maybe just a balcony) but still dream of fresh veggies and herbs all year?
A DIY hydroponic tower might just change your life.
Think of it like vertical farming for your home—it saves up to 98% more water than soil gardening and crams a ton of plants into the smallest spaces.
In this guide, I’ll break down how to build one yourself. Step by step, no fluff.
Why Choose a DIY Hydroponic Tower?
Space Efficiency and Higher Yields
Have you ever tried growing tomatoes on a windowsill and found out they take up all your time? That’s where vertical hydroponics helps.
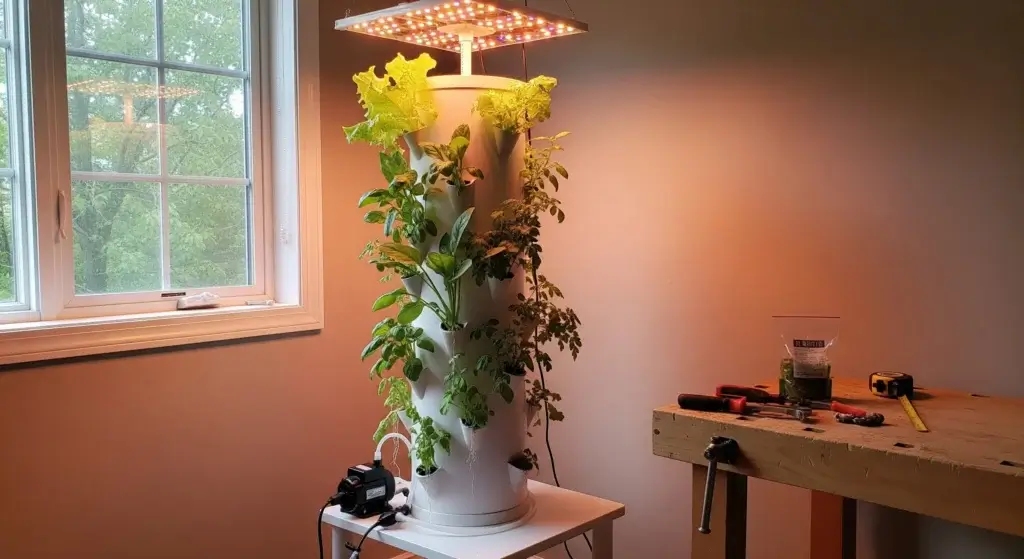
Instead of spreading plants out, you stack them, which lets you turn a balcony, patio, or even a sunny rooftop corner into a small garden.
Some setups can grow 30% more food using 90% less space than regular gardening. Picture a whole salad growing in the spot where your bike usually stands.
Water Conservation
Here’s the wild part: hydroponic towers use way less water.
Like, Tower Garden systems sip 98% less compared to soil gardening.
It’s basically recycling water on repeat, so your plants thrive without you dragging buckets around.
My first thought when I saw that stat? “That’s like trading in a gas-guzzler for a Tesla.”
Faster Growth and Better Control
Plants in hydroponic towers don’t mess around—they grow faster and bigger because you’re giving them the VIP treatment.
No bad soil, fewer pests, no praying to the weather gods. I
t’s like playing on easy mode but still getting epic results.
Cost-Effective Alternative
Sure, the fancy store-bought hydro towers can run you $500 or more.
But here’s the hack: you can build your own for around $100–200, depending on how big you go.
Why pay luxury prices when you can DIY it and brag about it?
Essential Materials and Tools for Your DIY Hydroponic Tower
Materials Needed
PVC Components:
- 6-foot length of 4-inch PVC pipe (main tower)
- 4-inch PVC pipe cap
- 4-inch PVC elbow joint
- 3-inch PVC pipe for net pot supports
- PVC primer and cement
Water System:
- Submersible water pump (200-400 GPH)
- 5/16″ ID vinyl tube for water circulation
- Reservoir container (5-10 gallons)
- Air pump and air stone for oxygenation
Growing Components:
- 3-inch net pots (20-30 pieces)
- Growing medium (clay pellets, rockwool, or perlite)
- pH test kit
- Hydroponic nutrients (liquid concentrate)
- Seeds or seedlings
Tools Required
- Drill with hole saw attachment (3-inch diameter)
- Measuring tape and marker
- Level
- Hacksaw or PVC pipe cutter
- Sandpaper
- Safety glasses and gloves
Step-by-Step Construction Guide
Step 1: Design and Planning
First things first—figure out how tall you want your tower to be.
Technically, you could build it sky-high, but let’s be real: the taller it is, the harder (and more expensive) it gets to pump water all the way up.
Think of it like using a straw—sipping from a glass is easy, but try drinking from a straw taller than you… not happening.
For most home setups, 6 feet is the sweet spot.
Take a marker and figure out where you want your plants to go.
Make small holes spaced about 8 to 10 inches apart, arranging them in a spiral around the tower.
This helps each plant get enough sunlight, just like giving everyone a good view instead of pushing them all to the back.
Step 2: Prepare the Main Tower Structure
Cut two pieces of 4-inch PVC pipe: one at 6 feet (that’s your main tower) and a short one at about 4 inches (this is your little base helper).
Clean them up and smooth the edges with sandpaper—sharp PVC burrs are not your friend.
Next, take a marker and draw four evenly spaced lines down the tall pipe.
These are your “guidelines.” Now, mark where each plant hole goes (every 8–10 inches), spiraling them around the tower.
It’s kind of like sketching out where you want ornaments on a Christmas tree—strategic, not random.
Step 3: Create Plant Holes and Supports
Grab a 3-inch hole saw (basically a drill bit that cuts circles) and carefully drill holes at your marks.
Don’t rush here, unless you want your PVC to crack and ruin the vibe.
Now, take a piece of 3-inch PVC and cut it at a 45-degree angle, making little “cups” about 2.25 inches tall.
These are your plant supports—the place where net pots will sit.
Smooth everything out with sandpaper and test it: your pots should fit snugly, not fall straight through like loose change.
Step 4: Assemble the Water Circulation System
Time to make it rain—for your plants. Seal the bottom of your tower with a PVC cap (and PVC cement to lock it in watertight).
At the top, attach an elbow joint to direct water back down into the tower.
Now, cut a piece of tubing a little over 5 feet long, add a fitting (½”x¼”), and screw it into a 3D-printed insert at the top of the tower.
That’s your water distributor—like a showerhead for your plants.
Hook up your submersible pump to the tubing and drop it in your reservoir (aka your water bucket).
Pro tip: make sure the pump is strong enough to push water up your entire tower plus a little extra pressure. Otherwise, your plants will be left thirsty.
Step 5: Set Up the Growing Medium and Reservoir
Slide your net pots into the tower holes and fill them with a growing medium (clay pellets or rock wool work great).
This holds your plants steady while also giving roots the moisture they need.
Now, fill your reservoir with water, mix in your hydroponic nutrients (follow the instructions—this isn’t the time for “winging it”), and drop in an air pump with an air stone.
This keeps oxygen levels high so your plants don’t “drown.” Think of it like giving them a bubble spa day.
Optimal Plant Selection for Your Hydroponic Tower
Best Plants for Tower Gardens
Leafy Greens (Ideal for beginners):
- Lettuce varieties (butterhead, romaine, leaf lettuce)
- Spinach
- Kale
- Swiss chard
- Arugula
Herbs (High-value crops):
- Basil
- Cilantro
- Parsley
- Mint
- Oregano
Compact Vegetables:
- Cherry tomatoes
- Peppers
- Cucumbers (bush varieties)
- Strawberries
Plants to Avoid
Avoid large, root vegetables like carrots, potatoes, or large tree fruits that require extensive root systems or significant structural support.
Maintenance and Troubleshooting Your DIY Hydroponic Tower
Regular Maintenance Tasks
Weekly Tasks:
- Check and adjust pH levels (6.0–6.5 for most plants). I keep a little pH meter on my bench — quick tweak and plants stop acting dramatic.
- Monitor water levels and top off as needed. Don’t let the reservoir run near empty or your pump will freak out.
- Inspect plants for signs of nutrient deficiency or pests. Look under leaves — that’s where sneaky bugs hide.
- Clean any algae growth from exposed surfaces. I once ignored a green slime patch and my basil started sulking. Clean it off fast.
Monthly Tasks:
- Change nutrient solution completely. Fresh mix = happy, fast-growing plants.
- Clean pump and check tubing for clogs. Clogs are the silent killers; a quick snip or flush usually fixes it.
- Harvest mature plants and start new seedlings. Rotate crops so your tower stays productive and not sad-looking.
- Deep clean reservoir and system components. Once a month I give everything a vinegar rinse and it keeps the system smelling like success.
Common Issues and Solutions
Problem: Algae Growth
Solution: Cover exposed water and nutrient lines to block light.
Move the reservoir out of direct sun, and pro tip — a simple black trash bag over the tank works. If it gets bad, consider adding a UV sterilizer.
Problem: Uneven Plant Growth
Solution: Make sure water is getting to every level. Check for clogged distribution lines or a weak pump.
I fixed my uneven lettuce by swapping the pump for a slightly stronger one — instant glow-up.
Problem: Nutrient Deficiencies
Solution: Test and adjust pH first (wrong pH = nutrients locked out).
If pH’s fine, increase nutrient concentration slowly or switch to a formula made for your crop. Don’t dump a whole bottle in — that’s how you fry roots.
Advanced Tips for Maximizing Your Harvest
Optimizing Growth Conditions
Lighting Considerations:
If you’re indoors or your balcony barely gets sun, grab some full-spectrum LED grow lights.
They’re like plant tanning beds, but healthier. Make sure the light hits every level of your tower — no “dark basement” zones for unlucky lettuce.
Environmental Control:
It’s 2025, and hydroponics is pretty much science fiction now.
You can interface your system to smartphone apps that yell at you if the water level’s too low, or allow you to adjust pH in your sleep.
Throw in temp, humidity, and nutrient sensors, and you’re operating NASA-grade agriculture from your bedroom.
Succession Planting:
Don’t dump all your seeds in at once. Start new seedlings every 2–3 weeks, and you’ll have a never-ending food train.
Trust me, nothing’s cooler than harvesting spinach while the next batch is already halfway grown.
Scaling Your Operation
Once you’ve nailed your first tower, why stop there? Build more. Stack them. Make a mini vertical farm.
I even used a 3D printer to crank out plant cup mounts — saved cash, saved time, and felt like a mad scientist.
You don’t have to print the whole tower (that’s overkill), just the parts you actually need. Suddenly your balcony looks like a futuristic salad factory.
Conclusion: Growing Your Future with DIY Hydroponic Towers
Building a DIY hydroponic tower isn’t just a hobby—it’s like unlocking the cheat code for sustainable living.
You’re growing 30% more food in 90% less space while using 98% less water. That’s basically farming on “God mode.”
Yeah, it costs around $130–200 to set up, but it pays for itself fast when you’re snipping lettuce for dinner instead of buying sad, wilted stuff from the store.
Start with easy greens and herbs, learn how to keep the system happy, then scale up when you’re ready.


