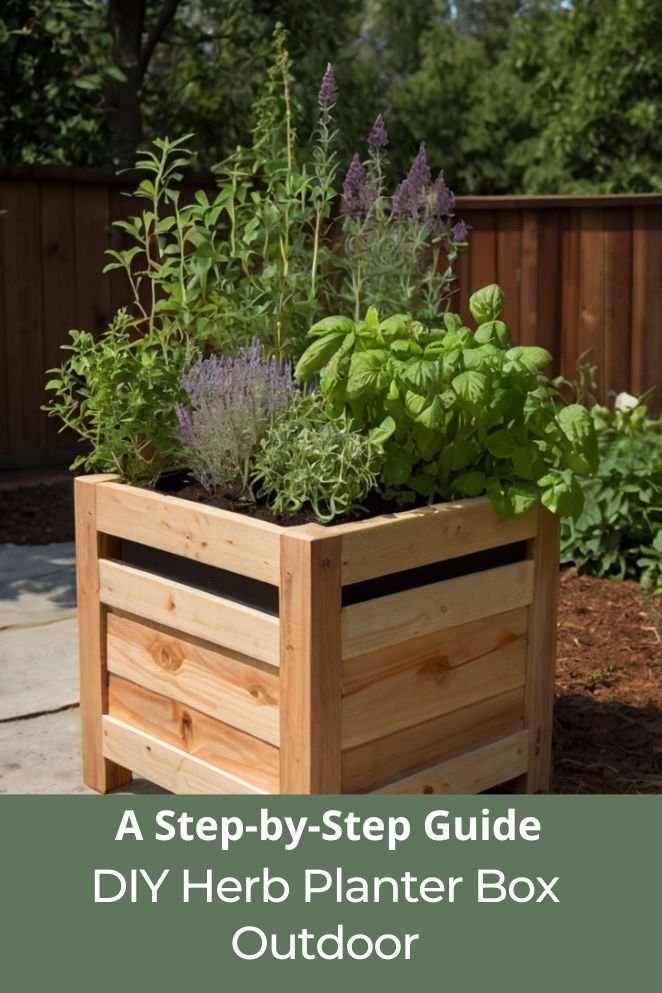
Growing your own herbs is a fantastic way to enjoy fresh flavors right from your garden, and a DIY outdoor herb planter box is the perfect project to start.
Not only does it add charm to your backyard or balcony, but it also gives you easy access to fresh herbs like basil, rosemary, and thyme whenever you need them.
Whether you’re new to DIY projects or a seasoned crafter, building a planter box can be simple and rewarding.
In this post, we’ll guide you step by step through the process, from selecting the right materials to adding finishing touches.
Materials Needed
Before you start, you’ll need to gather a few essential materials.
Selecting the right wood, tools, and other materials is key to building a sturdy, long-lasting planter box.
- Read also: Grow Fresh: Ultimate Guide to DIY Herb Planter Box Indoor
- Read also: From Trash to Table: DIY Container Ideas For Herbs
Wood
Choosing the right wood for outdoor use is important to ensure your planter box lasts.
Here are some wood types that are ideal for outdoor projects:
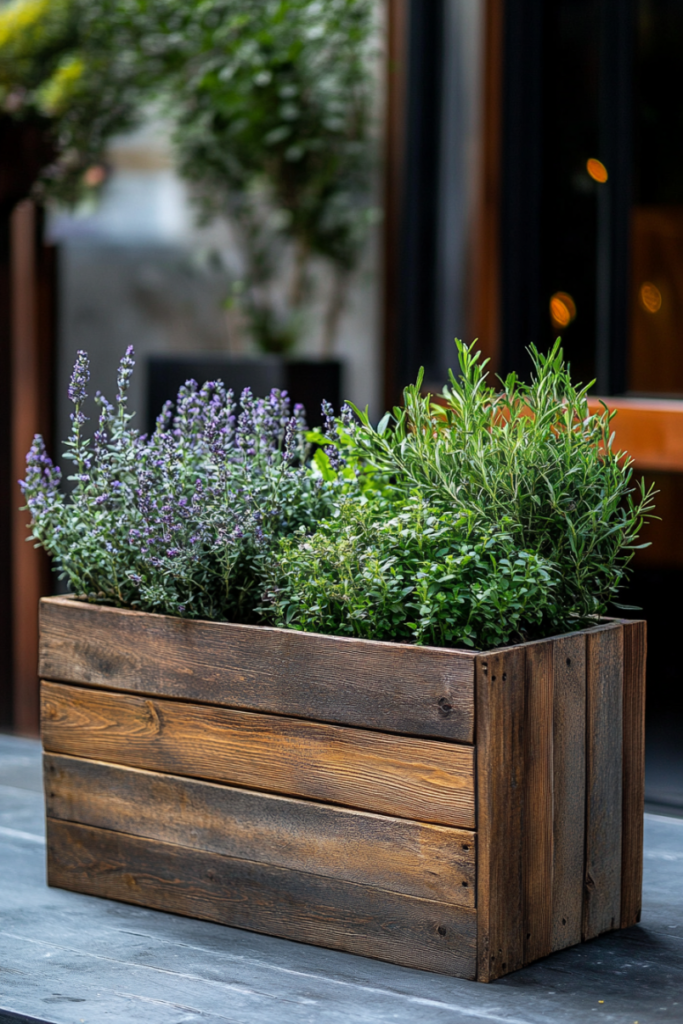
- Cedar: Cedar is a great option for planter boxes as it’s naturally resistant to rot and insects.
- Redwood: Similar to cedar, redwood is durable and resists decay, making it an excellent choice for outdoor planters.
- Pine: While less durable than cedar or redwood, pine is an affordable option. However, it’s recommended to treat it with a waterproof finish to prevent rotting.
Tools
You’ll need some basic tools to build your herb planter box. Here’s a list of tools that will make your project go smoothly:
- Miter saw or jigsaw: For precise cutting of the wood.
- Drill and screws: To assemble the frame and attach the planter box.
- Speed square: To ensure your cuts and angles are accurate.
- Tape measure: For measuring your wood pieces.
- Sander (optional): To smooth out any rough edges.
Additional materials
In addition to wood and tools, here are other materials you’ll need to complete the project:
- Compost and potting soil: For planting your herbs.
- Drainage materials: Like gravel or landscape fabric to allow proper drainage.
- Deck screws: For assembling the frame and planter box.
- Decorative elements: Paint, stain, or wood finish to protect your planter box and give it a polished look.

Step-by-Step Instructions
Now that you have all your materials and tools ready, it’s time to start building!
Follow these step-by-step instructions to create a durable and attractive outdoor herb planter box.
Cutting the wood
Start by measuring and cutting your wood to the required dimensions.
A common size for a planter box is around 36 inches long, 18 inches wide, and 24 inches high, but you can adjust these measurements to fit your space.
- Use a miter saw or jigsaw for precise cuts.
- You’ll need pieces for the frame, planter box sides, and legs.
Assembling the frame
Once your wood pieces are cut, it’s time to assemble the frame.
Here’s how:
- Using deck screws, assemble the pieces at a 45-degree angle to create a strong, stable frame.
- Ensure the frame is sturdy and square by using a speed square or scrap wood to check your angles.
Adding supports and legs
Cut additional wood pieces to create supports and legs for your planter box:
- Attach the legs to the frame using screws, making sure they’re the same height to keep the planter box level.
- Add supports between the legs for extra stability.
Creating the planter box
For the planter box itself, you’ll need to cut pieces for the bottom, sides, and front.
- Use 2×6 boards to create a solid base.
- Attach the front and sides to the bottom using deck screws.
- Make sure the box is secure by adding screws across the bottom.
Drilling drainage holes
To ensure proper drainage, it’s essential to drill holes in the bottom of your planter box.
- Use a 1.5″ spade bit to drill multiple holes in the bottom center of the box.
- Make sure there are enough holes for water to drain effectively and prevent root rot.
Adding lining and compost
Next, line the inside of the planter box to prevent soil from falling through the drainage holes and to protect the wood:
- Use compost bags or landscaping fabric as a liner.
- Once lined, fill the box with potting soil and get ready to plant your herbs.
Attaching the planter box to the frame
Now, you’ll attach the planter box to the frame:
- Use galvanized screws to securely fasten the box to the frame.
- Check that the planter box is level and secure to prevent tipping or wobbling.
Final touches
To protect your wood and enhance the appearance of your planter box, consider adding a waterproof wood finish or stain.
This will help protect the wood from the elements and extend the life of your planter.
If you want to personalize your planter box, now is the time to add decorative elements like paint, stencils, or handles for a custom look.
Tips and variations
Building a DIY outdoor herb planter box is a fun and customizable project.
Here are some tips and variations to help you get started:
Choosing the right herbs
When selecting herbs for your planter, consider those that thrive in containers and that you enjoy using in your cooking.
Here are a few popular options:
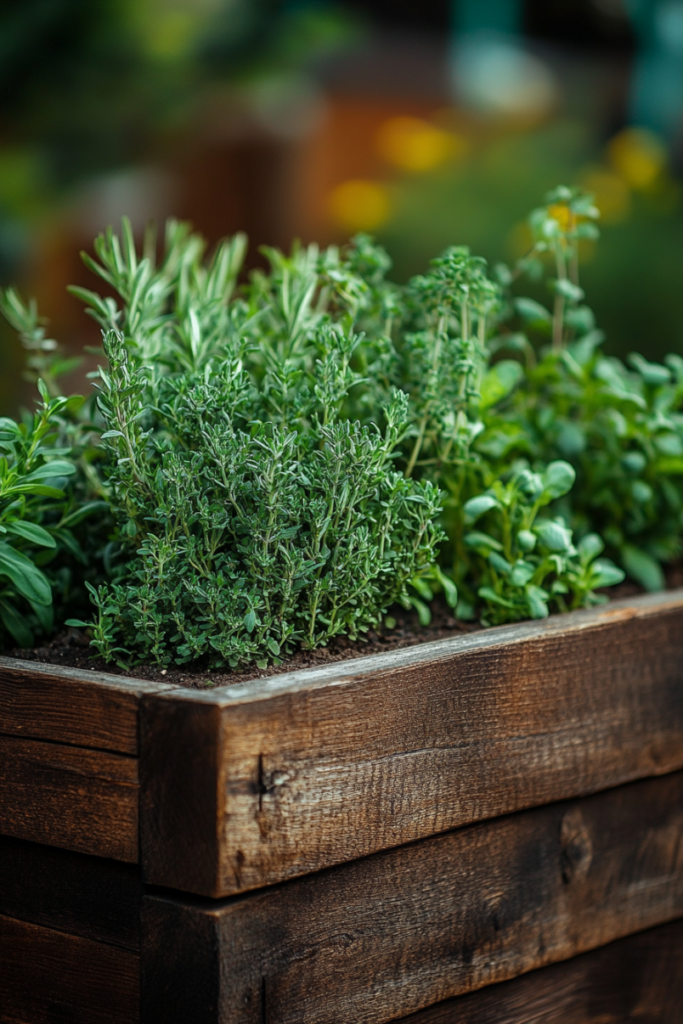
- Basil: This herb loves sunlight and is perfect for summer months.
- Rosemary: A hardy herb that grows well in various conditions, making it a great choice for containers.
- Thyme: Low-maintenance and easy to care for, thyme is ideal for planters.
Think about which herbs you use most often in your kitchen to make your planter both practical and enjoyable.
Customizing the planter
You can personalize your planter box in many ways. Here are some ideas to enhance its functionality and appearance:
- Add shelves: Consider installing a shelf underneath the planter box to store gardening tools or pots.
- Use different materials: Instead of wood, try using metal or upcycled materials like pallets for a unique design.
- Stain or paint the wood: Give your planter box a fresh look by staining or painting it in a color that complements your home’s exterior.
Maintenance tips
To keep your herb planter box in great shape, follow these simple maintenance tips:
- Waterproof your wood: Apply a waterproof finish every season to protect the wood from rotting.
- Rotate your herbs: If possible, rotate the planter box to ensure all your plants get equal exposure to sunlight.
- Replenish the soil: Over time, the soil will lose nutrients, so be sure to add fresh compost or fertilizer regularly to keep your herbs healthy.
- Read also: Balcony Heaven: DIY Vertical Herb Garden For Balcony
- Read also: Kitchen Convenience: Create a DIY Window Herb Garden
Final Thoughts
Building your own outdoor herb planter box is a fun and rewarding DIY project that not only enhances your outdoor space but also provides fresh herbs for cooking.
With the right materials, tools, and a little patience, you can create a sturdy, functional planter box that will last for years.
By choosing durable wood, ensuring proper drainage, and adding personal touches, your planter box will be a beautiful addition to your garden.


