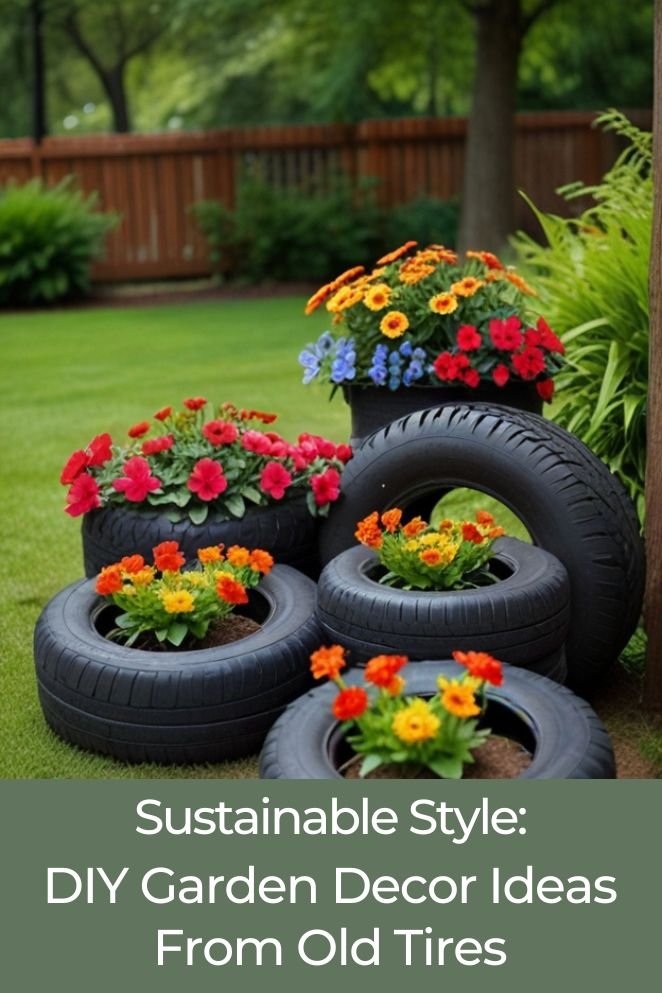
Garden decor can add charm and character to your outdoor space, but it doesn’t always have to cost a fortune.
In this blog post, we’ll explore the benefits of reusing old tires for garden decor and share five creative DIY ideas to inspire your green thumb.
Benefits of Reusing Old Tires for Garden Decor
Benefits of Reusing Old Tires for Garden Decor:
- Eco-friendly: Repurposing old tires keeps them out of landfills and reduces waste, promoting environmental sustainability.
- Cost-effective: Old tires are often free or inexpensive, making them a budget-friendly option for garden decor.
- Durable: Tires are weather-resistant and can withstand harsh outdoor conditions, ensuring long-lasting garden decor.
- Versatile: Tires can be shaped and painted to create unique and whimsical designs, adding character to your outdoor space.
- Natural insect deterrent: The rubber material of tires acts as a natural deterrent to insects, helping protect plants from pests.
- Weed prevention: Rubber mulch made from recycled tires acts as an effective weed barrier, reducing the need for constant weeding and maintenance.
- Moisture retention: Rubber mulch helps retain soil moisture, promoting healthier plant growth and reducing the frequency of watering.
- Pest resistance: Rubber mulch is pest-resistant, protecting plants from damage.
- Safety: In playgrounds, rubber mulch provides a cushioned surface that absorbs impact, enhancing safety by reducing the risk of injuries from falls.
- Reduced carbon emissions: Recycling old tires helps reduce carbon emissions by reducing the need for new raw materials and energy.
5 DIY Garden Decor Ideas from Old Tires
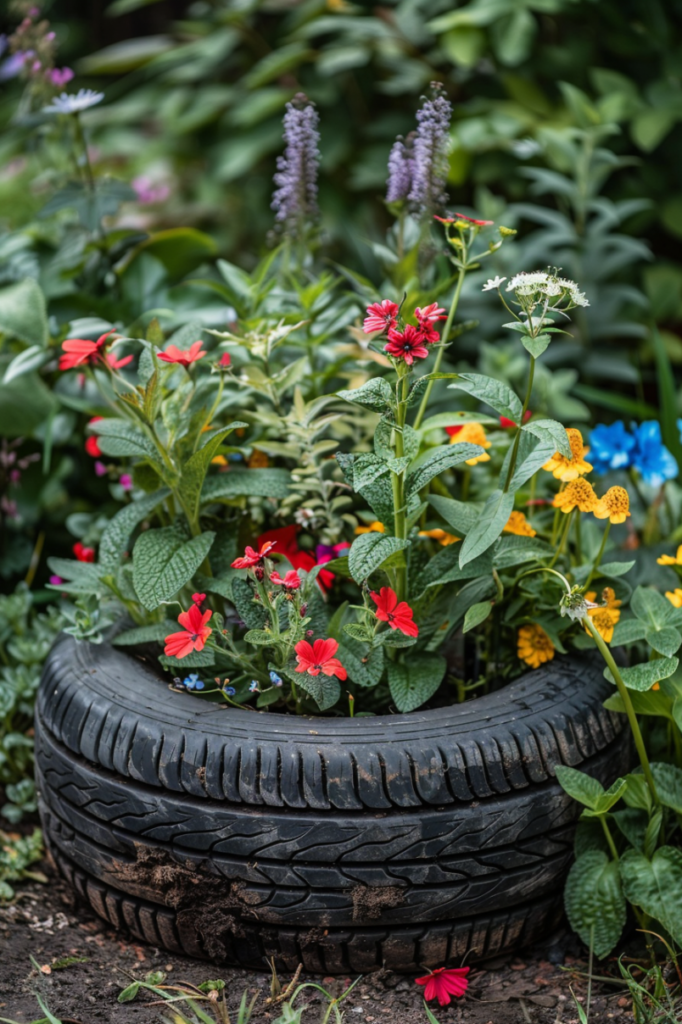
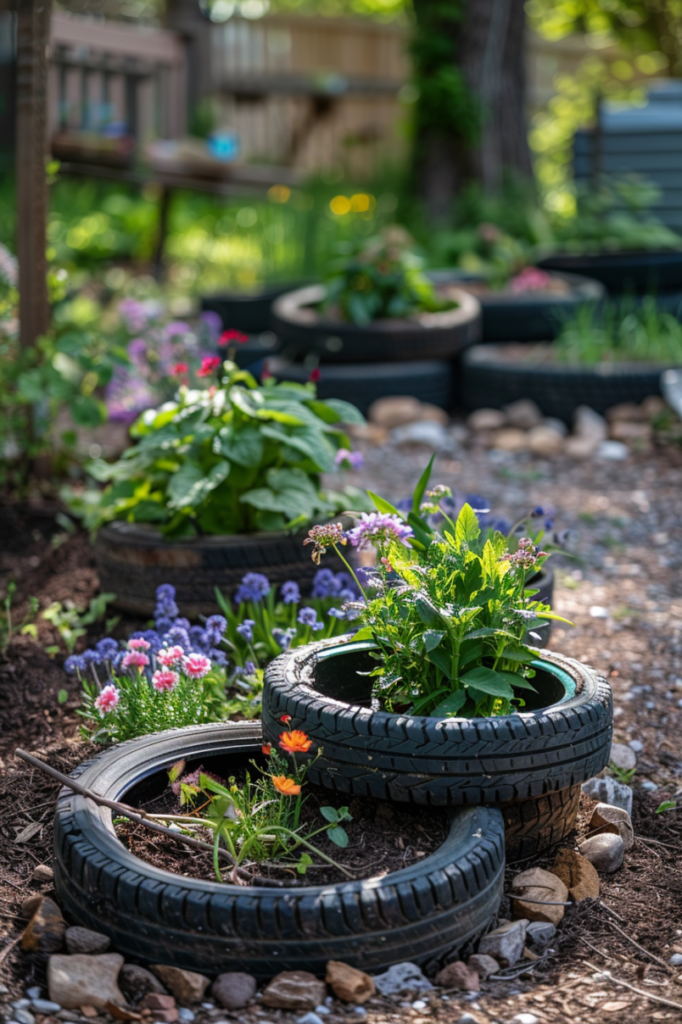
Tire planter
- Read also: DIY Broccoli Planters Made from Everyday Items
- Read also: Garden Up! Easy DIY Vertical Gardens in Small Spaces
Creating a DIY Tire Planter is a fun and eco-friendly way to add some greenery to your outdoor space.
Follow these simple steps to make your own:
Gather Materials
- Old tire
- Utility knife or scissors
- Drill (optional)
- Paint (optional)
- Potting soil
- Plants or flowers
Prepare the tire
- Clean the tire thoroughly to remove any dirt or debris.
- Use a utility knife or scissors to cut away the inner rim of the tire, leaving only the outer ring intact. This will create a wide opening for planting.
Drill drainage holes (optional)
If your tire doesn’t already have drainage holes, use a drill to make several holes in the bottom of the tire.
This will prevent water from pooling and ensure proper drainage for your plants.
Paint the tire (optional)
If desired, you can paint the outside of the tire with weather-resistant paint to add some color and personality to your planter.
Allow the paint to dry completely before proceeding.
Fill the tire with soil
- Place the tire in the desired location for your planter.
- Fill the bottom of the tire with a layer of potting soil, ensuring that it covers the entire surface area.
Plant your flowers or plants
- Carefully remove the plants from their containers and gently loosen the roots.
- Place the plants inside the tire, arranging them according to your desired design.
- Fill in any empty spaces with additional potting soil, pressing it down gently to secure the plants in place.
Tire birdhouse
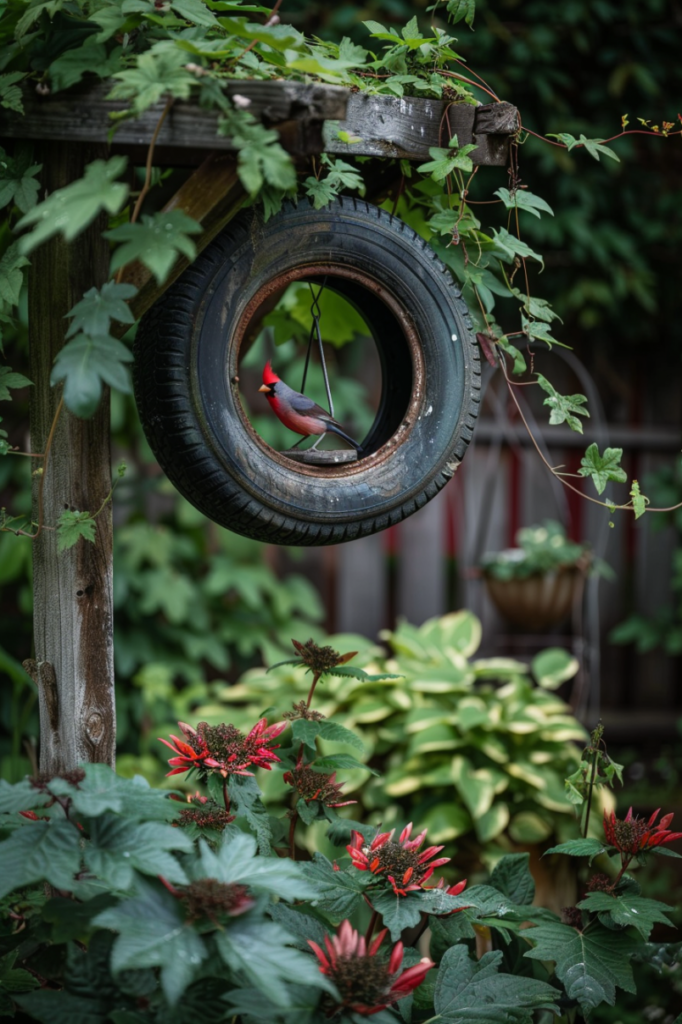
Creating a Tire Birdhouse for plants is a creative and environmentally-friendly way to attract birds to your garden while also adding a touch of charm to your outdoor space.
Follow these step-by-step instructions to make your own:
Gather materials
- Old tire
- Utility knife or scissors
- Drill
- Potting soil
- Plants or flowers suitable for birds (such as ones that attract bees or butterflies)
- Hanging hardware (optional)
Prepare the tire
- Clean the tire thoroughly to remove any dirt or debris.
- Use a utility knife or scissors to cut the tire in half horizontally, creating two equal halves. You will only need one half for this project.
Drill drainage holes
Using a drill, make several small drainage holes in the bottom of the tire half.
These holes will prevent water from pooling and ensure proper drainage for your plants.
Fill the tire with soil
- Place the tire half in the desired location for your birdhouse.
- Fill the bottom of the tire half with a layer of potting soil, covering the entire surface area.
Plant your flowers
- Carefully remove the plants from their containers and gently loosen the roots.
- Arrange the plants inside the tire half, placing taller plants towards the back and shorter ones towards the front to create depth and dimension.
- Fill in any empty spaces with additional potting soil, pressing it down gently to secure the plants in place.
Tire Swing
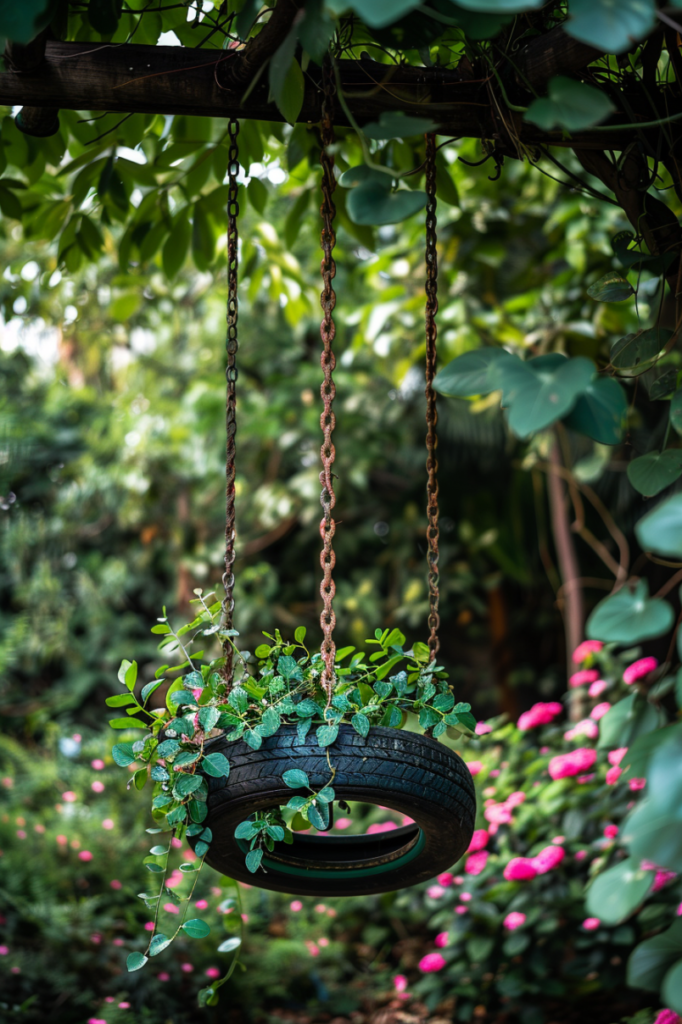
Creating a Tire Swing for plants is a delightful way to incorporate greenery into your outdoor decor while also adding a playful touch to your garden or backyard.
Follow these step-by-step instructions to make your own:
Gather materials
- Old tire
- Strong rope or chain
- Utility knife or saw
- Drill
- Potting soil
- Plants or flowers suitable for hanging (such as trailing vines or ferns)
Prepare the tire
- Clean the tire thoroughly to remove any dirt or debris.
- Use a utility knife or saw to cut out the center of the tire, leaving a wide opening. This will create a space for planting your flowers.
Drill drainage holes
Using a drill, make several small drainage holes in the bottom of the tire to prevent water from pooling and ensure proper drainage for your plants.
Attach hanging hardware
- Cut a length of strong rope or chain to your desired length for hanging the tire swing.
- Thread the rope or chain through the tire, ensuring it is securely attached and can support the weight of the tire and plants.
Fill the tire with soil
- Place the tire in a stable position for planting.
- Fill the tire with potting soil, filling it to just below the rim of the tire.
Plant your flowers
- Carefully remove the plants from their containers and gently loosen the roots.
- Plant your chosen flowers or plants in the tire, arranging them to your liking and ensuring they have enough space to grow.
Hang your tire swing
- Find a sturdy tree branch or beam to hang your tire swing from.
- Attach the rope or chain to the branch or beam, ensuring it is securely fastened and can support the weight of the tire swing.
Tire fountain
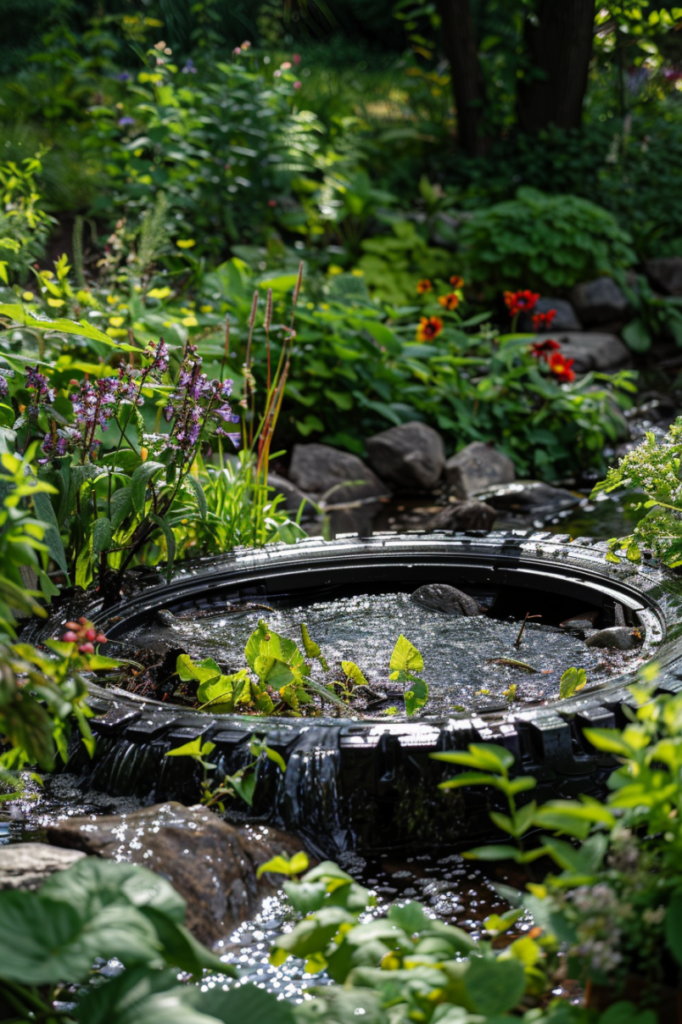
Creating a Tire Fountain for plants is a unique and captivating way to incorporate greenery into your outdoor space while adding the soothing sound of running water.
Follow these step-by-step instructions to make your own:
Gather materials
- Old tire
- Submersible fountain pump
- Plastic tubing
- Drill
- Utility knife or saw
- Waterproof sealant
- Potting soil
- Plants suitable for water features (such as water lilies or aquatic grasses)
Prepare the tire
- Clean the tire thoroughly to remove any dirt or debris.
- Use a utility knife or saw to cut the tire in half horizontally, creating two equal halves. You will only need one half for this project.
Drill holes for tubing
Use a drill to make a hole in the bottom center of the tire half large enough to accommodate the plastic tubing. This will serve as the outlet for the water.
Install the fountain pump
- Place the submersible fountain pump inside the tire half, positioning it near the center.
- Thread the plastic tubing through the hole drilled in the bottom of the tire and attach it to the pump outlet.
Seal the tire
Apply waterproof sealant around the hole where the tubing exits the tire to prevent leaks and ensure a watertight seal.
Fill the tire with water
Fill the tire half with water, ensuring that the fountain pump is fully submerged.
Plant your flowers
Carefully arrange your chosen plants inside the tire half, ensuring they are positioned securely and can thrive in a water environment.
Use potting soil to anchor the plants in place and cover any exposed roots.
Turn on the fountain
- Plug in the fountain pump and switch it on to start the flow of water.
- Adjust the flow rate as needed to achieve the desired water movement and sound.
Tire fairy garden
Creating a Tire Fairy Garden for plants is a whimsical and enchanting way to add a touch of magic to your outdoor space.
Follow these step-by-step instructions to make your own:
Gather materials
- Old tire
- Utility knife or saw
- Potting soil
- Small plants suitable for fairy gardens (such as succulents, miniature flowers, or ferns)
- Miniature fairy garden accessories (such as fairy figurines, tiny houses, benches, and pathways)
- Decorative stones or gravel
- Optional: Paint, glitter, or other embellishments
Prepare the tire
- Clean the tire thoroughly to remove any dirt or debris.
- Use a utility knife or saw to cut the tire in half horizontally, creating two equal halves. You will only need one half for this project.
Fill the tire with soil
- Place the tire half in the desired location for your fairy garden.
- Fill the tire half with potting soil, ensuring it is evenly distributed and reaches just below the rim of the tire.
Plant your fairy garden
- Carefully arrange your chosen plants inside the tire half, creating a miniature landscape that mimics a fairy forest or garden.
- Use a combination of plants with different heights, textures, and colors to add visual interest to your fairy garden.
Add fairy garden accessories
- Place miniature fairy garden accessories throughout the tire garden, such as tiny houses, benches, pathways, and decorative stones or gravel.
- Arrange the accessories to create a whimsical scene that invites imagination and wonder.
Optional: decorate the tire
Get creative and decorate the outside of the tire with paint, glitter, or other embellishments to enhance the magical ambiance of your fairy garden.
- Read also: A Comprehensive Guide: How to Build a DIY Bean Trellis
- Read also: A Step-by-Step Guide to Crafting Your Own DIY Plant Terrarium
Conclusion
Old tires can be transformed into unique and functional garden decor with a little creativity and some basic tools.
Not only are these DIY projects eco-friendly and cost-effective, but they also add character and charm to your outdoor space.


