Gardening isn’t just sunshine and seeds—weather, bugs, and random cold snaps can wreck your plants fast.
That’s where floating row covers come in.
These light fabric shields sit on or just above your crops, blocking pests and bad weather.
The best part? You can DIY them cheap instead of buying pricey ones.
Whether you’re a veggie pro or just starting out, these covers help your garden stay strong when nature gets messy.
What Are Floating Row Covers and Why Do They Work?
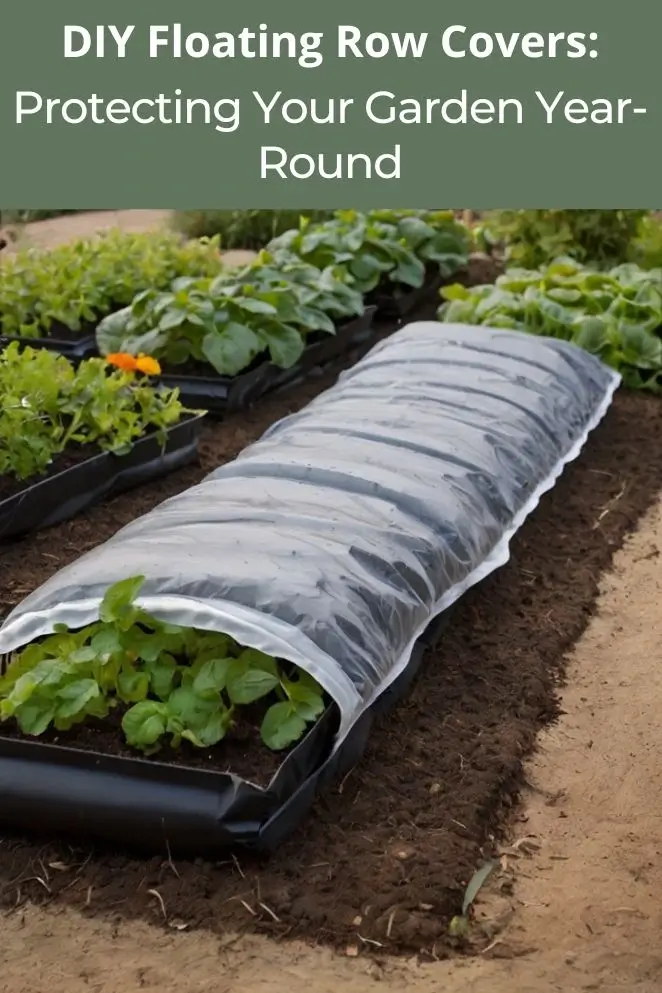
Floating row covers are thin fabric sheets you lay over your garden beds.
They’re see-through enough to let sun, air, and water in—but still tough enough to block bugs, wind, and cold snaps.
Think of them as the crop-top version of a greenhouse: protective but chill.
You can drape them right over your plants, or prop them up with cheap hoops.
As your veggies grow, the cover just kind of “floats” along with them. Magic? Nah, just smart gardening.
Why they actually work?
Here’s the trick: floating row covers trap warm air underneath.
That little heat bubble can raise the temp by 2–10°F. So when it’s chilly out, your plants stay toasty.
They also help during hot days by throwing a bit of shade and cutting down on water loss.
It’s like giving your lettuce a sun hat and a reusable water bottle.
Why bother with DIY row covers?
Longer growing season
Start earlier in spring, keep going later into fall. Covers stretch your season and boost harvests by up to 40%.
That’s like squeezing an extra harvest level in Stardew Valley.
Pest blocker
Floating covers keep out bugs like flea beetles, squash bugs, cabbage moths—basically the garden version of mini boss fights.
Use them right, and you can cut pest damage by up to 90%.
Weather armor
They buffer your plants from wind, heavy rain, and even light hail.
Super handy when your seedlings are young and dramatic (you know the type).
Cheap wins
Store-bought covers? Expensive. DIY covers? Way cheaper.
You can slash costs by up to 80% with stuff from the hardware store or even your garage.
More budget for seeds, compost, or that fancy trowel you’ve been eyeing.

- Read also: DIY Row Covers: The Ultimate Guide to Protecting Your Garden
- Read also: DIY Cold Frame Plans: Complete Guide to Year-Round Garden Extension
Materials Needed for DIY Floating Row Covers
You don’t need fancy tools or a greenhouse budget to make floating row covers.
You just need the right mix of fabric, supports, and ways to hold it all down.
Here’s the stuff that works:
Fabric options
Garden fabric (aka reemay or agribon)
This is the good stuff. It’s light, lets in 85–90% sunlight, and protects plants down to 28°F.
It’s not the cheapest, but it works great if you’re serious about frost and bug protection.
Cheesecloth
Old-school and cheap. Go for 100% cotton with a tight weave.
It lets air through and keeps out some bugs, but don’t expect it to handle cold weather like a champ.
Landscape fabric
Not ideal, but it’ll do for pest control.
Use white or clear types—skip black ones unless you’re trying to cook your plants.
Old bed sheets
Got ripped sheets in the closet? Use ’em.
They won’t stop frost, and they tear in wind, but they’re fine for quick bug protection on bigger plants.
Support systems
Wire hoops
Use 9 or 10-gauge wire, bend it into arcs, and space them every 3–4 feet. Strong and easy.
PVC pipe
Half-inch PVC is cheap and light. Bend it into shape (or use a pipe bender). Works great for bigger beds.
Bamboo stakes
Look cool, biodegradable, but flimsy in wind. Good for small setups or short-term use.
Securing materials
Landscape staples
Those U-shaped pins you poke into the ground. Simple. Fast. Reusable.
Rocks or sandbags
Toss ‘em along the edges. Not fancy, but they get the job done.
Clips and clamps
Use spring clamps or row cover clips to hook the fabric to your hoops. Easy on, easy off when you need to weed or harvest.
Step-by-Step Construction Guide
Method 1: Simple floating covers
Perfect for lettuce, spinach, radishes, and stuff that won’t shoot up overnight.
Step 1: Measure your bed
Grab a tape measure. Measure the length and width of your garden bed.
Add 2–3 feet to each side—this extra bit lets you anchor the fabric properly.
Skipping this step = flappy mess.
Step 2: Cut the fabric
Use sharp scissors or a rotary cutter. Don’t eyeball it.
If you want the edges to last longer, use pinking shears or run them through a serger (if you’ve got one) so they don’t fray.
Step 3: Lay it down
Drape the fabric over your plants like a blanket—not too tight, not dragging in the dirt.
Leave a bit of space so the plants can grow without punching holes in it.
Step 4: Secure the edges
Use whatever you’ve got—landscape staples, rocks, bricks, sandbags.
Just weigh the edges down so wind doesn’t flip it like a bad hair day.
Leave some slack in the fabric to avoid tears as your plants stretch out.
Step 5: Add an access point (optional but smart)
You’ll want to get under there at some point.
Add snaps, zipper strips, or even a Velcro edge so you’re not ripping the whole thing off every time you want to check on your kale.
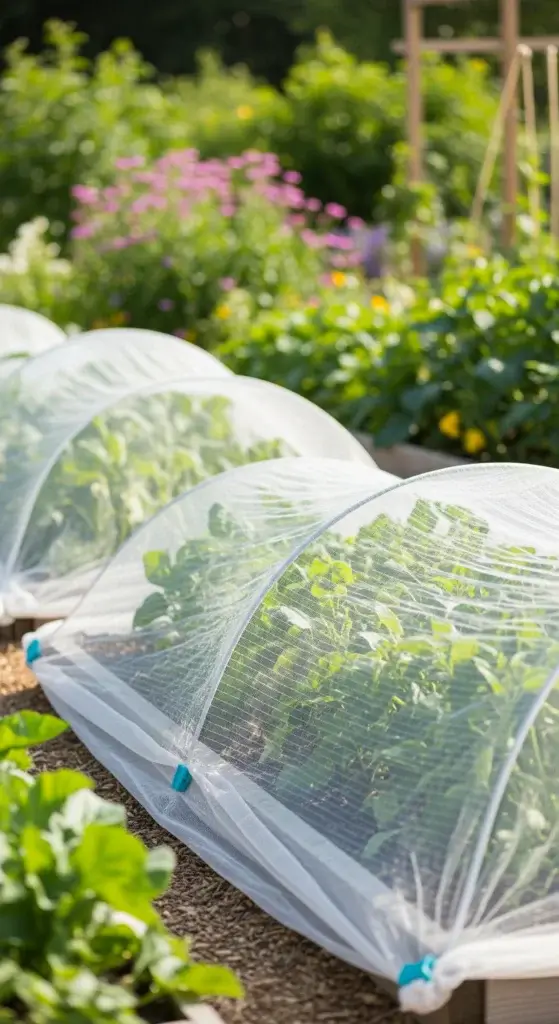
Method 2: Hoop-supported covers
If you’re growing tomatoes, peppers, or anything that likes to stand tall—go with this method.
Step 1: Set up your hoops
Use wire, PVC pipe, or bamboo stakes. Stick them into the ground every 3–4 feet along the row.
Make sure the hoops are tall enough for the full-grown plant plus an extra 6–12 inches for breathing room.
Step 2: Make it straight
Use a string line if you want the tunnel to look neat (and avoid the wavy chaos).
Keep the height and spacing even across the whole bed.
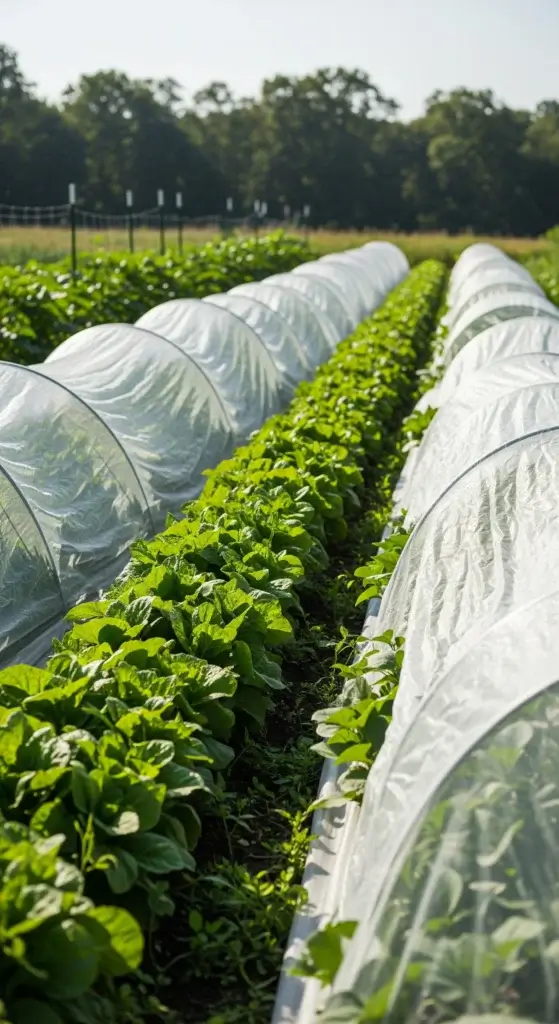
Step 3: Drape the fabric
Lay your fabric over the hoops. Let it hang evenly on both sides so it doesn’t slide off in a gust of wind.
Center it up before moving on.
Step 4: Clip it down
Use spring clamps, binder clips, or row cover clips to hold the fabric to the hoops.
Space clips every 2–3 feet so the fabric stays in place but can be popped off when you need in.
Step 5: Anchor the sides
Same as before—rocks, staples, bricks, sandbags. Tuck the edges and weigh them down.
Keep the fabric tight enough to stay put but loose enough to move a little with the wind and plant growth.
Seasonal Applications and Best Practices
Row covers aren’t just a spring thing—they work year-round if you know how to play it.
Here’s how to use them like a pro from early chill to late-season frost.
Spring
Seedlings hate cold. Late frost can wipe them out fast. So:
- Cover ASAP: As soon as you plant, throw on the row cover. Don’t wait.
- Avoid touching wet leaves: If the fabric touches wet foliage during a freeze, it can actually cause frost damage.
- Cool-weather crops? Lettuce, spinach, peas—leave covers on until it’s regularly 70°F during the day.
- Remove slowly: Don’t just yank it off. First, open the ends. Then the sides. Let your plants get used to the outside world like a shy cat.
Summer
In summer, it’s less about cold and more about keeping pests out (squash bugs, cabbage moths, the usual suspects).
- Cover early: Put the cover on right after planting—before bugs show up.
- Pollinators? Take the cover off when plants flower—or hand-pollinate if you’re feeling extra.
- Watch for heat stress: If temps hit 85°F+ for a few days, remove the cover or swap it with shade cloth. Your plants can cook under there like leftovers in foil.
Fall
Want more harvests into fall? Row covers can buy you 4–8 extra weeks of growing time.
- Cover before the first frost: Don’t wait for the freeze warning to pop up on your weather app.
- Protect mature plants: Covers won’t grow crops faster, but they’ll help you keep what you’ve got alive longer.
- Layer up: Use two layers—light fabric inside, heavier one outside. That air gap helps hold heat. Done right, you can protect down to about 20°F.
Maintenance and Troubleshooting
Regular Maintenance Tasks
Check weekly
Look for holes, loose corners, or bugs that snuck in. Small tears?
Patch them with fabric tape or stitch them up with a needle and thread.
Five minutes now saves your crops later.
Clean monthly
Take the covers off and rinse them with water and a little mild soap.
Clean covers let in more light and help stop mold and disease from spreading.
Don’t skip this if your garden’s in a humid area.
Store smart
When the season’s done, dry the covers completely.
Roll them up and stash them in a breathable bag or box—no plastic tubs.
Keep them away from mice and sharp tools unless you want mystery holes next spring.
Common problems and solutions
Problem: Fabric rips
- Why it happens: You pulled it too tight or didn’t anchor it right.
- Fix it: Don’t stretch the fabric like you’re wrapping leftovers. Patch small tears right away before they get worse.
Problem: Plants aren’t growing well
- Why it happens: They’re not getting enough light or air.
- Fix it: Use lighter fabric or cut little flaps to let in more airflow. You’re not making a sauna.
Problem: Bugs got in
- Why it happens: There’s a gap somewhere.
- Fix it: Walk the edges. Make sure the cover touches the ground all the way around. Patch any holes you find.
Problem: It’s too hot under there
- Why it happens: It’s summer and the cover’s trapping heat.
- Fix it: Use a thermometer to check. If temps are climbing, vent the sides or just take the cover off for a bit. Plants can’t sweat—but they sure can wilt.

- Read also: Maximizing Small Spaces: DIY Rooftop Garden Ideas
- Read also: Elevate Your Space: DIY Hanging Gardens for Small Spaces
Wrap-Up: Why DIY Row Covers Are Totally Worth It
DIY floating row covers are one of the smartest, cheapest ways to protect your garden.
They block bugs, handle weird weather, and stretch your growing season without breaking the bank.
Start with one bed. Use the right fabric. Set it up well. Keep it clean. Boom—your plants are safer, and your harvest gets bigger.
Once you see it work, you’ll want to cover more beds.
Row covers give you control over your garden’s vibe. Use them right, and your plants will grow better, faster, and safer.
It’s like giving your crops their own tiny VIP lounge.


