Gardening enthusiasts understand the importance of proper irrigation for thriving plants.
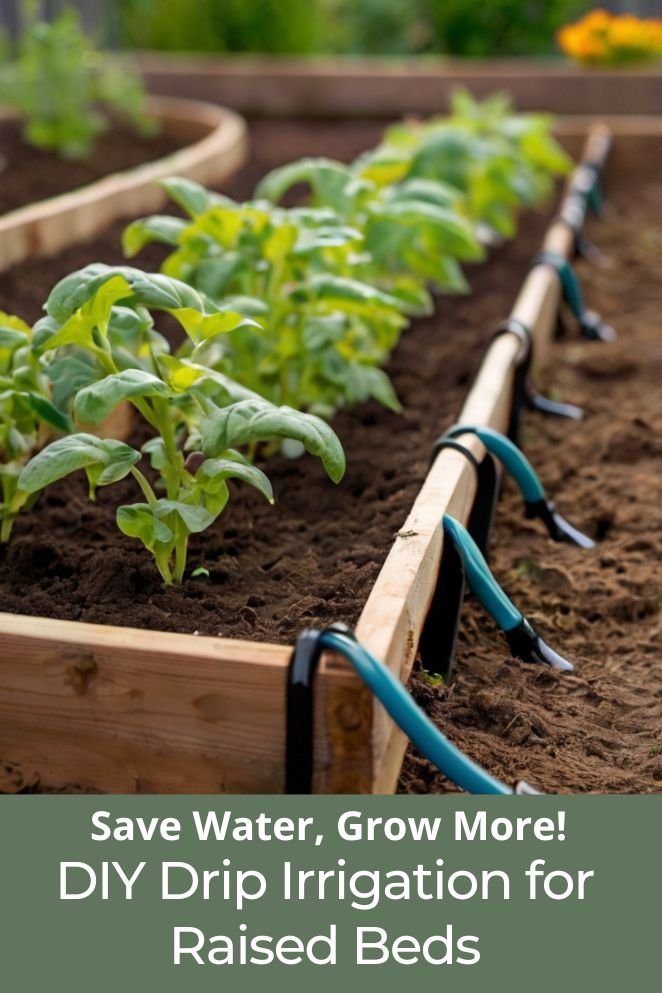
Raised beds, in particular, benefit greatly from efficient watering systems like drip irrigation.
Drip irrigation is an environmentally friendly and cost-effective method that delivers water directly to the plant roots, minimizing waste and promoting healthy growth.
In this guide, we will walk you through creating your own DIY drip irrigation system for raised beds, ensuring your garden flourishes with minimal effort.
Supplies Needed
Before you start, gather the necessary supplies for your DIY drip irrigation system. Here’s a list of what you’ll need:
- Mainline tubing: 1/2-inch polyethylene tubing to serve as the main water supply line.
- Drip emitters: Emitters that control the water flow to each plant.
- Tubing connectors: T-connectors, elbow connectors, and end caps for connecting the tubing.
- Punch tool: A tool to punch holes in the mainline tubing for inserting emitters.
- Timer (optional): An automatic timer to regulate watering times.
- Pressure regulator: To ensure consistent water pressure.
- Filter: To prevent debris from clogging the system.
- Stake holders: To secure the tubing in place.
- Read also: A Step-by-Step Guide: DIY Self-Watering Raised Garden Bed
- Read also: Herbs on Autopilot: DIY Drip Irrigation For Herb Garden
Step-by-Step Instructions
Follow these steps to set up your drip irrigation system for raised beds:
Step 1: Plan your layout
Start by sketching out a layout of your raised beds. Consider the size and water needs of each plant.
This will help you decide where to place the mainline tubing and emitters for even water distribution.
Plants that need more water should have emitters closer together.
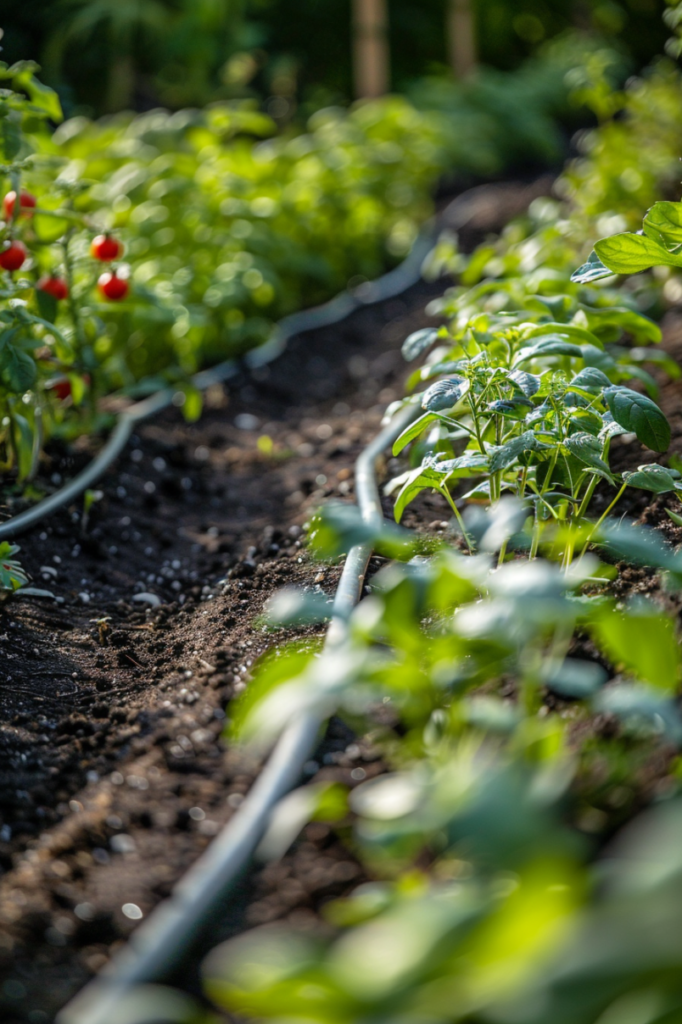
Step 2: Install the mainline tubing
Use 1/2-inch polyethylene tubing to create the mainline along the perimeter of your raised beds.
Secure the tubing in place using tubing stakes.
For larger beds, you may need to run the tubing down the center as well to ensure all plants receive water evenly.
Step 3: Connect the tubing
Use T-connectors to branch off from the mainline tubing.
These connectors will direct water to different sections of your raised beds.
Use elbow connectors to navigate corners smoothly, ensuring the tubing doesn’t kink.
Close off the ends of the tubing with end caps to prevent water from leaking out.
Step 4: Punch holes for emitters
With a punch tool, make small holes in the mainline tubing where you want to place the emitters.
The spacing of these holes should match the water requirements of your plants, typically every 12 to 18 inches apart.
This ensures that each plant receives the right amount of water directly at its roots.
Step 5: Insert drip emitters
Carefully insert drip emitters into the holes you punched in the mainline tubing.
Make sure they fit snugly to prevent any water leaks.
Drip emitters come in different flow rates, so choose ones that match the water needs of your plants.
This ensures each plant receives the right amount of water directly at its roots.
Step 6: Install the pressure regulator and filter
Attach a pressure regulator and filter to the mainline tubing near your water source.
The pressure regulator helps maintain consistent water pressure throughout the system, which is crucial for proper operation of the emitters.
The filter prevents debris from clogging the emitters, ensuring they continue to deliver water effectively.
Step 7: Connect to the water source
Connect the mainline tubing to your garden hose or a dedicated water source.
If you’re using a timer to automate watering schedules, install it between the water source and the mainline tubing.
This allows you to set specific times for watering, which is especially helpful during periods of hot weather or when you’re away from home.
Step 8: Test the system
Turn on the water to test your drip irrigation system.
Check carefully for any leaks along the tubing or at the connections.
Monitor each emitter to ensure they are dispensing water properly.
Adjust the position or flow rate of the emitters as needed to achieve even water distribution across your raised beds.
Tips and Variations
Creating a DIY drip irrigation system for raised beds can be customized based on your garden’s specific needs.
Here are some tips and variations to consider:
Mulch for moisture retention
Adding a layer of mulch around your plants helps retain moisture in the soil and reduces water evaporation.
This keeps the soil consistently moist, which is beneficial for plant growth.
Organic mulches like wood chips or straw work well and also help suppress weeds.
Use a timer
Incorporating a timer into your irrigation system automates your watering schedule.
This is especially useful when you’re not available to water manually.
Set the timer to water early in the morning or late in the evening to minimize water loss from evaporation during hotter parts of the day.
Adjust for seasonal changes
Adjust your watering schedule based on seasonal variations.
During hot summer months, plants may need more frequent watering to stay hydrated.
In cooler seasons, reduce watering frequency as plants require less moisture.
Observing your plants’ condition and soil moisture levels helps determine when adjustments are needed.
Regular maintenance
Regularly inspect your drip irrigation system for any issues like clogs, leaks, or worn-out parts.
Clean the filter periodically to ensure proper water flow and replace any damaged emitters or tubing promptly.
Maintaining your system keeps it efficient and ensures your plants receive consistent water distribution.
- Read also: A Guide: Mastering the Art of Drip Irrigation for Tomatoes
- Read also: Nurturing Greenery: A DIY Potted Plant Watering System Guide
Additional Tips
- Spacing and placement: Ensure emitters are placed correctly to deliver water directly to plant roots. Adjust emitter flow rates based on plant water requirements.
- Water pressure: Monitor and adjust water pressure to prevent overwatering or underwatering.
- Winter precautions: Before winter, drain your irrigation system to prevent freezing damage.
Conclusion
Setting up a DIY drip irrigation system for raised beds is an excellent way to ensure your garden thrives with minimal effort.
By delivering water directly to the roots, you promote healthy plant growth, conserve water, and reduce weed growth.
With the step-by-step instructions and tips provided in this guide, you can create an efficient and reliable irrigation system tailored to your garden’s needs.
FAQs
The frequency depends on your plants’ water needs and the climate. Typically, running the system for 30 minutes to an hour, 2-3 times a week, is sufficient. Adjust based on soil moisture levels and plant requirements.
Yes, drip irrigation is versatile and can be used for vegetables, flowers, shrubs, and even trees. Just adjust the emitter placement and flow rate to match each plant’s needs.
Install a filter to keep debris out of the tubing. Regularly check and clean the filter and emitters to prevent clogs. Using mulch can also reduce the amount of debris entering the system.
Absolutely! Drip irrigation is highly adaptable and can be scaled to fit any garden size, from small raised beds to large landscapes.
Yes, you can easily expand your system by adding more tubing and emitters. Plan for expansion when setting up the initial layout to ensure seamless integration.


