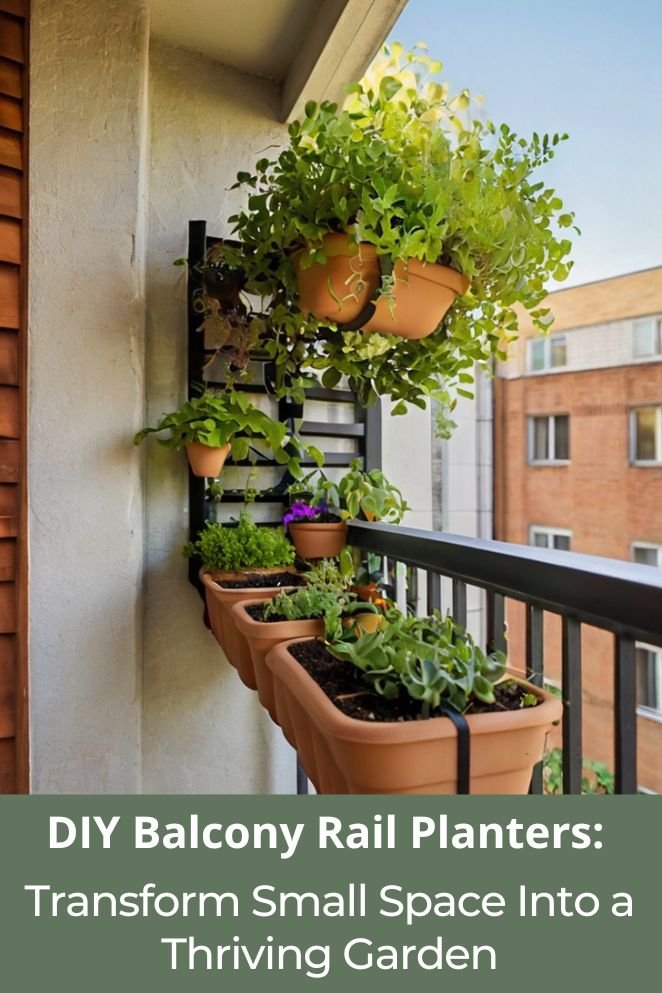
Just because you live in an apartment or condo doesn’t mean your plant parent dreams are dead.
Welcome to the world of DIY balcony rail planters — the MVP of urban gardening (aka the “Taylor Swift of tiny space hacks”).
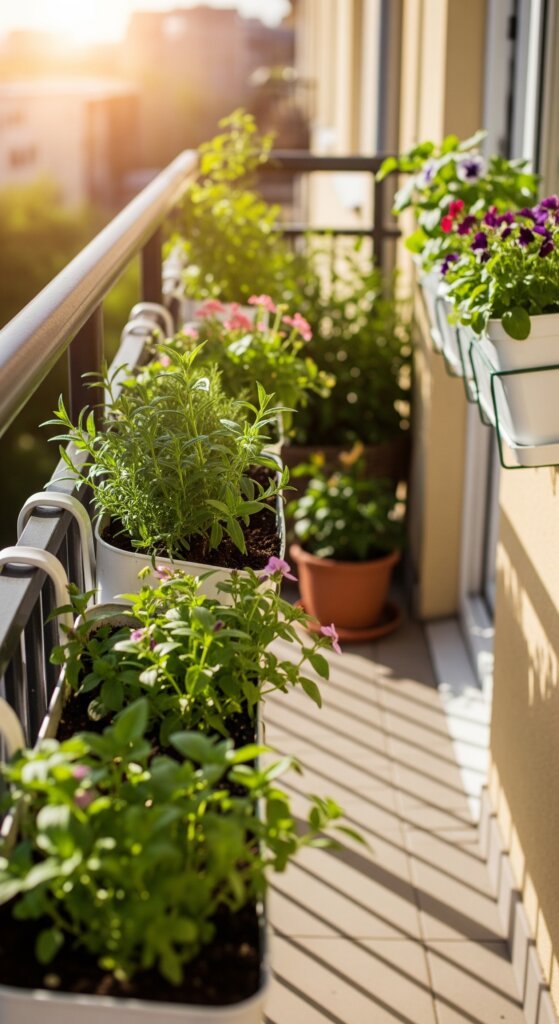
These bad boys let you turn your railing into a lush little jungle, no backyard required.
Whether you’ve got a green thumb or can barely keep a cactus alive, making your own railing planters is budget-friendly, totally customizable, and makes your balcony look like the set of a Pinterest home tour.
Think of it as turning your outdoor space from “meh” to plant queen vibes with just a weekend project.
Why Choose DIY Balcony Rail Planters?
Maximize your limited space
Let’s be real—your balcony railing is just standing there doing nothing.
It’s like that one character in every sitcom who never gets a storyline.
Enter: railing planters.
They’re like turning a blank wall into a feature film.
Instead of crowding your tiny floor space with pots you trip over at 2 a.m., slap some planters on the railing and boom—vertical garden magic.
Cost-effective garden solution
Why drop $50+ on a basic store-bought planter when you can DIY something cooler for under $20?
That’s like trading a latte a day for a mini plant empire.
You can make a bunch, try out different looks, and if one turns out wonky?
Congrats, you just invented a new rustic aesthetic.
- Read also: DIY Plant Shelf Outdoor Ideas for Green Enthusiasts
- Read also: A Step-by-Step Guide to Crafting Your Own DIY Plant Terrarium
Complete customization
This is your custom build moment—like HGTV, but with fewer power tools and more succulents.
You get to decide how long, how deep, and what it looks like.
Wanna match your balcony to your favorite Pinterest board or Studio Ghibli vibe? Go wild.
Want secret drainage for your basil babies? You got this.
Enhanced curb appeal
Nothing levels up a boring outdoor space like some hand-crafted green goodness.
These planters add major curb appeal—and help block your neighbors from seeing you in your PJs watering plants at 7 a.m.
Add some trailing vines or tall herbs and you’ve basically got a private garden suite in the sky.

Essential Materials and Tools
Materials needed
For basic wooden planters:
- Cedar or pressure-treated lumber (1×6 and 1×8 boards work well)
- Wood screws (1¼ inch and 2½ inch)
- Wood glue
- Exterior wood stain or paint
- Landscape fabric or plastic liner
- Mounting brackets or heavy-duty zip ties
For alternative materials:
- PVC boards for lightweight, weather-resistant options
- Recycled plastic lumber for eco-friendly builds
- Metal brackets for industrial-style designs
Tools required
- Circular saw or miter saw
- Drill with various bits
- Measuring tape and pencil
- Safety glasses and work gloves
- Sandpaper (120 and 220 grit)
- Level for proper installation
Step-by-Step Construction Guide
Step 1: Planning your design
Before you go all Bob the Builder, grab a tape measure and figure out how wide your balcony railing is.
No guesswork here—this isn’t a rom-com, accuracy does matter.
Decide how many planters you want (just one? a whole squad?) and sketch it out.
Trust me, “measure twice, cut once” is more than a dad joke—it saves wood and your sanity.
Step 2: Cutting your materials
Here’s the basic breakdown for one 24″ long planter box:
- Front & back panels: 2 pieces @ 24″ (1×8 boards)
- Sides: 2 pieces @ 5″ (1×8 boards)
- Bottom panel: 1 piece @ 22¾” (1×6 board)
- Support cleats: 2 pieces @ 5″ (1×2 boards)
If this sounds like a baking recipe for wood, you’re not wrong.
Just remember: the bottom panel is slightly shorter so it tucks in nice and snug like a burrito.
Step 3: Assembly process
- Drill pilot holes: This prevents your wood from cracking like your voice in middle school.
- Glue & screw: Slather a little wood glue, then drive in your screws.
- Build the frame: Start by attaching the side panels to the front and back panels. It should start looking like a box and less like a pile of regrets.
Step 4: Drop in the bottom
Pop that bottom panel into place so it lines up with the lower edge of the sides.
It should sit flush, like it belongs there. Because it does.
Step 5: Drill some drainage
Drill a few ½-inch holes across the bottom—space them every 4–6 inches.
Think: “spa for roots, not swamp.”
Step 6: Sand, paint, make it pretty
Start with 120-grit sandpaper and finish with 220 for that smooth-like-butter finish.
Then stain it, paint it, or leave it rustic—whatever fits your vibe (Boho jungle? Modern farmhouse? Coastal grandma chic?).
Creating Mounting Systems
Always mount inside your railing, not outside, unless you want to test gravity (spoiler: gravity always wins).
Most leases also frown on planters falling onto your neighbor’s dog.
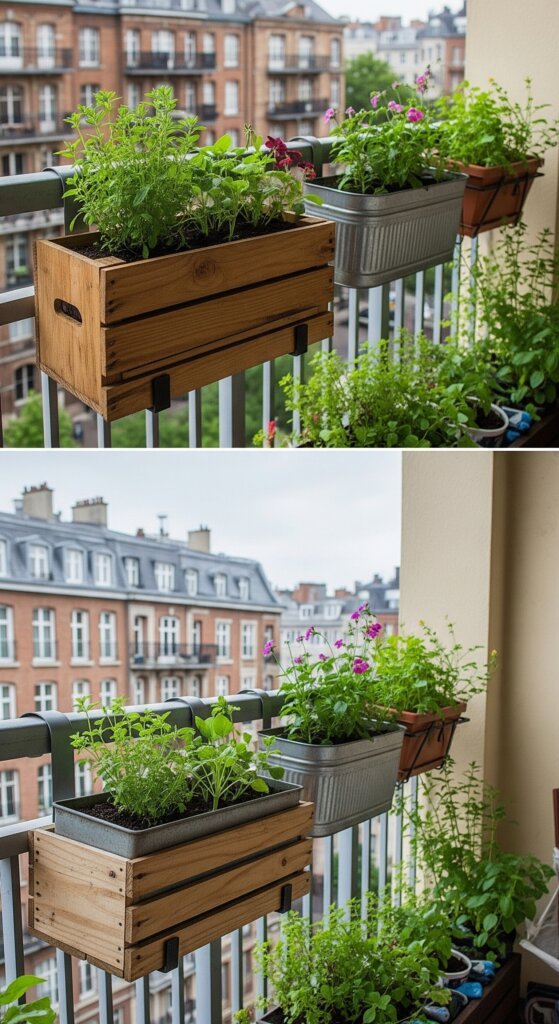
Mounting options you’ll love:
- Bracket system: Use custom wooden cleats to hook over the railing. It’s like a little shelf for your planter—super secure and looks classy.
- Zip tie hack: Not just for cable management anymore. Heavy-duty zip ties + brackets = fast and easy install, perfect for weird-shaped railings.
- Clamp style: Use adjustable clamps (add padding to avoid scuffs!). Ideal for renters who want to keep their deposit and their aesthetic.
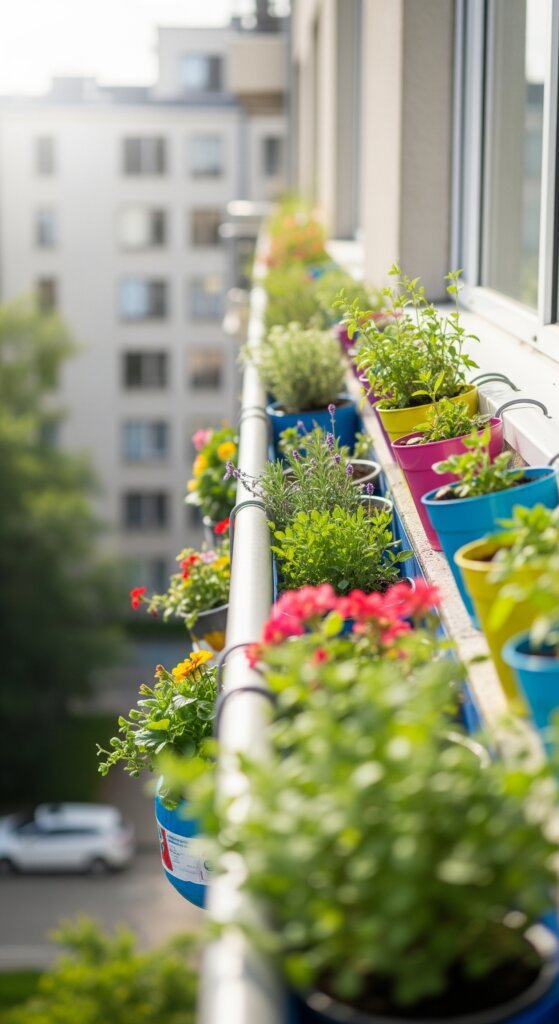
Plant Selection for Rail Planters
Best plants for balcony rail planters
Picking plants for your railing planters isn’t just about what looks cute on Instagram (though, yes, that too).
You’ve gotta think like a plant matchmaker: who thrives in your balcony’s light, who can handle a little wind, and who plays nice in small spaces.
Ready? Let’s build your dream cast.
Full sun options:
Got a sun-drenched balcony? These plants are your ride-or-dies:
- Petunias: Constant blooms like a pop star on a comeback tour.
- Marigolds: Bright, bold, and they repel pests—basically the bouncers of your plant party.
- Herbs (basil, oregano, thyme): They look good and taste good. Think of them as edible decor.
- Cherry tomatoes: Tiny tomatoes, huge personality. Great for snacking straight from the vine.
Partial shade choices:
If your balcony’s more “shady brunch spot” than “sun deck,” go for these:
- Coleus: Moody colors, funky patterns—like the Billie Eilish of foliage.
- Begonias: Delicate blooms that don’t need the spotlight.
- Ferns: Lush, dramatic, and basically the plant version of a spa robe.
- Impatiens: Chill, reliable, and always blooming on time.
Trailing varieties:
Want that lush, cascading vibe? Add these trailing stunners:
- Sweet potato vine: Fast-growing and showy—like the plant version of a red carpet dress.
- Nasturtiums: Bright, beautiful, and edible. Toss those flowers into a salad and feel fancy.
- Ivy: Classic, low-maintenance, always looking put together (teach me your ways).
- Bacopa: Tiny blooms that spill over the edge like confetti—subtle but stunning.
Soil and nutrition considerations
Look, your plants don’t live in the ground — they’re living the high-rise life in a box.
So they need that good stuff. Regular garden soil? Hard pass.
It’s heavy, clingy, and holds onto water like it’s in a toxic relationship. Your planter babies deserve better.
Recommended soil mix:
- 40% high-quality potting mix – This is your base. Go for the premium stuff — no bargain bin dirt, please.
- 30% compost – Like a green smoothie for your plants. Full of nutrients, keeps them strong and blooming.
- 20% perlite or vermiculite – These little white bits are the fluffers. They help your soil breathe and drain like a champ.
- 10% Coconut coir or peat moss – Holds just enough water without drowning roots. Think of it as the plant version of a moisture-wicking hoodie.
Safety Considerations and Installation Tips
Before you go full HGTV and hang up your gorgeous DIY rail planter, let’s make sure your balcony doesn’t turn into a plant-related crime scene.
We’re building a vibe, not a lawsuit.
Weight distribution
Wet soil = heavy soil. Like, “dragging a suitcase up five flights of stairs” heavy.
Most balcony railings can handle about 20–30 lbs per foot, so don’t go full jungle mode unless your railing is built like Captain America.
Weather protection
Your balcony isn’t just a cute sun spot — it’s a weather battlefield.
A retractable awning, shade sail, or even a big patio umbrella can help your green gang survive those surprise downpours or midday scorch-fests.
Think of it as SPF… but for leaves.
Drainage management
Drainage holes are essential. No one likes soggy roots (root rot = plant heartbreak).
Add a drip tray underneath if you don’t want mystery water stains on your tiles — or worse, your downstairs neighbor’s yoga mat.
We’re growing plants, not feuds.
Wind considerations
Balconies can be wind tunnels, especially up high.
Don’t let your planters take flight like they’re in The Wizard of Oz.
Secure them with clamps, brackets, or zip ties—multiple points. And choose sturdy plants that won’t faint at the first breeze.
Maintenance and Seasonal Care
Regular Maintenance Tasks
Weekly:
- Check soil moisture levels
- Deadhead spent flowers
- Monitor for pest issues
- Adjust plant ties and supports
Monthly:
- Apply liquid fertilizer during growing season
- Prune overgrown vegetation
- Check mounting hardware for looseness
- Clean planter exteriors
Seasonal Considerations
Spring Setup:
- Replace or refresh potting soil
- Apply slow-release fertilizer
- Install new plants after last frost
- Check and tighten mounting systems
Summer Care:
- Increase watering frequency
- Provide shade during extreme heat
- Monitor for heat stress
- Harvest herbs and vegetables regularly
Fall Preparation:
- Remove spent annuals
- Plant cool-season varieties
- Reduce watering frequency
- Prepare planters for winter storage if needed
Winter Protection:
- In cold climates, move planters indoors or to protected areas
- Wrap exposed containers to prevent freeze damage
- Reduce or eliminate fertilizing
- Plan next year’s planting schemes
Creative Design Ideas and Variations
So you’ve got your planter box — now what? Time to level up and make it a whole vibe.
Let’s turn that balcony into the plant version of a design Pinterest board, complete with lights, tiers, and a little drama.
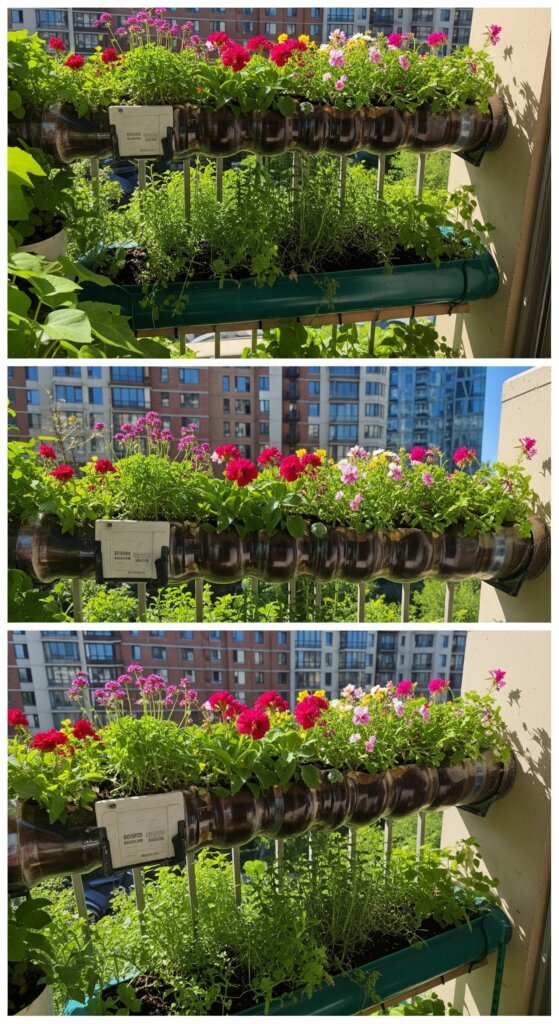
Tiered planter systems
Want to feel like you’re running a mini botanical garden? Build planters at different heights—think steps, but for plants.
It’s not just cute; it’s functional.
Put your go-to herbs (hi, basil!) up top for easy snipping and let the taller stuff chill out in the back like plant bodyguards.
Combination planters
Climbers in the back, dangly vines in the front.
Add a mini trellis and BOOM—you’ve got a container that does both: grow up and glow down.
It’s like a mullet, but make it chic.
Think cherry tomatoes climbing while nasturtiums spill over like they’re in a shampoo commercial.
Modular systems
Build planters that mix and match.
One week it’s an herb bar, next week it’s a floral waterfall.
Modular systems let you switch things up like you’re playing Sims.
Change your mind, change your layout. Zero commitment, all the aesthetic.
Integrated lighting
Wrap a few solar LED strips around your planter and watch your balcony transform into a cozy rom-com movie set.
No plugs, no drama. Just soft glowy vibes for your 8 p.m. “watering my plants while overthinking” ritual.
Troubleshooting Common Issues
Drainage problems
If your planter turns into a swamp after one rainstorm, you need more drainage holes.
Or lift it up slightly so air can flow underneath—like giving it plant stilts.
No one likes soggy roots, including your begonias.
Mounting instability
If your planter jiggles when the wind blows, stop everything.
Add more brackets, zip ties, or switch to something sturdier.
Balcony rail planters are cute until one yeets off mid-thunderstorm.
Safety first, Pinterest board second.
Plant performance issues
If things look sad (leggy, droopy, no blooms), check the holy trinity:
- Are they getting the right sun?
- Are they being blasted by wind like they’re on “America’s Next Top Model”?
- Is your soil good or just old dirt in disguise?
Sometimes it’s not you—it’s the plant. Swap it out like last season’s sandals.
- Read also: Sustainable Style: DIY Garden Decor Ideas From Old Tires
- Read also: Kitchen Convenience: Create a DIY Window Herb Garden
Conclusion
DIY rail planters = turning your boring balcony into a mini Eden.
You’re taking that dead space and turning it into a herb haven, a flower fest, or a snack-producing veggie wall—whatever fits your vibe.
Just measure right, pick the right plants for your light and wind, and secure those planters like they’re holding Beyoncé tickets.
Start simple, grow with confidence, and upgrade as you go.
Urban gardening isn’t just trendy—it’s smart, sustainable, and low-key therapeutic.
Just double-check your lease (no surprise emails from property managers, please) and you’re good to grow.


