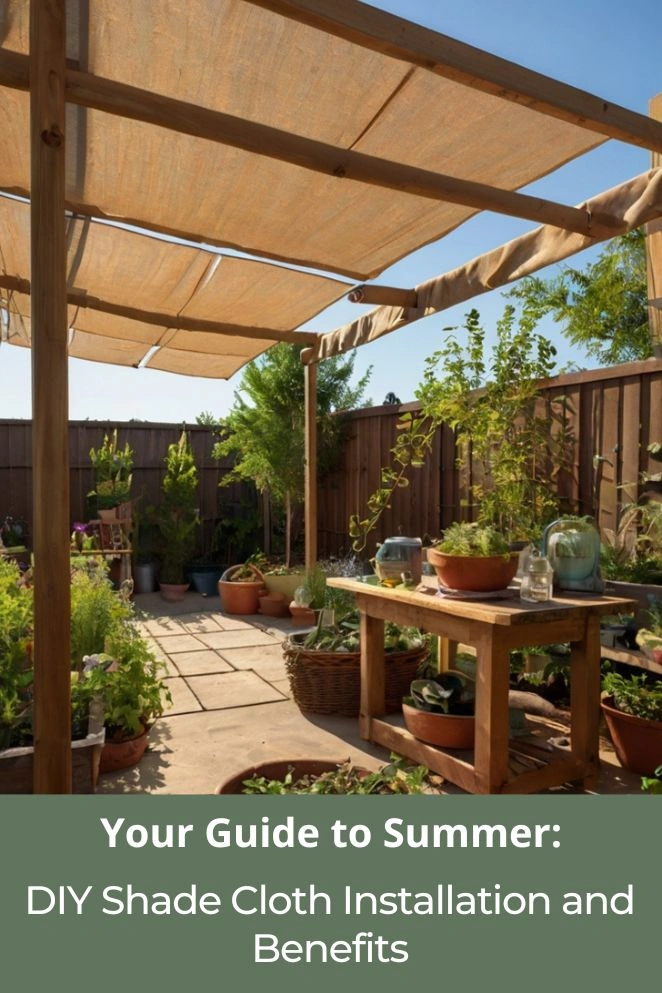
Summer’s getting brutal — protecting your patio, plants, and people from raw sunlight isn’t optional anymore.
DIY shade cloth is a cheap, clever fix: pick the right shade percentage for your plants, mount it so it’s secure but breathable, and angle it for max coverage and airflow.
Trust me — I once watched my lettuce go from thriving to crispy in a week; a nailed-on shade cloth saved the next round.
This short guide shows you how to choose, install, and squeeze the most benefit out of shade cloth so your outdoor space stays cool and your garden doesn’t roast.
Why Summer Shade Cloth is Essential for Your Outdoor Spaces
Summer heat is brutal — it fries plants and makes hanging outside feel like sitting in an oven.
In my Square Foot Garden, I once lost half my veggies in a single heatwave before I discovered shade cloth.
It’s basically sunscreen for your garden and your chill spots.
Protection for plants and gardens
Too much sun cooks leaves, stresses roots, and makes plants guzzle water like they’re at an all-you-can-drink soda bar.
Shade cloth cools things down, cuts leaf scorch, and creates a mini “chill zone” where plants can actually thrive instead of wilt.
Energy savings and cooling benefits
Shade cloth isn’t just for plants — it makes you cooler too.
I’ve sat under one in August and felt like I’d stepped into a pocket of fresh air.
Aluminet can drop temps by 10°F, which means cheaper AC bills, comfier patios, and a backyard that doesn’t feel like a desert.
- Read also: DIY Floating Row Covers: Protecting Your Garden Year-Round
- Read also: DIY Cold Frame Plans: Complete Guide to Year-Round Garden Extension
Understanding Shade Cloth Percentages and Selection
Picking the right shade cloth is kinda like picking the right pair of sunglasses.
Too dark, and your plants starve for light. Too light, and they still get fried.
The “percentage” tells you how much sun it blocks — and trust me, it makes all the difference.
Common shade cloth percentages and their uses
- 30% shade cloth: Perfect for tough plants like peppers, tomatoes, and squash — the ones that laugh at heat but still appreciate a little sunscreen.
- 40–50% shade cloth: This is the sweet spot for most veggie gardens. Enough light for growth, enough shade to keep your plants from fainting.
- 60–90% shade cloth: This is for drama-queen plants that burn easily, animal shelters, patios where you don’t want to melt.
Climate considerations
Your local weather totally changes the game.
In desert-like heat, you’ll need 70–90% shade just to keep things alive. In cooler or cloudy spots, 30–50% is plenty.
Think about how intense the sun is, how long summer drags on, and what you’re trying to protect.
Fragile plants? Go higher. Human comfort zone? Aim for 60–80%.
Essential Materials and Tools for DIY Installation
Before you dive into hanging shade cloth, get your gear straight.
Nothing’s worse than being halfway up a ladder, shade cloth flapping in your face, and realizing you forgot zip ties. Been there — not fun.
Materials you’ll need:
- Shade cloth (pick the right percentage, like we talked about)
- Support posts (wood or metal, just sturdy enough not to wobble)
- Mounting hardware (grommets, clips, or carabiners — I love carabiners, they make adjusting way easier)
- Guy wires or tensioning cables
- Ground anchors or post brackets
- Measuring tape (don’t eyeball it, trust me)
- Cable ties or fasteners
Tools you’ll use:
- Drill with the right bits
- Level (because crooked shade cloth will haunt you)
- Hammer or post driver
- Wire cutters
- Scissors (for the cloth)
- Ladder (unless you’re 10 feet tall)
Planning your installation
Don’t just wing it — plan first. Measure the space like you’re laying out a stage for a concert.
Think about wind; I once had my shade cloth act like a parachute during monsoon season, but the carabiners held strong and saved the whole setup.
Make sure it’s easy to adjust for different seasons, and don’t forget water drainage — nobody wants a saggy, rain-filled hammock hanging over their tomatoes.
Step-by-Step DIY Shade Cloth Installation Guide
Step 1: Site preparation and measurement
Measure first, build later. Grab a tape measure and mark where your posts will go — usually 8–12 feet apart for a backyard setup.
Decide how tall you want it (too low and you’ll smack your head, too high and the sun sneaks in).
Watch out for underground utilities — you don’t want your “garden upgrade” turning into a call to the power company.
Step 2: Installing the support structure
This is the backbone of your shade cloth.
- Permanent posts: Dig holes 2–3 feet deep, set wood or metal posts, and use concrete if you live somewhere windy. Let it cure a day or two before adding the cloth.
- Temporary setups: Weighted bases, pergolas, gazebos, or even trees (if you use the right hardware).
Step 3: Preparing the shade cloth
Roll it out somewhere clean.
Check for rips, add grommets if it doesn’t already have them, and cut it to size — but leave a little extra, because cloth that’s too short is a nightmare.
Step 4: Installation and tensioning
This is where having a friend saves you from frustration.
Start by attaching one corner, then work your way around, keeping it tight as you go.
Carabiners or clips make life easier (and let you take it down when seasons change).
Keep the tension even, or you’ll end up with saggy spots that collect rain like giant water balloons.
Step 5: Final adjustments and securing
Tighten everything, double-check your clips, and snip off extra material if it’s flapping.
Then give the whole thing a shake test. If it holds up to you tugging on it, it’ll probably handle summer storms — or at least won’t fly away like a giant kite into your neighbor’s yard.
Maximizing Benefits: Advanced Tips and Techniques
Seasonal adjustments
Shade cloth isn’t a “set it and forget it” thing. Your garden’s needs change as the summer drags on:
- Early summer: Go light — your plants still want sun while temps are manageable.
- Peak summer: Crank it up. This is the season when tomatoes turn to salsa on the vine if you’re not careful.
- Late summer: Ease off as the weather cools down.
- Spring/fall: Removable systems are a lifesaver. I’ve yanked mine down in September, only to slap it back up during an October heatwave.
Combining with other cooling strategies
Shade cloth is powerful, but pair it with other tricks and you’ve got the ultimate summer defense:
- Misting systems: Shade + mist = outdoor AC. Standing under one feels like cheating the weather.
- Strategic landscaping: Tall plants can act like bodyguards for shorter ones. Sunflowers shading lettuce? Chef’s kiss.
- Reflective surfaces: A shiny panel bouncing heat away can drop temps big-time.
- Ventilation: Don’t suffocate your garden. Airflow under the cloth keeps everything fresh instead of muggy.
Maintenance and care
If you treat your shade cloth right, it’ll last for years instead of one sweaty season.
- Regular inspection: Look for tears, loose clips, or droopy spots. A sagging shade cloth once dumped a rain puddle right onto my squash — lesson learned.
- Cleaning: Knock off leaves and dust, and give it a soap-and-water wash now and then. Always let it dry before packing it up.
- Storage: Fold it neatly, stash it somewhere dry (not your damp garage corner), and label the percentages so you’re not playing “shade cloth roulette” next season.
Common Mistakes to Avoid
Shade cloth is awesome, but mess up the setup and you’ll either wreck your plants or watch the whole thing take off like a backyard parachute.
Here’s what not to do:
Improper sizing
Mistake:
Picking the wrong percentage. Too much shade and your plants sulk. Too little and they roast.
Solution:
Know your plants and your climate. Tomatoes aren’t orchids, and desert sun isn’t the same as a cloudy backyard in Oregon.
I once slapped 70% cloth over my peppers — they basically stopped growing because they thought it was winter.
Inadequate support structure
Mistake:
Cheap, wobbly posts or weak clips.
Solution:
Overbuild it. Pretend you’re making something that has to survive a hurricane.
I learned this after my “budget” shade cloth setup toppled in one windy afternoon — crushed my bean trellis too. Brutal.
Poor tension management
Mistake:
Pulling the cloth too tight (it tears) or too loose (it sags and collects rain like a sad water balloon).
Solution:
Leave just enough give for the fabric to expand and contract with heat. Think of it like lacing sneakers — snug, but not cutting off circulation.
Ignoring Wind Factors
Mistake:
Pretending the wind doesn’t exist. Spoiler: it does.
Solution:
Study your local wind patterns and plan for them. Add wind breaks, stronger anchors, or clips that can flex.
A gust once ripped my cloth halfway off and turned it into a giant sail — the neighbors thought I was launching a DIY kite.
Troubleshooting Common Issues
Even if you plan like a pro, shade cloth can still throw curveballs. Here’s how to deal when things go sideways:
Sagging problems
Causes:
Usually happens if you didn’t pull it tight enough, if the fabric loosens in the heat, or if it’s collecting junk like wet leaves and rain.
Solutions:
Start fresh — re-tension from one corner and work around evenly.
Add more support points if it keeps drooping. And for the love of your plants, clear debris before your cloth turns into a hammock full of soggy leaves.
Wind damage
Causes:
Weak anchors, the wrong hardware, or Mother Nature showing off during a storm.
Solutions:
Reinforce your posts and connections so the whole setup doesn’t wobble like a loose tooth.
Add wind breaks (shrubs, fences, whatever works).
If you live somewhere with insane storms, consider making the cloth removable so you can stash it before the weather tries to yeet it into the next neighborhood.
- Read also: DIY Greenhouse from Old Windows: The Ultimate Guide
- Read also: DIY Planters from Household Items: Creative and Budget-Friendly
Conclusion: Creating Your Perfect Summer Oasis
DIY shade cloth is hands-down one of the cheapest, smartest ways to beat summer heat — for you and your plants.
Get the right percentage, install it solid, and keep it maintained, and suddenly you’ve got a backyard that feels chill instead of scorching.
The best part? You can shape it however you want.


