Growing your own veggies all year doesn’t need a fancy, expensive greenhouse.
A DIY hoop house is basically the cheat code for gardeners—it’s cheap, easy to build, and keeps your plants safe when the weather gets nasty.
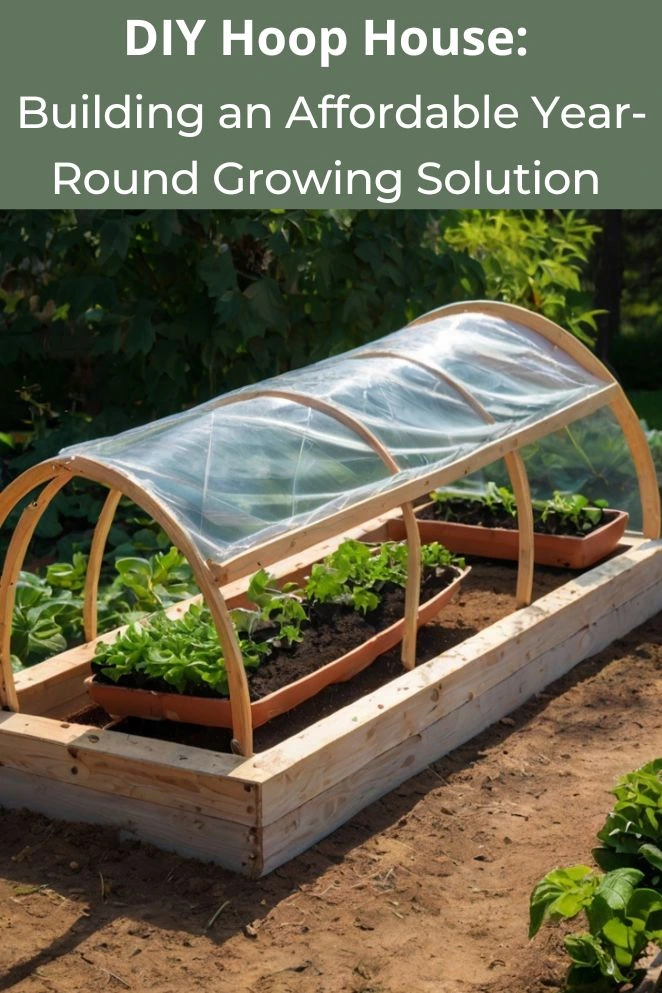
I built my first one with PVC pipes and plastic sheeting, and it worked like magic—suddenly I was harvesting spinach in the middle of winter.
Benefits of Building Your Own Hoop House
Cost-effective growing solution
Here’s the thing—greenhouses are crazy expensive. We’re talking thousands of dollars.
A hoop house? Way cheaper.
Even the bigger walk-in versions usually cost just a couple hundred bucks.
It’s like getting the same superpowers as a greenhouse without draining your wallet.
Extended growing season
Normally, you plant in spring, harvest in fall, and that’s it—game over.
But with a hoop house, you get bonus time.
We’re talking an extra 4–6 weeks on both ends of the season.
You’ll get earlier spring crops and late fall harvests, and in many places, you can keep growing leafy greens right through winter.
Weather protection
Mother Nature can be moody—hail, heavy rain, surprise windstorms, you name it.
A hoop house acts like a shield, keeping your plants safe from all that chaos.
Once, a storm flattened my neighbor’s tomato patch, but mine were chilling under the hoop house like nothing happened.
Increased crop yield
Because the environment inside a hoop house is more controlled, your plants grow better—and faster.
You can plant closer together, and the conditions push your crops to thrive.
It’s not unusual to pull in 25–50% more food from the same space.
More spinach, more tomatoes, more bragging rights.
- Read also: A Guide to Building a DIY Thriving Wicking Bed Garden System
- Read also: The Guide to Creating a DIY Living Wall Garden for Your Apartment
Planning Your DIY Hoop House
Site selection and preparation
Where you put your hoop house can make or break it.
Think of it like picking the best seat in a movie theater—you want the perfect view.
Plants need full sun (6–8 hours a day), so don’t stick it behind your garage or under a tree.
Pick a place with good drainage too—plants hate wet feet.
If your soil is heavy clay and turns into mud soup, toss down some gravel or sand to keep things dry.
Oh, and keep it close to your house—you’ll thank yourself when it’s raining and you don’t feel like trekking across the yard to check your plants.
Determining size and dimensions
This part depends on what you’re growing and how much space (and cash) you’ve got.
Small hoop houses (4′ x 8′ to 6′ x 12′)
These are starter packs. Perfect if you’re just testing the waters or have a small backyard.
Great for salad greens and herbs. Costs around $30–100 and stands about 3–4 feet tall.
Medium hoop houses (8′ x 16′ to 10′ x 20′)
A solid upgrade. You can mix veggies, actually walk around a little, and feel like a “real” gardener.
Costs about $150–300, with 5–6 feet of headroom.
Large walk-in hoop houses (12′ x 24′ and bigger)
Now we’re talking pro-level vibes. These are spacious, comfy to work in, and perfect if you want to grow like a mini-farmer.
Costs $300–800+, with a height of 6–8 feet.
Here’s a pro tip: wider hoop houses (10+ feet) stay more stable and keep temps more even, but you’ll need sturdier materials and anchors.
Essential Materials for Your Hoop House
Frame materials
You’ve got options here, and each comes with its own vibe.
- PVC pipe: Cheap, easy, but kinda flimsy. Use thicker stuff (1″–1.5″, Schedule 40/80) so it doesn’t fold like a pool noodle in the wind. Costs about $4–5 per 10-foot stick.
- Electrical conduit (gray PVC): Same deal but way tougher. It doesn’t get wrecked by the sun like white PVC.
- Galvanized steel tubing: The tank. Super durable, laughs at bad weather, but pricey and you’ll need special tools to bend it. Best for big, pro-style setups.
Covering materials
This is your plant’s blanket, so don’t skimp.
- 6 mil greenhouse plastic: The classic—affordable and durable.
- 4 mil plastic: Cheaper, but doesn’t last as long.
- Double-wall polycarbonate: Fancy and warm, but $$$.
Pro tip: always put felt or duct tape between plastic and PVC so the sun doesn’t cook your cover.
Hardware and fasteners
The little things matter. Wiggle wire and clamps keep your plastic tight (and trust me, nothing’s worse than chasing a flapping tarp in a storm).
Add anchors, screws, and hinges for doors and vents, so you can actually get in there without feeling like you’re crawling into a pillow fort.
Step-by-Step Construction Guide
Step 1: Create the base frame
Think of this as your hoop house’s foundation—like sneakers for your plants.
Use treated lumber (2×6 or 2×8 boards are solid) to build a rectangle.
This gives your hoops something to grip onto, keeps the plastic in place, and makes sure your whole setup doesn’t wobble like a Jenga tower.
Anchor it into the ground with stakes or rebar, and double-check it’s level.
Step 2: Install the hoops
Now for the arches!
- If you’re going PVC style, cut pipes about 20–24 feet long for a 10-foot wide hoop house. Hammer 2-foot rebar pieces into the ground (about 18 inches deep), then slide the PVC over them. Boom—you’ve got hoops. Space them 4–6 feet apart so they don’t flop over.
- If you’re going more permanent, bolt the hoops right onto the wooden base with brackets or fittings. Feels way sturdier, like the difference between a tent and an actual house.
Step 3: Add ridge support
This is the backbone that stops your hoops from sagging like a sad noodle.
Run a pole (PVC or conduit) across the top, connecting all the hoops.
Secure it with zip ties or metal clamps. Anything over 12 feet long needs this, or else the first heavy rain will have your hoop house drooping like a wet cardboard box.
Step 4: Install end walls
Time to give your hoop house a face. Build end walls from the same lumber as the base, but don’t forget the essentials:
- A door big enough to walk through (at least 3 feet wide, unless you enjoy crawling).
- Vent windows for air flow.
- Sturdy framing so the plastic doesn’t rip when the wind acts up.
Step 5: Apply the plastic covering
Pick a calm, sunny day for this part—wind will turn the plastic into a giant sail, and you’ll end up chasing it across the yard (ask me how I know).
Roll the plastic over the frame, pull it snug, and secure it to the base with wiggle wire or channels.
Clamp the ends tight. Leave just a bit of slack, because plastic expands and shrinks with the weather.
If you stretch it drum-tight, it’ll tear before the season’s done.
Step 6: Install ventilation
Plants love warmth, but too much and you’ll cook them.
Add roll-up sides for quick cooling, vents in the end walls, or even an exhaust fan if you’re going big and have power.
Fresh air keeps everything healthy and stops mold from moving in.
Think of it like giving your plants their own AC system.
Maximizing Your Hoop House Investment
Crop selection and rotation
Pick plants that actually love the hoop house life.
Cool-weather champs like lettuce, spinach, and kale will grow even when it’s chilly.
With good airflow, you can also crush it with tomatoes, peppers, and cucumbers once it warms up.
Don’t forget herbs (basil, parsley, cilantro)—they grow like crazy.
Microgreens and sprouts? Those are your instant-gratification crops—ready in days, not weeks.
Pro tip: keep replanting in waves (succession planting) so your harvest never stops.
Nothing’s more satisfying than pulling carrots while your friends are stuck with store-bought lettuce.
Advanced features and upgrades
Once you get the basics down, you can level up.
Add drip irrigation so you’re not stuck with a watering can every day.
A couple of water barrels inside can act like heaters, keeping temps steady at night.
If you’re into tech, automated vents or even insulation for super cold winters can turn your hoop house into a year-round growing machine.
Troubleshooting Common Issues
Structural problems
If your hoops start sagging or collapsing, throw in a ridge pole and double-check your anchors.
Plastic ripping? Look for sharp edges and pad them—nothing’s worse than discovering a giant tear after a windy night.
Doors and vents sticking? A little lube and tweaking keeps everything running smooth.
Environmental challenges
Too hot inside? Roll up the sides or add shade cloth (otherwise your lettuce will cook like stir-fry).
Too humid? Vent more and ease up on the watering can.
Bugs moving in? Screens and smart pest control keep them from turning your hoop house into an all-you-can-eat buffet.
Seasonal adjustments
Winter brings condensation—vent even in the cold so your plants don’t drown in their own sweat.
Snow piling up? Knock it off fast before your hoop house crumples like a soda can.
And in windy weather, lock everything down—I once had plastic flap so hard it sounded like a helicopter landing in my backyard.
- Read also: DIY Greenhouse from Old Windows: The Ultimate Guide
- Read also: DIY Window Farm Hydroponic System: Growing Fresh Produce Indoors
Conclusion
Building a DIY hoop house is hands-down one of the cheapest and smartest ways to grow more food for longer.
With just $100–500 upfront, you can pull in thousands of dollars’ worth of fresh veggies over the years.
With good care, your hoop house will become a game-changer in your garden—fresh food, less grocery spending, and the pure flex of eating tomatoes in November.


