Turning your junk into jungle is the new eco glow-up.
Whether you’re a plant pro or just trying to keep one cactus alive, DIY planters made from old mugs, boots, or random kitchen gear are a fun, low-waste way to green your space.
This guide’s got you—creative ideas, safety tips, and inspo to make your home look like it got a plant mom makeover on Pinterest. Let’s turn trash into plant treasure.
Why Choose DIY Planters?
Why go the DIY planter route? Honestly, it’s kind of a no-brainer—and your wallet, your planet, and your Pinterest board will all thank you.
Cost-effective
No need to drop $$$ on fancy pots when you’ve got old mugs, teapots, or even that cracked mixing bowl collecting dust.
If it can hold soil, it’s fair game.
Eco-friendly
Turning your “trash” into plant homes keeps stuff out of landfills.
It’s basically recycling, but make it aesthetic.
Personalized aesthetics
DIY planters let you flex your style—vintage, artsy, minimalist, chaotic plant witch energy—you name it.
Your plant babies deserve cute homes that match your vibe.
Space optimization
Got a weird windowsill? A tiny shelf that’s screaming for greenery?
DIY planters can be custom-fit like the high-rise jeans of the garden world.
- Read also: Affordable DIY Patio and Deck Ideas for Your Backyard
- Read also: Transform Your Garden: Easy DIY Greenhouse for Beginners
Household Items Perfect for Planters
Turning everyday junk into plant homes? Chef’s kiss.
Here’s your VIP list of household items just begging to be reborn as planters—eco-friendly, budget-friendly, and totally personality-packed.
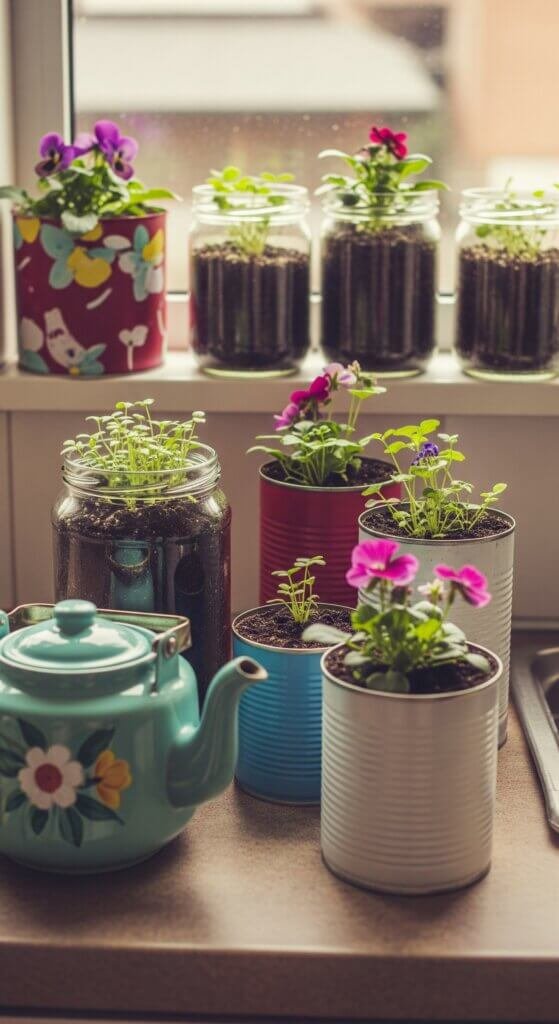
1. Tin Cans & Glass Jars
Finished that can of chickpeas? Don’t toss it—transform it.
Cleaned-out tin cans and old pasta sauce jars are perfect for tiny plants like herbs or succulents.
Just drill a few holes at the bottom for drainage (plants hate soggy feet), and you’re golden.
Want extra flair? Wrap them in twine, paint them, or slap on a label that says “Plant Me, Baby.”
2. Old boots and shoes
Got a pair of beat-up boots or sneakers you wouldn’t dare wear in public? Plant in them instead. Leather boots are especially durable and look rustic-chic in a garden. Plus, they already have soles (ha!) and structure—just poke a few drainage holes, stuff with soil, and voilà: garden couture.
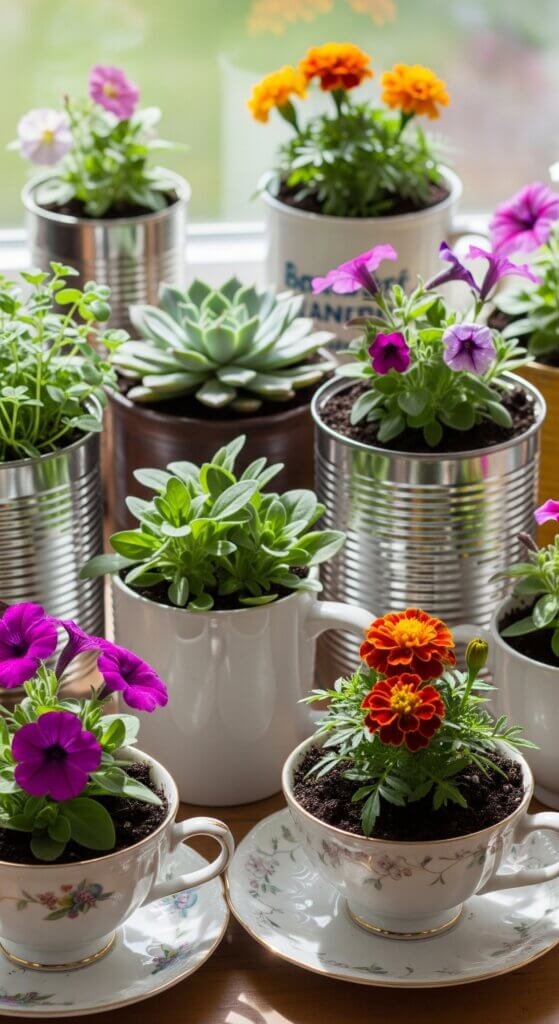
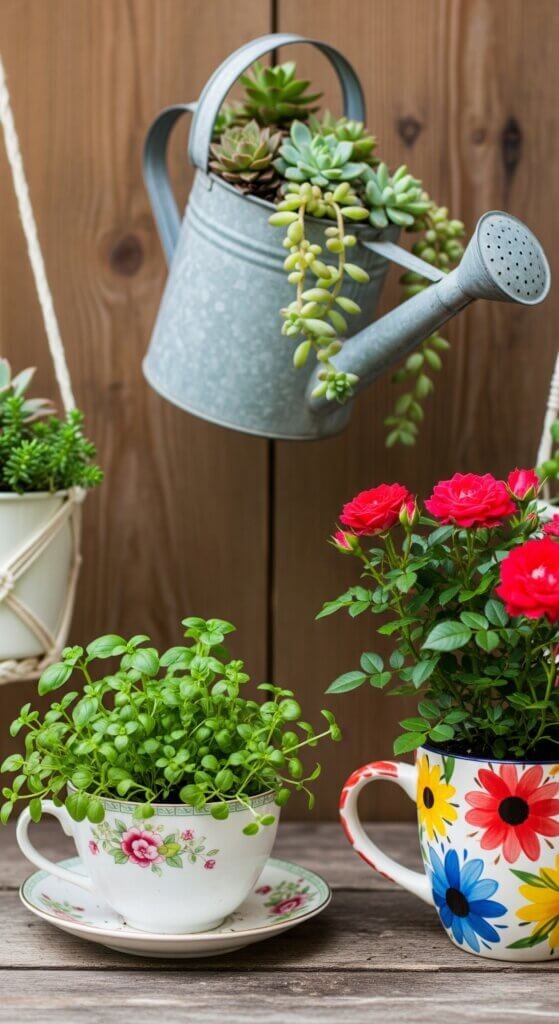
3. Teacups and mugs
Chipped teacups? Random mugs that don’t match your set anymore?
They’re basically pre-decorated planters.
These are great for baby succulents or desk plants.
If you’re feeling fancy, add some pebbles at the bottom for drainage. Bonus points if your mug says something like “World’s Okayest Gardener.”
4. Colanders and strainers
These kitchen MVPs are low-key perfect for plants.
They’ve already got drainage holes (thanks, spaghetti), and with a little lining—like coconut coir, burlap, or even a coffee filter—you’re ready to plant.
Hang them or perch them on a windowsill.
They give off big rustic-market vibes.
5. Plastic bottles
Plastic bottles are the glow-up queens of the planter world.
Cut them lengthwise to make hanging planters, or slice the tops off and stand them up for mini pots.
Decorate them with paint or washi tape if you want them less “I-just-came-from-the-recycling-bin” and more “look at my crafty genius.”
Pro tip: Whatever you use, make sure you’ve got drainage covered.
If it doesn’t already have holes, add some. Nobody wants root rot. Not even your plants.
Step-by-Step Guide: Creating a DIY Planter
Alright plant parent, here’s your step-by-step guide to turning random household stuff into legit planters—even if your DIY skills peak at assembling IKEA furniture.
Grab your coffee (or compost tea?), and let’s make something green and gorgeous.
Materials needed:
- Chosen household item
- Drill or nail and hammer (for drainage holes)
- Landscape fabric or coconut coir (optional)
- Potting soil
- Plants or seeds
Instructions:
1. Clean your container
Before anything goes in, make sure your container is sparkling clean.
Old salsa jars? Scrub them.
Rain boots that saw one too many muddy puddles? Hose ‘em down.
No mold, no mystery gunk. Plants are picky houseguests.
2. Add drainage holes
This is non-negotiable.
Plants need to drain or they’ll throw a tantrum (read: root rot).
Drill a few holes in the bottom. If you’re working with metal or tough plastic, use a power drill.
For softer stuff (like plastic bottles), a hammer and nail will do the trick.
3. Line the inside (optional but smart)
If your container has big holes (looking at you, colander), line it with coconut coir, landscape fabric, or even a coffee filter.
This keeps the soil in while still letting water drain out—think of it like a comfy but breathable mattress for your plant’s roots.
4. Add soil like a pro
Don’t skimp here—use quality potting soil made for the type of plant you’re growing.
Succulents? Go gritty and well-draining. Herbs? Something rich and airy.
Fill the container about 2/3 full, leaving space for your plant and watering.
5. Plant your green baby
Pop your plant or seeds in.
Follow the planting depth and spacing instructions (yes, even if you’re a free spirit).
Gently press down the soil around the roots.
Be firm but kind—like a plant therapist.
6. Water gently
Give it a light watering and watch the excess drain out like a little green waterfall.
Don’t flood it—just enough to settle the soil and hydrate the roots.
Safety and Maintenance Tips
Material Safety
Before planting anything, ask: “What used to live in this?”
If it once held bleach, paint thinner, or mystery motor oil from 1998—hard pass.
Your plants deserve a non-toxic home, and so do you.
Stick to food-safe or well-cleaned containers.
Weight considerations
Planning to hang that vintage teapot full of ivy? Make sure the hook, rope, or shelf can handle the load.
Wet soil adds weight fast.
No one wants a potted plant kamikaze-ing from above during Zoom calls.
Weather resistance
For outdoor setups, pick materials that can handle sun, rain, and maybe even snow if you’re brave.
Terracotta and some plastics are great; untreated wood might rot faster than a banana in August.
Give your outdoor planters a fighting chance.
Regular checks
Every few weeks, peek under the hood.
Cracks, mold, weird smells? Time to refresh or rehome.
You want cute, not creepy.
Creative Design Ideas
Paint and decorate
Grab some non-toxic paint and turn your can or colander into a canvas.
Think stripes, polka dots, or even little plant puns. (“Thyme to Grow” on a mint planter? Chef’s kiss.)
Themed collections
Got a few mismatched mugs? Group them into a quirky herb garden.
Teacups, tins, or mini buckets—arranged together, they look intentional and super chic.
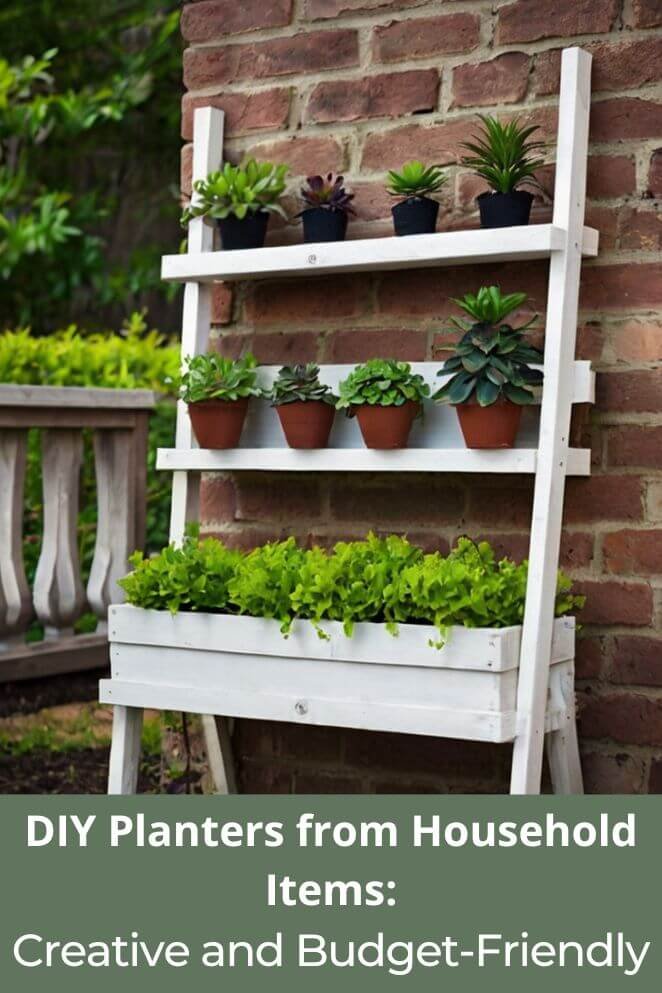
Vertical gardens
Short on floor space? Go vertical.
Mount your planters on a wooden pallet, balcony rail, or garden fence.
Bonus: it makes your wall look like an earthy Pinterest board.
Labeling
Use chalkboard paint or cute little tags to mark what you’ve planted.
Perfect for herbs and great for anyone who can’t tell cilantro from parsley until it’s too late (no judgment).
- Read also: A Beginner’s Guide: Crafting the Perfect DIY Seed Starting Mix
- Read also: Grow Fresh Anywhere: Create Your Own DIY Mobile Herb Garden
Conclusion: Embrace Sustainable Gardening
Turning old stuff into planters isn’t just eco-friendly—it’s a total style flex.
From chipped mugs to worn-out boots, your “trash” can be plant treasure.
It saves cash, cuts waste, and makes your space look effortlessly cool.
So grab that random colander, get a little messy, and let your inner plant stylist shine.
Mother Nature (and your TikTok feed) will love it.


