
Creating nutrient-rich compost is vital for sustainable gardening, but large chunks and debris can make it hard to use.
A compost sifter is a handy tool that helps you separate unwanted materials, leaving you with fine compost that’s perfect for nourishing your garden.
In this post, we’ll guide you through building your own DIY compost sifter, highlight its benefits, and provide tips for using it effectively.
What is a Compost Sifter?
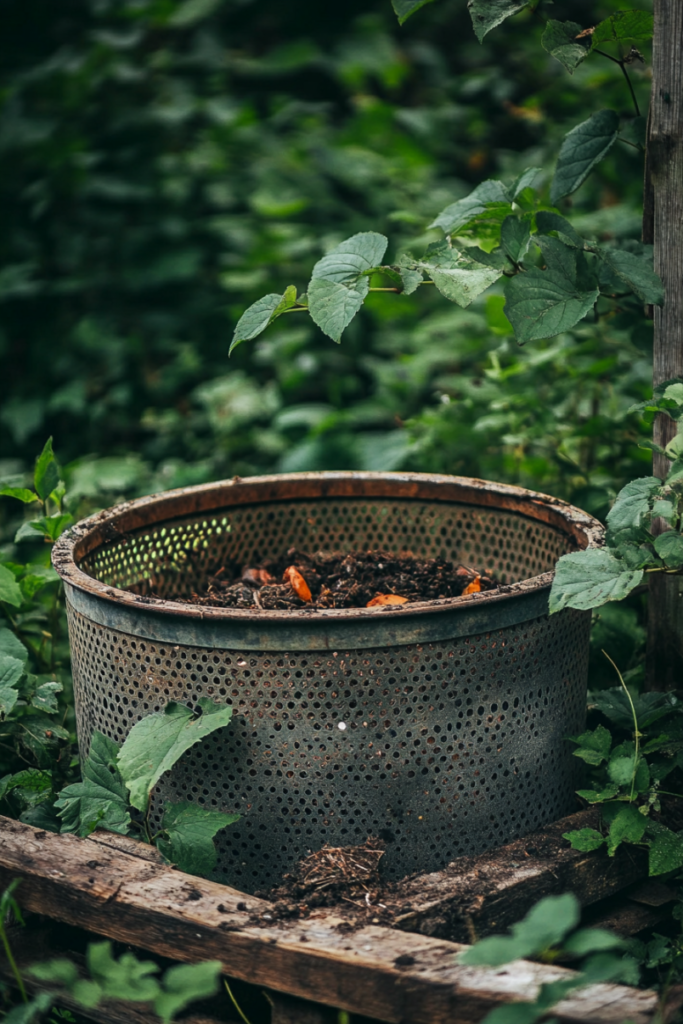
A compost sifter, sometimes called a soil sieve, is a simple tool designed to help you sort through finished compost.
It consists of a frame with a mesh or wire screen that allows you to shake or sift the compost.
By doing this, you can separate the finer, fully decomposed material from the larger chunks that still need more time to break down.
This makes it easier to get high-quality compost ready for your garden or potted plants.
- Read also: The Ultimate Guide: Homemade DIY Plant Fertilizer Indoor
- Read also: A Comprehensive Guide: Inorganic vs Organic Fertilizers
Benefits of Using a Compost Sifter
Using a compost sifter can greatly benefit gardeners who want to enhance soil quality and promote plant health.
Here are some key advantages:
Produces finer compost
One of the main reasons to use a sifter is to achieve finer compost.
When sifted, compost breaks down into a soft, rich soil amendment, making it perfect for starting seeds or adding to delicate plants.
Removes uncomposted debris
Sometimes, larger pieces of organic matter, like twigs or fruit pits, may not have fully decomposed.
A sifter helps you remove these chunks, which you can then return to your compost bin for further breakdown.
Enhances soil quality for gardening
Finer compost mixes more easily into garden soil, improving aeration and drainage.
It also adds essential nutrients that promote healthy plant growth, making your garden thrive.
Materials Needed
Building your own compost sifter is a simple and cost-effective project.
Most of the materials can be found at home improvement stores or repurposed from scrap wood and metal.
Essential materials
- Wood: 2×4 or 4×1 timber for the frame.
- Hardware cloth or chicken wire: A screen with a mesh size of around 1/4 inch works best.
- Screws and nails: Deck screws or U nails to secure the frame and mesh.
Optional materials
- Handles: For easier sifting.
- Trim: To strengthen and clean up the edges of the frame.
Tools required
- Drill and drill bits: To assemble the frame.
- Saw: Circular or hand saw to cut the wood to size.
- Wire cutter: For trimming the hardware cloth.
- Staple gun: To attach the mesh to the frame.
- Tape measure and speed square: To measure and ensure straight edges.
Step-by-Step Instructions
Creating your own compost sifter is a straightforward project that you can typically complete in about an hour.
Here’s a detailed guide to help you through each step.
Step 1: Prepare your materials
Before you start building, gather all the materials and tools you’ll need. Here’s what you’ll need:
- Wood: You can use new lumber or repurpose old wood, like pallets.
- Hardware cloth or chicken wire: This will serve as the screening material.
- Screws: These will hold the frame together.
- Optional handles: You can add handles to make it easier to lift and shake the sifter.
Tip: If you’re using recycled materials, take a moment to sand down any rough edges on the wood. This not only makes your sifter look better but also ensures safety while you work.
Step 2: Construct the frame
Measure and cut
Decide on the size of your compost sifter. A common size is 2 feet by 3 feet, but feel free to adjust this based on your needs and how you plan to collect the sifted compost (like using a wheelbarrow or large bin).
Assemble the frame
Once you’ve cut the wood to size, use screws to put the frame together.
To ensure the corners are square (which means they form a perfect right angle), use a tool called a speed square during assembly.
This step is crucial for a sturdy frame.
Step 3: Attach the screening material
Cut the hardware cloth
Cut the hardware cloth or chicken wire to fit the frame. Leave a bit of extra material on the edges to wrap around.
Secure the mesh
Attach the mesh to the frame using a staple gun or screws with washers.
The washers will help hold the mesh tight and ensure it doesn’t sag.
Make sure the mesh is taut, as this will help sift the compost more effectively.
Step 4: Final assembly
Add handles
If you’d like, you can attach handles to the sides of the sifter.
This will make it easier to shake and move the sifter as you work.
Check stability
Go over all the parts to ensure everything is securely attached and that the frame feels stable.
If you want a cleaner look, consider adding trim around the edges to cover any exposed wire.
How to Use the Sifter Effectively
Now that you’ve built your compost sifter, using it is a breeze!
Follow these simple steps to make the most out of your sifter:
Set up your sifter
Begin by placing your compost sifter over a collection container.
This could be a wheelbarrow, a large bin, or even a tarp—anything that can catch the sifted compost will work.
Add your compost
Next, take your compost and dump it onto the screen of the sifter.
Make sure to spread it out a bit for easier sifting.
Shake and sift
Gently shake or lift the sifter to allow the compost to pass through the mesh.
As you move the sifter, the finer compost will fall through into your collection container below, while the larger, un-composted debris will stay on top of the screen.
Return unfinished materials
After you’ve sifted through the compost, check the larger pieces left on top.
If they are still recognizable (like twigs, fruit pits, or large clumps), return these materials to your compost pile.
They will continue to decompose and break down, contributing to future batches of compost.
Extra Tips for Maximizing Your Compost Sifter
To get the best results from your DIY compost sifter, consider these additional tips:
Choose the right mesh size
For most gardening needs, a 1/4-inch mesh is ideal.
It allows for a good balance between sifting out debris and retaining valuable nutrients.
If you desire even finer compost for specific plants, you might want to try a smaller mesh size.
Sift in dry conditions
Compost tends to sift more easily when it’s dry.
Try to avoid using your sifter immediately after it has rained or following heavy watering.
Wet compost can clump together and make it harder to separate the finer material.
Keep your sifter clean
After each use, give your sifter a quick clean. Shake off any remaining debris from the mesh to prevent buildup.
A clean sifter will work more efficiently the next time you use it.
Additional Uses for a DIY Compost Sifter
Your DIY compost sifter is a versatile tool that can serve more purposes than just producing fine compost.
Here are some additional ways you can use it to enhance your gardening experience:
Seed starting
When starting seeds, having the right soil mixture is crucial for healthy growth.
Sifted compost provides a soft and nutrient-rich medium that is perfect for delicate seedling roots.
The fine texture allows seeds to easily push through as they germinate, while the nutrients help them grow strong and healthy.
Using sifted compost in seed trays or pots creates an ideal environment for young plants to thrive.
Potting mix
If you’re potting houseplants or filling outdoor containers, incorporating sifted compost into your potting mix can significantly improve the soil quality.
Sifted compost helps to enhance soil structure, making it more aerated and improving drainage.
This is especially important for potted plants, which can suffer from overwatering if the soil is too dense.
The essential nutrients found in the compost will also nourish your plants, promoting growth and vitality.
Mulching
Sifted compost can also be used as a mulch in garden beds.
Applying a layer of this fine compost around your plants helps to retain moisture in the soil, reducing the need for frequent watering.
Additionally, it acts as a barrier against weeds, helping to suppress their growth.
This is particularly beneficial in vegetable gardens and flower beds, where competition from weeds can hinder plant growth.
The organic matter in the compost will gradually break down, enriching the soil over time.
- Read also: Nourishing Naturally: How to Make Organic Fertilizers at Home
- Read also: The Secret Hacks: Tips on How to Increase Soil Fertility
Final Thoughts
A DIY compost sifter is a valuable tool for any gardener, allowing you to create finer, more manageable compost while removing large chunks of debris.
Whether you’re using it for seed starting, potting mix, or improving your garden soil, a compost sifter is an inexpensive and easy-to-build addition to your gardening toolkit.
By building your own, you can customize the size and features to suit your needs, all while promoting sustainability through composting.
FAQs
A 1/4-inch mesh is a good size for most gardens, as it allows fine compost to pass through while filtering out larger debris.
Ensure your compost is dry before sifting. Wet compost tends to clump together, making it harder to sift through the mesh.
Yes! A compost sifter can also be used to sift soil, gravel, or sand, making it a versatile tool for gardening and DIY projects.
You can sift compost whenever it’s fully decomposed and ready to be used in your garden. Regularly sifting can help remove large debris and speed up the composting process.


